Almost no other manufacturing process has attracted as much attention in recent years as 3D printing, also known as additive manufacturing (AM). This process has already existed for more than three decades and has proved itself, for example, in prototype production and mechanical engineering. Additive manufacturing has also been used for many years in areas such as architecture, design, the entertainment industry etc. One of the currently most interesting and intensively researched areas is 3D printing in healthcare and medicine. In tissue engineering for example, scientists are attempting to produce biological tissue by cell seeding on printed frameworks [9]. 3D printing also offers great potential in the patient-individualized reproduction of anatomical shapes. Used in combination with digital imaging procedures (e.g. computed tomography), DICOM data can be generated, segments extracted in STL format and implants (e.g. in surgery) or anatomical models printed (e.g. for surgical planning). 3D printing is also used in dentistry and dental technology, for which various 3D printing techniques have been established [13]. In dental laboratories, a popular application is the printing of dental appliances (e.g. jaw models, impression trays, drill templates). Splints, bite plates or denture bases are also often produced using the 3D printing process. Interesting developments with the potential to change manufacturing methods in future can be observed in the printing of ceramic materials for dentures [12]. The latest research in dental 3D bioprinting (tissue engineering) is also revealing exciting possibilities, for example in the printing of patient-specific bone substitute materials, implants and cell-loaded 3D structures [14]. But 3D printers as a supplementary technology are not only closing a gap in the digital workflow in research, the manufacturing industry or the dental laboratory, but also in the dental practice.
3D printers in the dental practice
3D printing offers numerous advantages in the dental practice , practice laboratory and dental laboratory. For example, it can be used to produce objects with complex geometries (e.g. models, drill templates, impression trays) within a short time. In contrast with subtractive milling, 3D printing is not associated with any significant loss of material. Resin-based, light-curing 3D printer systems are usually used in the dental practice and are based mainly on the DLP or SLA technologies. A crucial difference between the two methods is the type of light source used for polymerization. In an SLA printer, the material is cured at very precise points using a laser beam, whereas the polymerization of the printing resin in the DLP printer (Digital Light Processing) is based on a projector, thereby curing the whole surface of the layer to be printed. This accelerates the printing process. An example of a modern 3D printing system based on the DLP technology is the Straumann® CARES® P20 from the company Rapid Shape.
Use in practice
Although modern printer systems often follow automated sequences, working with the printer still requires a basic technical understanding of digital technologies and some experience in CAD design. The actual printing process is comparatively quick. An assessment of the overall production time needs to take account of not only the design and the printing, but also the post-processing (cleaning, light-curing) of the printed component [10, 16]. This post-processing significantly determines the quality, including the material quality, of the printed object [11]. If simple and reliable post-processing is desired, it is useful to opt for 3D printer systems that facilitate an extensively automated process chain. Examples include the printers from the Straumann® CARES® P series, which are embedded in a validated process chain. The system components are as follows:
- 3D printer with software,
- various 3D printing resins,
- automatic cleaning system (Straumann® CARES® P wash) and
- automated light-curing unit (Straumann® CARES® P cure).
3D printing of dentures in the dental practice
A wide range of dental applications exists for 3D printers. Printing dentures has so far proven to be a challenge. Although any geometrical shape can be produced with a 3D printer, suitable materials are needed. Dental printing materials (resins) must be able to cope with the demands of intraoral use (Medical Devices Act) . Printing resins approved for fixed restorations (crowns, bridges) have been available for some time. These include the light-curing composite P pro Crown & Bridge (Straumann) for the additive manufacturing of temporary anterior and posterior restorations. As a result, the digital workflow – subsequently presented using the example of implantology – has become a reality and offers interesting alternatives to the conventional route. Thus, the printing of temporary crowns can be viewed as an alternative to the time-consuming manually produced or milled provisional.
Patient case report: Initial situation
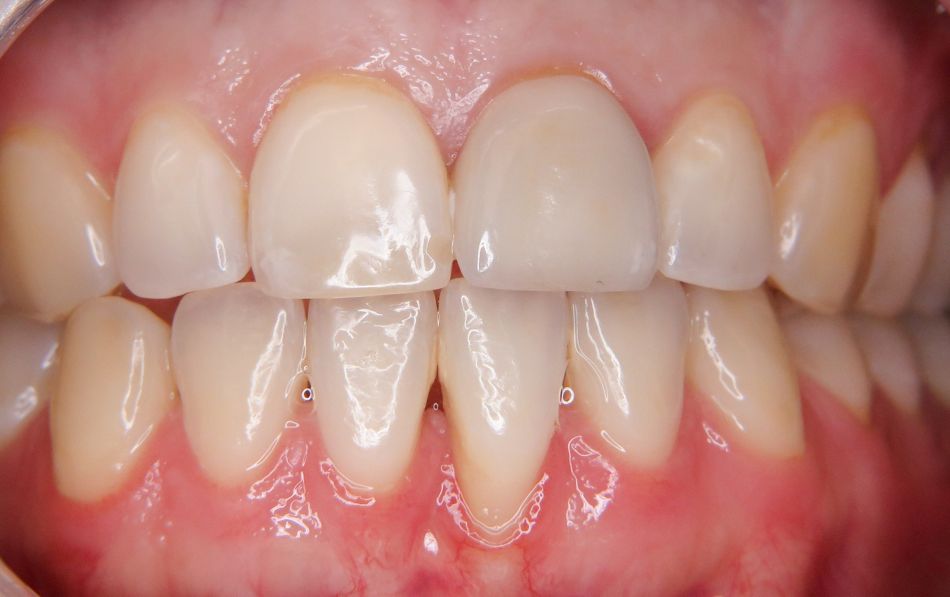
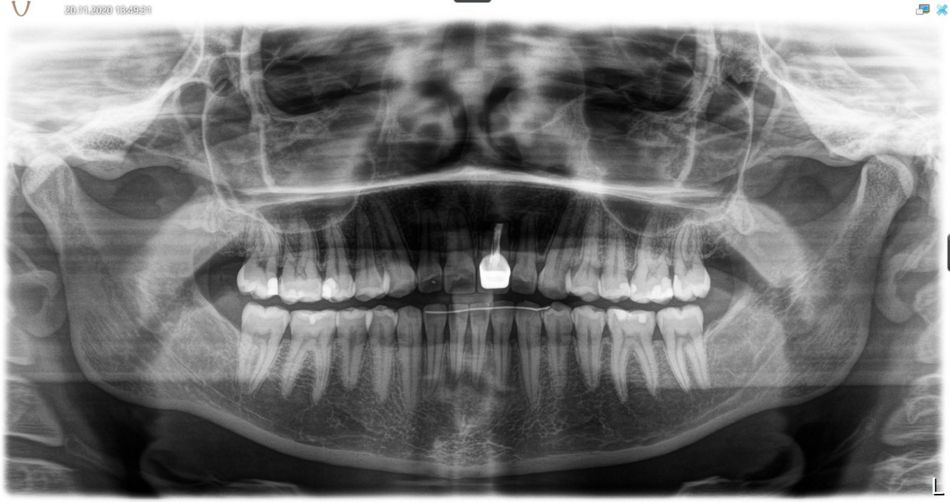
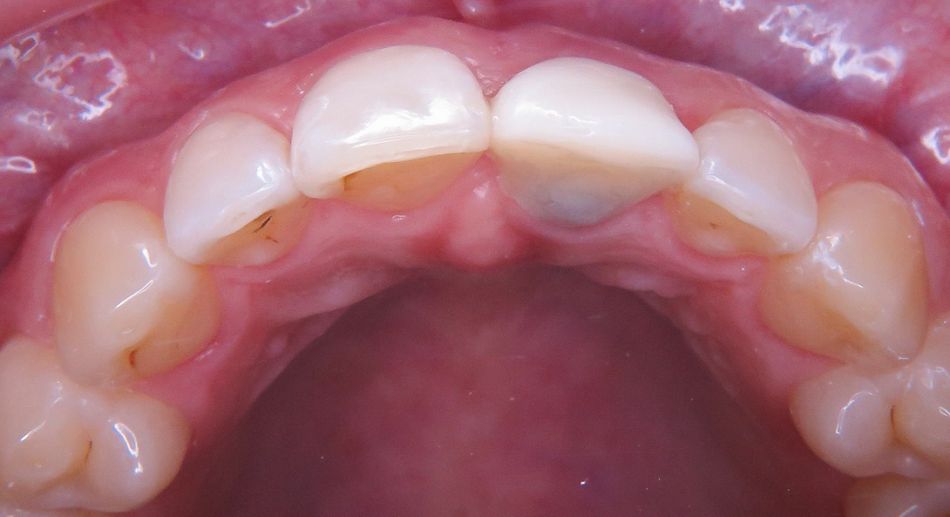
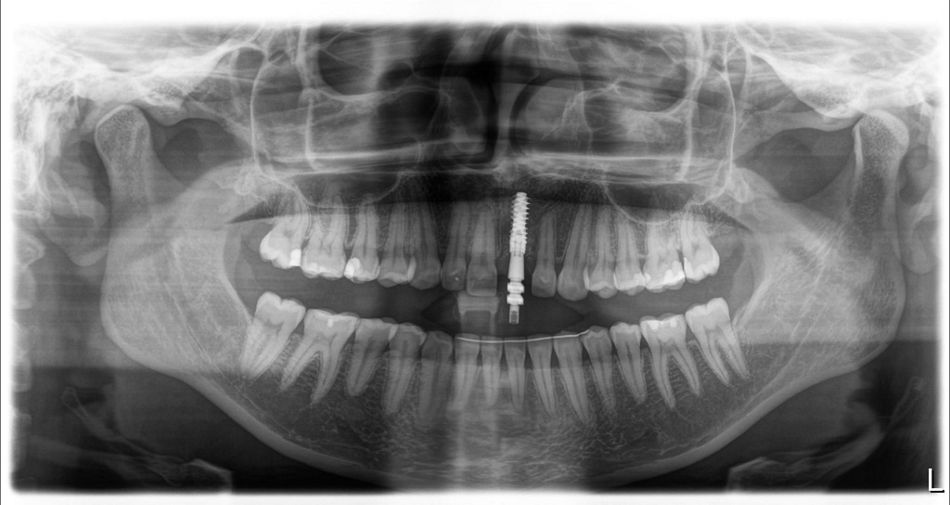
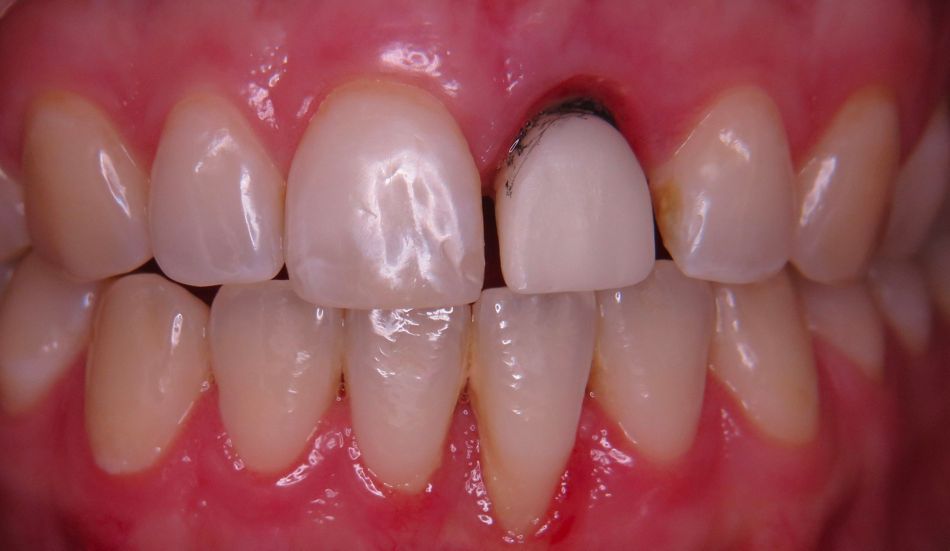
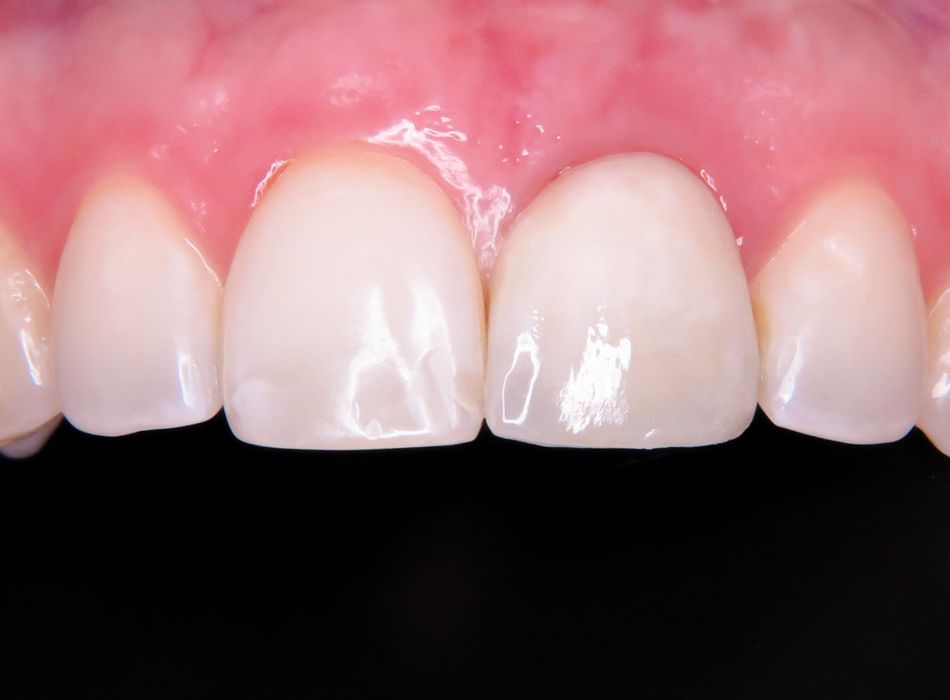
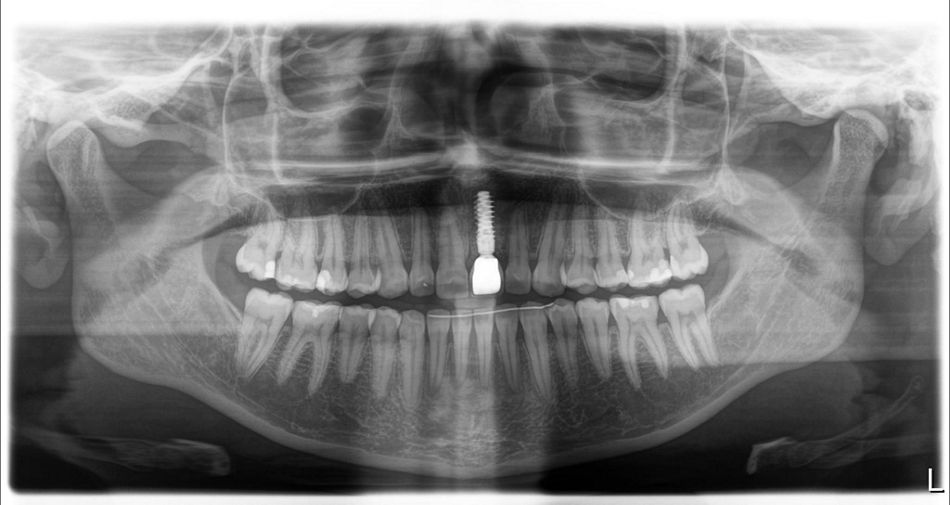
The young woman presented at the dental practice with symptoms at tooth 21. The tooth had been endodontically treated (multiple root apex resections) and provided with a crown (Fig. 1). The crown appeared slightly dark in the mouth and had a gray sheen. Since the tooth was also repeatedly causing symptoms, the patient expressed her wish for a new restoration. Otherwise, she had a full set of functioning teeth with no abnormal findings. Periodontal examination revealed a small recession in the anterior region of the lower jaw. The problematic requirements in the anterior region included high esthetic demands. Since the clinical and radiological diagnostic (Fig. 2) assessment revealed that an attempt to preserve tooth 21 would not offer any reliable prospects of success, the decision was made to extract the tooth. An immediate implant placement was planned in order to preserve the hard and soft tissues as effectively as possible before physiological remodeling after the extraction. The immediate insertion of an implant in the extraction socket is designed to prevent extensive bone resorption and severe soft tissue regression [7, 1, 5]. A flap-free procedure also minimizes the surgical trauma, thereby benefiting the esthetic result (no scar formation). Ultimately, the comparatively quick prosthetic rehabilitation and the reduced number of treatment sessions are arguments in support of this treatment protocol.
- Figs. 1: Initial situation from the clinical and radiological standpoints, and as a virtual data set in the intraoral scanner software
- Figs. 2: Initial situation from the clinical and radiological standpoints, and as a virtual data set in the intraoral scanner software
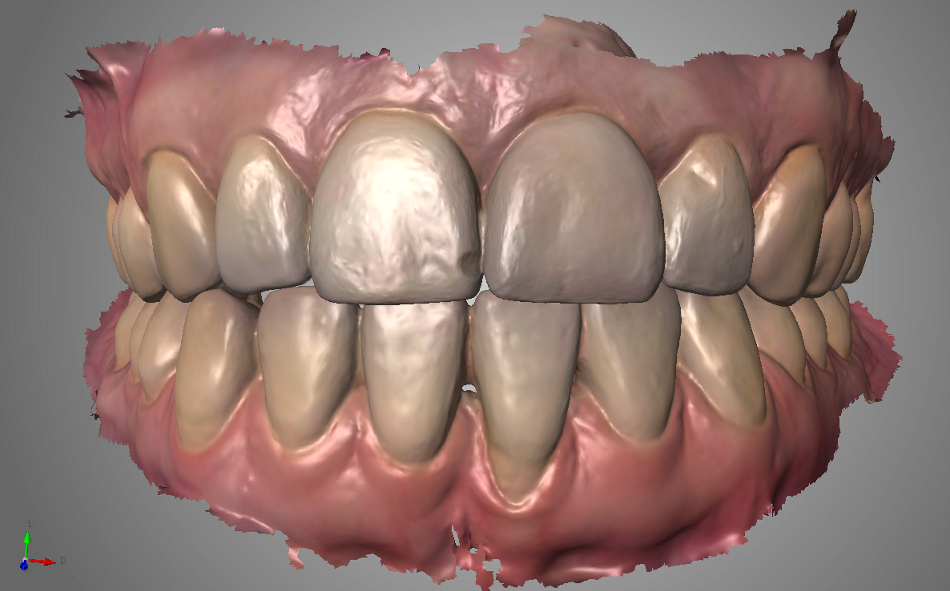
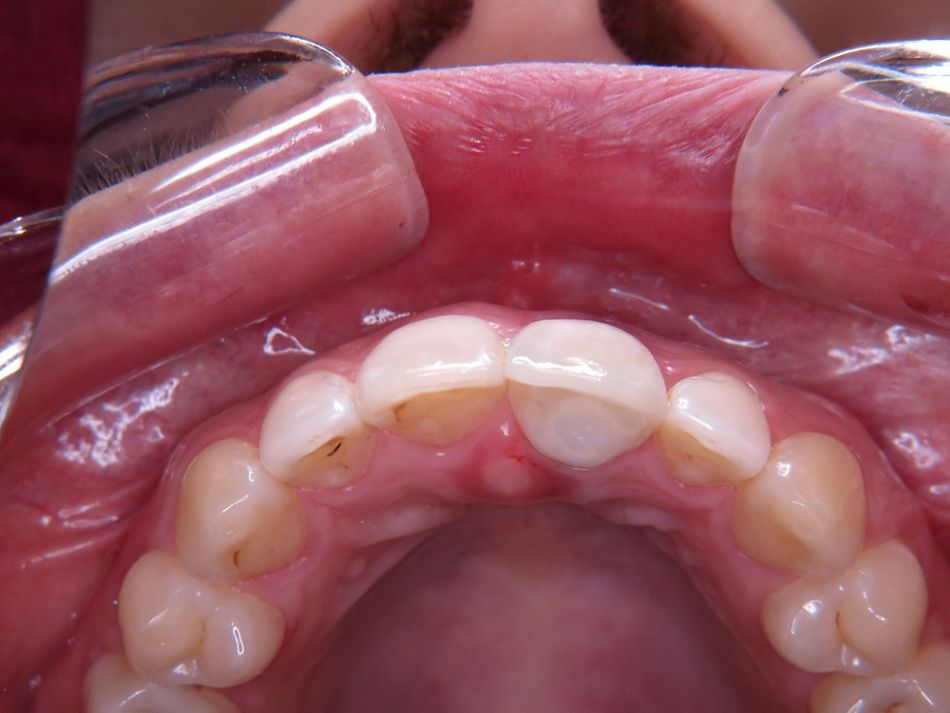
- Figs. 3: Initial situation from the clinical and radiological standpoints, and as a virtual data set in the intraoral scanner software
Diagnosis and planning
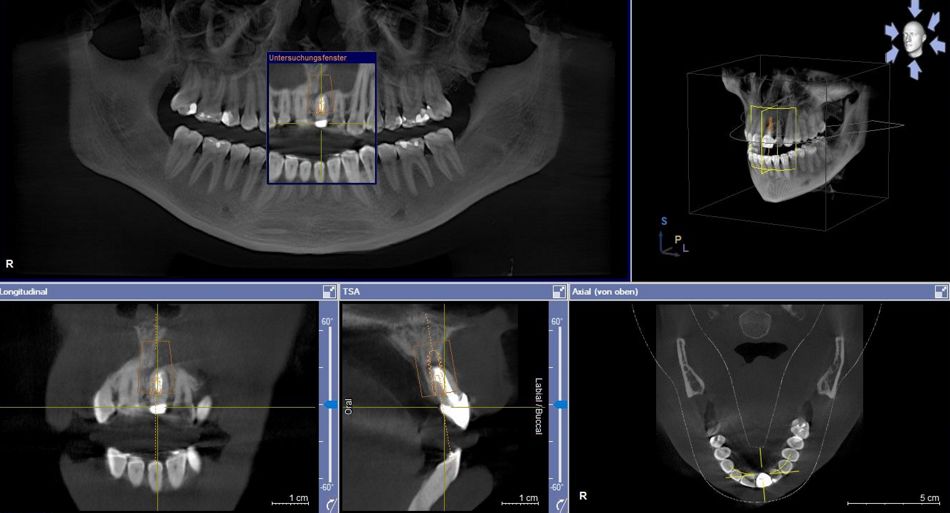
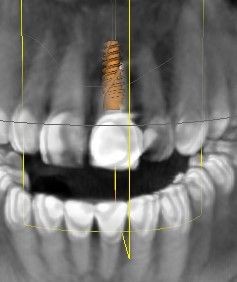
The first step in preparation for the implant planning and the CADCAM fabrication of the temporary crown was the digital data acquisition with the intraoral scanner (Trios 3, 3Shape). The data set for the initial situation should provide helpful information later during the CAD design (Fig. 3). The scan enables the initial situation to be archived digitally, ready for subsequent retrieval at any time. A CBCT scan was also recorded for the planning of the implant position on the three-dimensional image, and the DICOM data set was imported into the implant planning software (Figs. 4,5). In theory, the STL data set from the intraoral scanner (initial situation or set-up) can be imported into the planning software so that the implant position can be ideally defined from the prosthetic standpoint. In the case presented here, the 3D diagnosis showed a sufficiently stable bone volume in region 21. The insertion of a BLX implant (Straumann) had been planned.
- Figs. 4,5: Planning the implant position in region 21 using the three-dimensional image (CBCT). (Planning: immediate implantation, BLX implant)
- Fig. 5
The implant system
The Straumann® BLX is very suitable for immediate restoration protocols. Special features include its "cut-collect-condense" properties. The implant has a self-tapping thread, as well as the ability to collect and transport the cut bone. According to the manufacturer, this results in uniform peri-implant bone density. The self-tapping properties (cut) allow improved control via the torque. Moreover, during the implant placement native bone can be redistributed along the implant (collect). The distribution of bone particles and blood leads to extensive bone-implant contact directly after implantation. For optimal primary stability, the apical section of the implant secures itself in the cancellous bone, gently and evenly condensing the peri-implant bone (condense) and taking the pressure off the sensitive cortical bone. The proven SLActive surface reduces the healing time and ensures rapid osseointegration [8].
Surgical procedure
Extraction and insertion
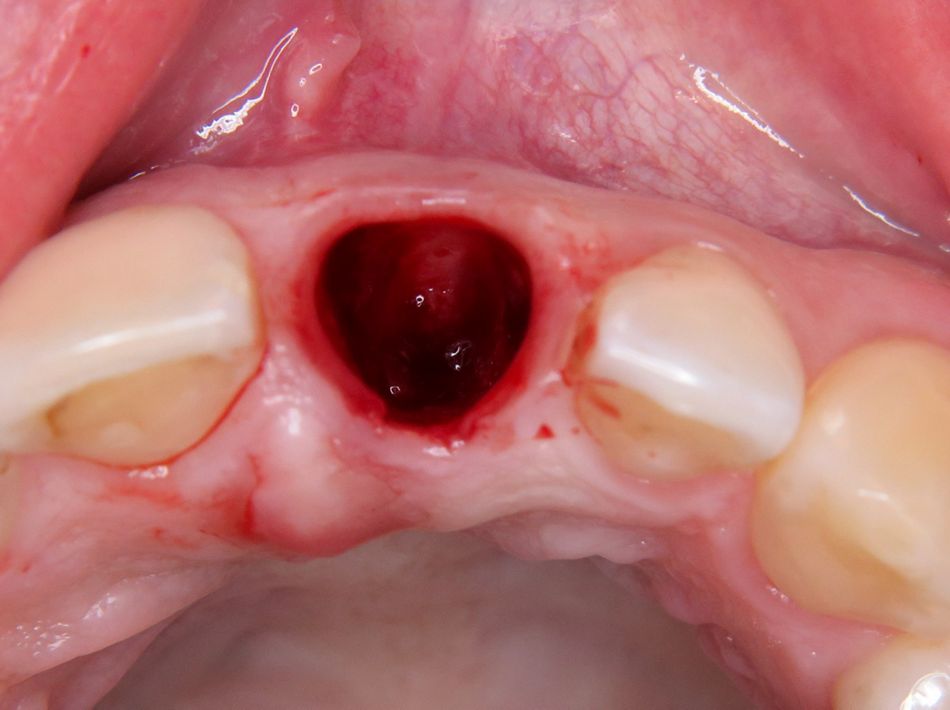
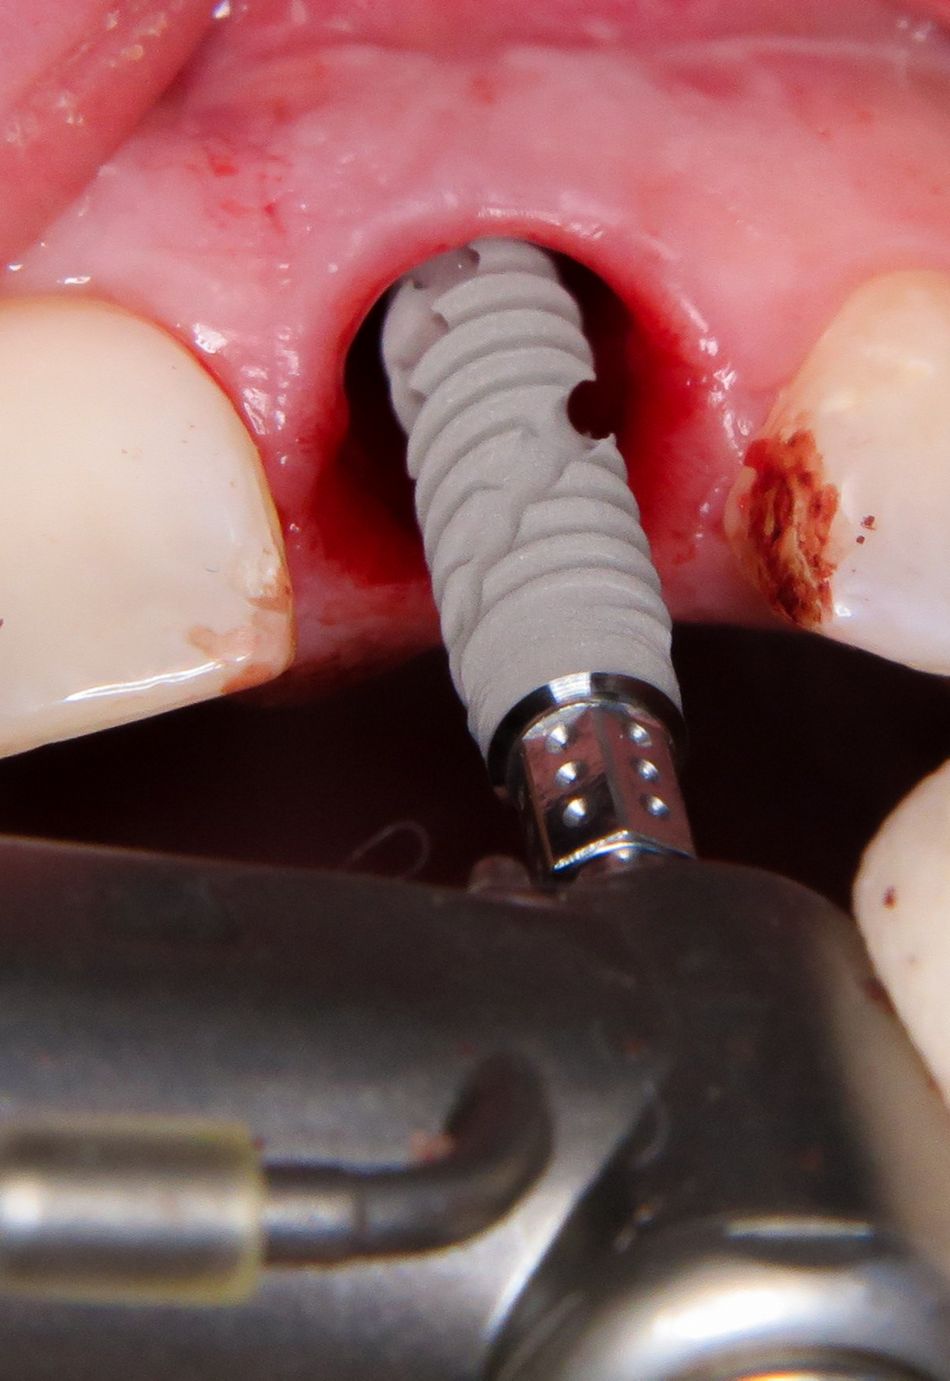
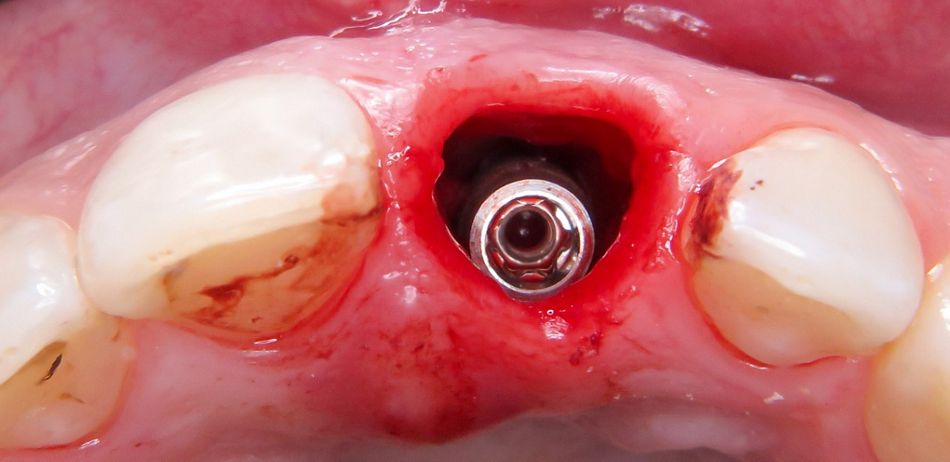
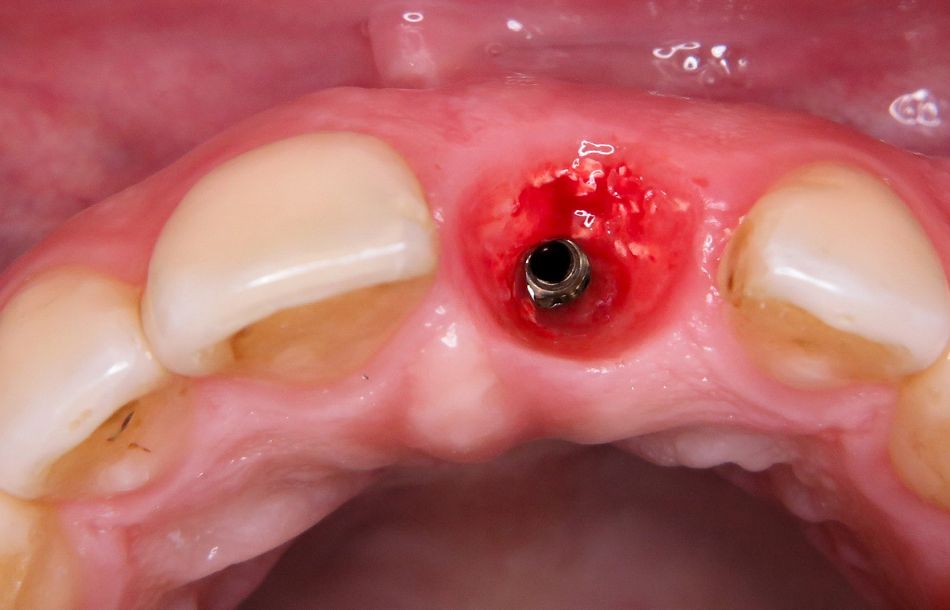
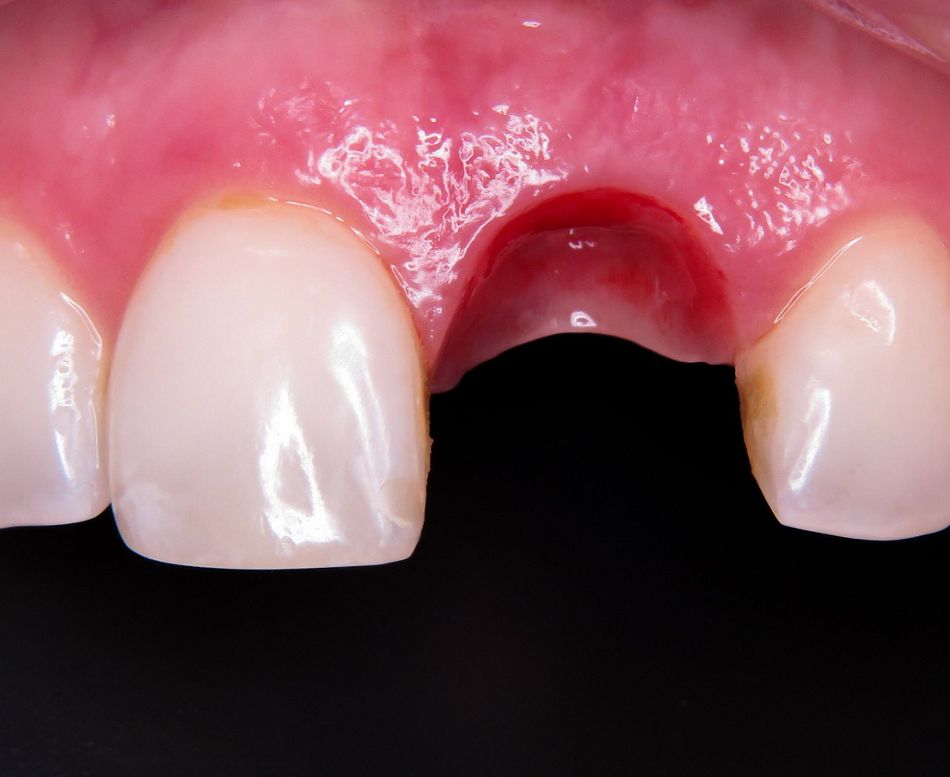
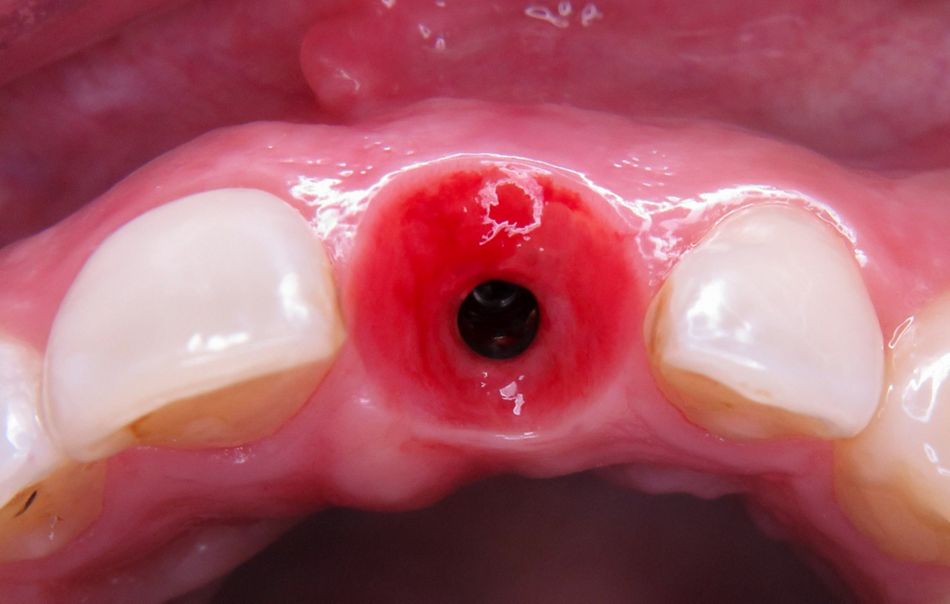
Under local anesthesia, the infected tooth 21 was extracted, sparing the vestibular wall as much as possible. All of the inflamed tissue was removed. Probing revealed an intact facial bone wall (Fig. 6). The fresh extraction socket was prepared as an implant bed, and the implant (BLX ø 4 mm, 14 mm) was inserted three-dimensionally in the palatal area of the socket, as planned [3, 6] (Figs. 7,8). The BLX implant has a few special design features. For example, since the threads of the implant are larger as they enter the crestal bone, vertical bone is condensed in addition to the horizontal condensation. The aim is to achieve primary stability in the whole implant bed based on uniform force distribution and thereby prevent areas of pressure necrosis. In the crestal area, the implant is reduced by 1/10 in order to eliminate any pressure on the sensitive bone in the cortical bone. The BLX implant was inserted with a primary stability that was sufficient for the immediate restoration (min. 45 N/cm2).
- Fig. 6: Extraction socket after careful removal of tooth 21
- Fig. 7: Insertion of the implant (Straumann BLX ø 4 mm, 14 mm)
- Fig. 8: Palatally oriented position of the inserted implant
Chairside scanning: Digital implant scan instead of analog impression-taking
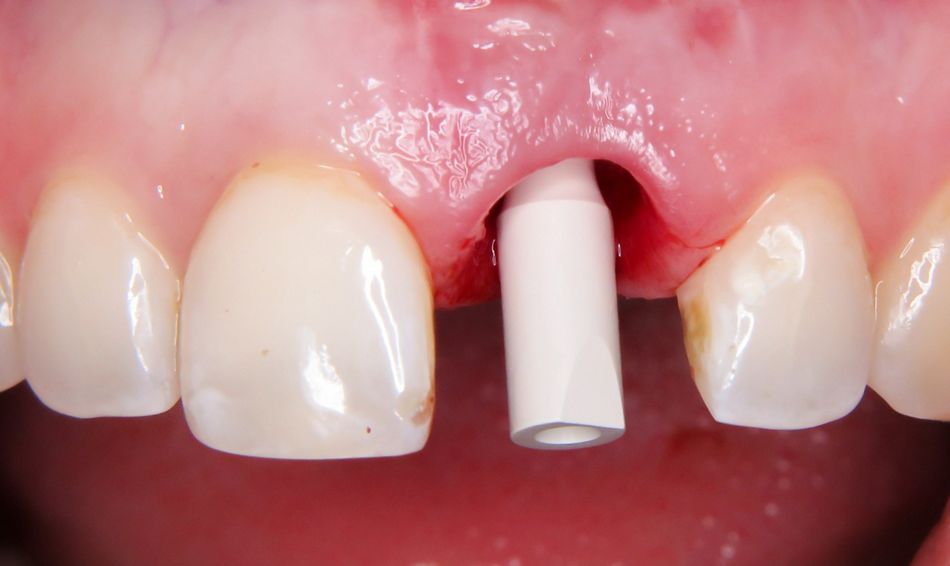
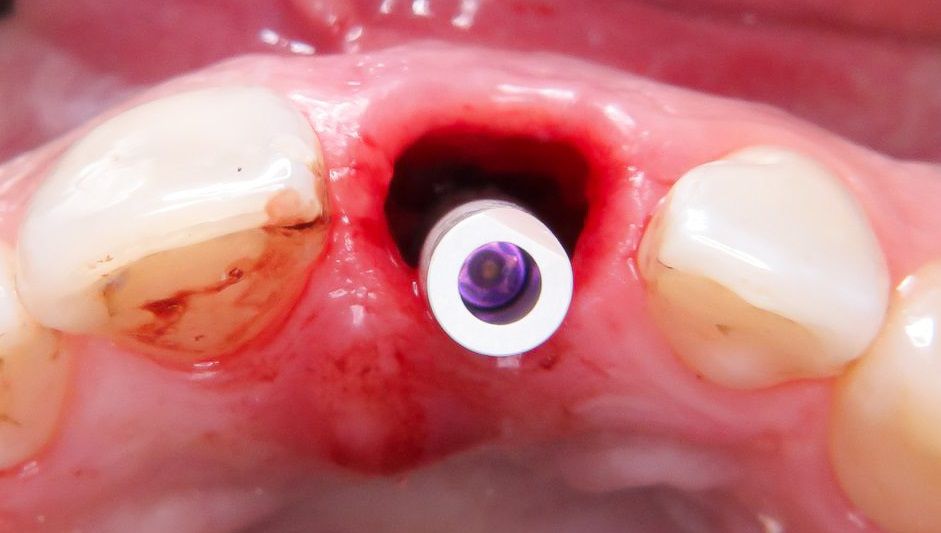
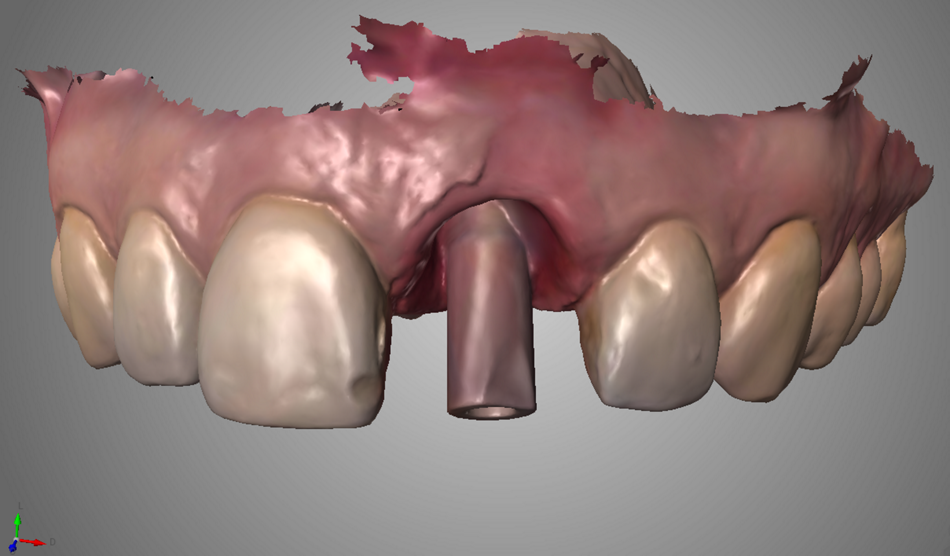
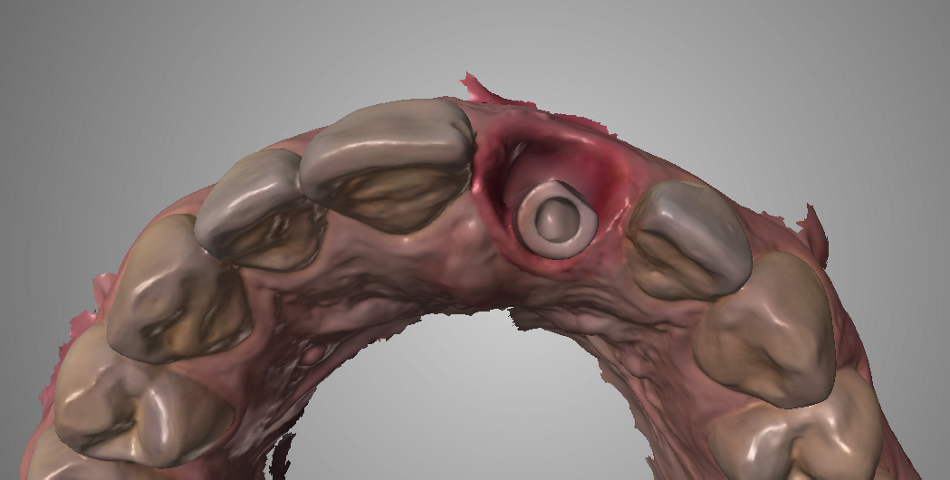
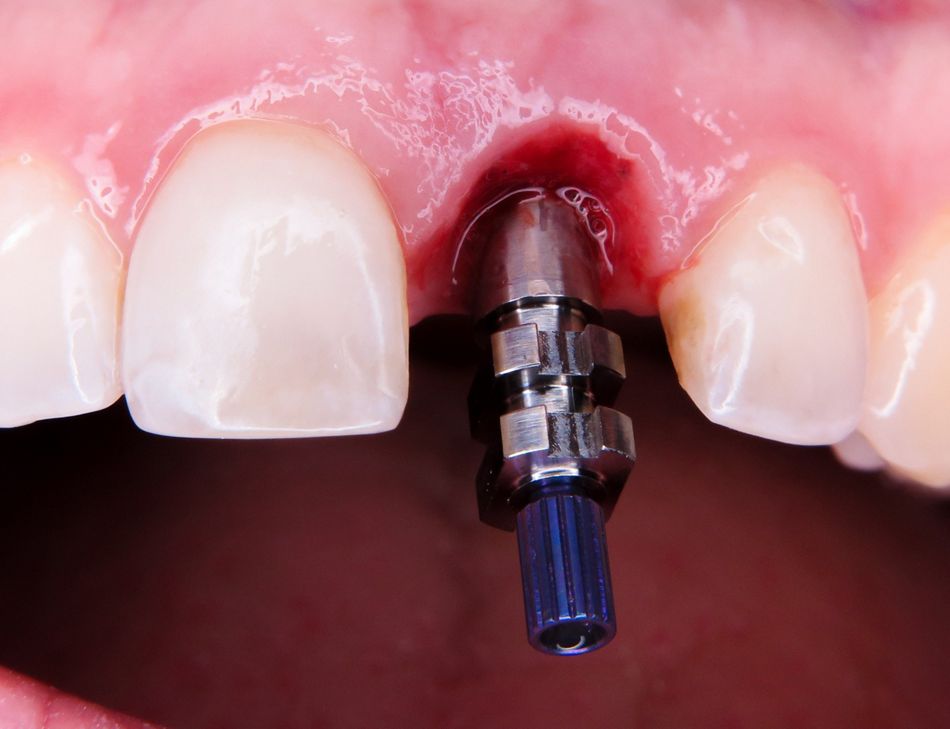
The immediate restoration was fabricated by CADCAM in the dental practice using the 3D printing system Straumann® CARES® P20. To this end, the situation after implant placement was digitized directly, i.e. chairside. This dispenses with the need for conventional impression-taking with model fabrication and subsequent conversion into a digital data set (laboratory scanner). The scanbody was placed on the inserted implant in region 21 (Figs. 9,10). The implant position was now recorded with the intraoral scanner (Trios, 3Shape) and saved in the software (Figs. 11,12).
- Figs. 9,10: Scanbody placed on the implant in region 21 for the direct digitization of the situation with the intraoral scanner (Trios 3, 3Shape)
- Fig. 10
- Figs. 11,12: Data set from the intraoral scanner as a basis for the fabrication of the immediate temporary restoration in region 21
- Fig. 12
Augmentation
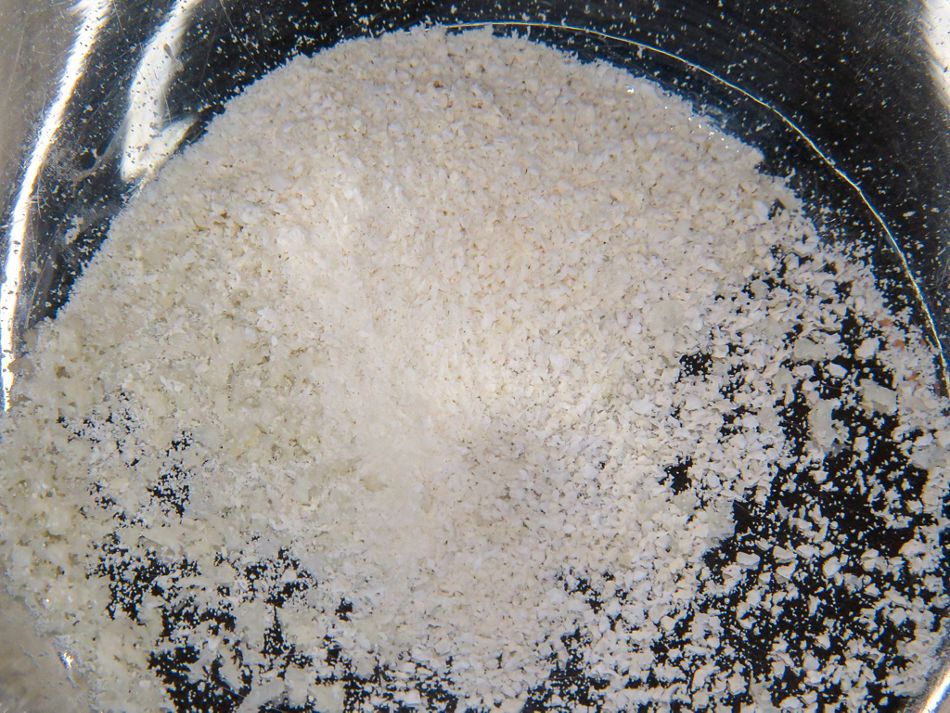
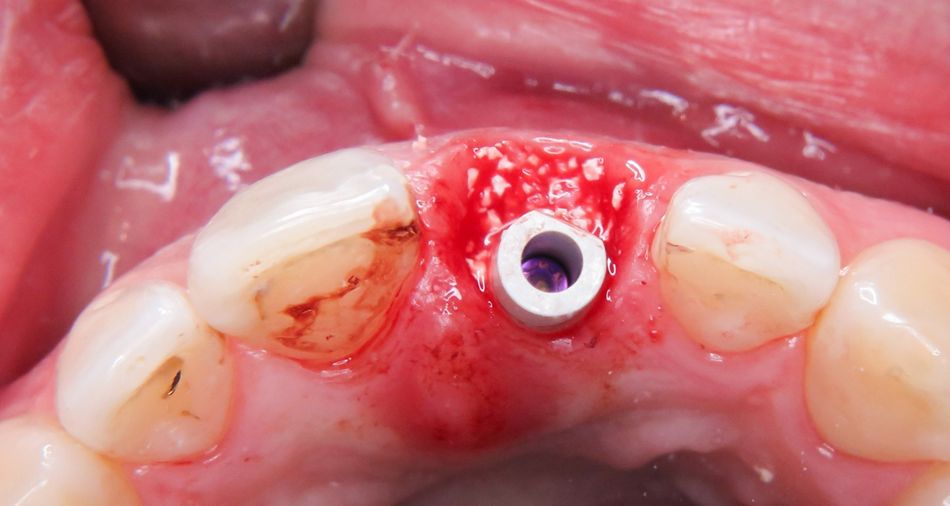
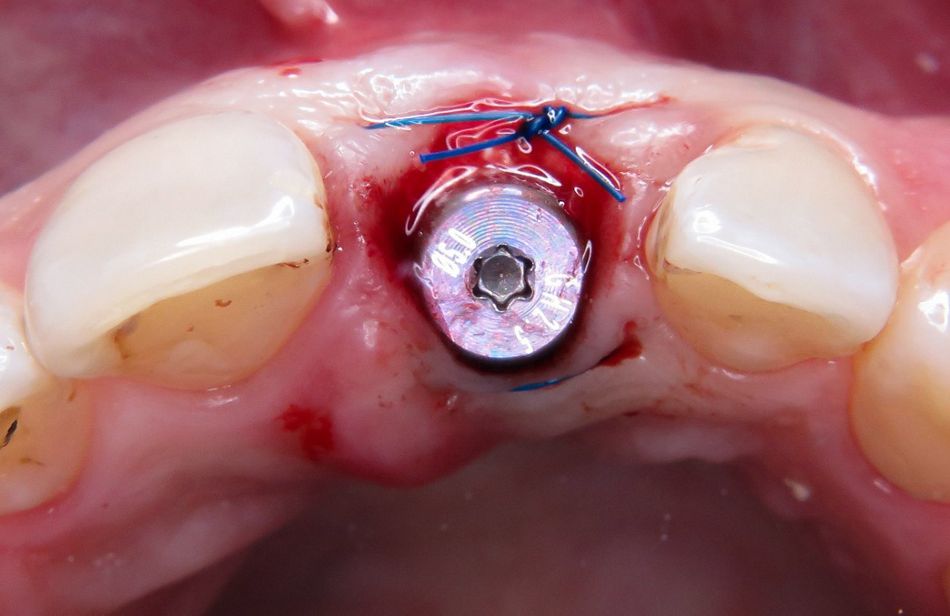
The gap between the implant in region 21 and the vestibular socket wall (jumping distance) was filled with bone substitute material (cerabone, Botiss) (Figs. 13,14). The aim of augmentation in the area of the vestibular socket wall is to improve the regenerative capacity of the hard and soft tissues [15]. In order to prevent the soft tissue from collapsing, the socket should be restored as soon as possible. The augmentation is designed to counteract the resorption of the buccal plate and support the formation of new bone as effectively as possible. Experience has shown that filling the gap produces a better result in many cases and often avoids the need for time-consuming augmentations at a later date. In this case a bovine bone substitute material was used [4]. After this material was inserted and the cover screw placed, the site was closed with a mattress suture (Fig. 15).
- Fig. 13: Preparation of the bovine bone substitute material (Cerabone, Botiss)
- Fig. 14: Filling the gap between implant and buccal plate
- Fig. 15: Situation after placing the cover screw and suturing (mattress suture)
3D printing of the temporary restoration
CAD design of the crown
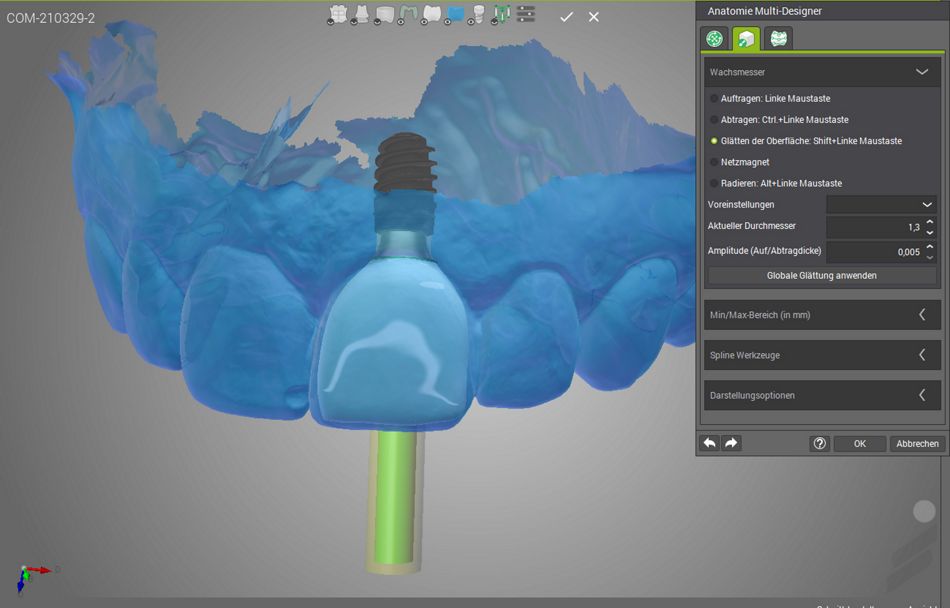
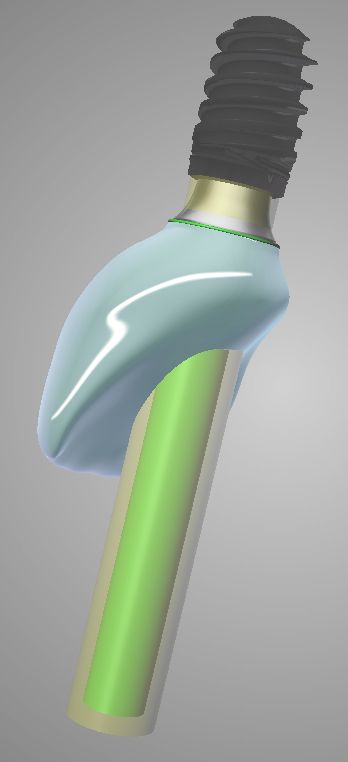
The temporary restoration was fabricated on the basis of the scan data. Since the intraoral scanner is a system that outputs an open data set, there is the option to specify who will carry out further processing or the fabrication of the restoration. The STL file or PLY file can be prepared for forwarding to the dental laboratory or another external service provider. Or – as in this case – the process can be undertaken directly in the practice. To this end, the data set was imported into the CAD software (Straumann® Cares® Visual) and the implant crown designed (Figs. 16,17).
- Fig. 16: Designing the temporary implant crown in the CAD software (Straumann® CARES® Visual Design Software)
- Fig. 17: Virtual design of the implant crown
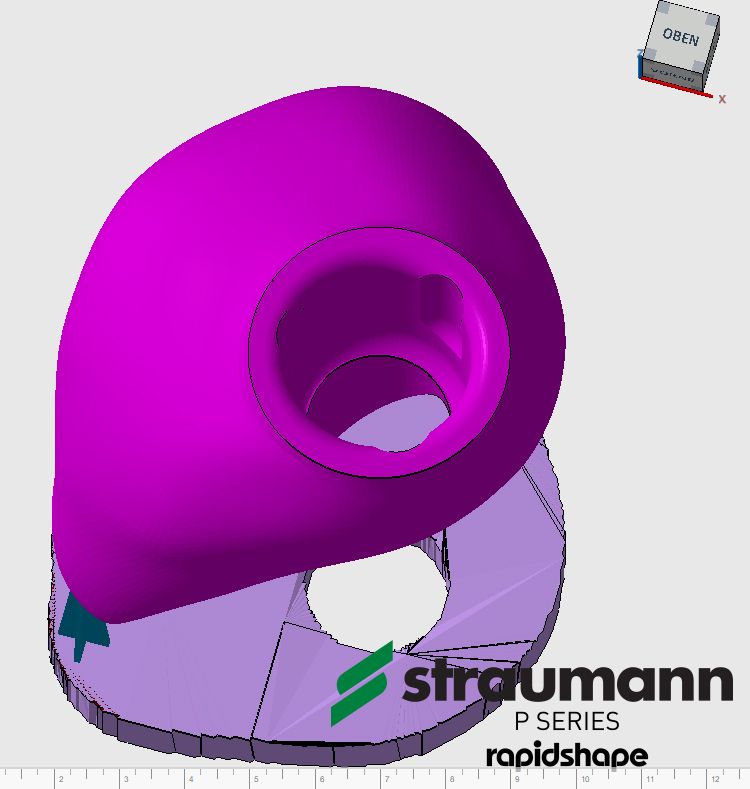
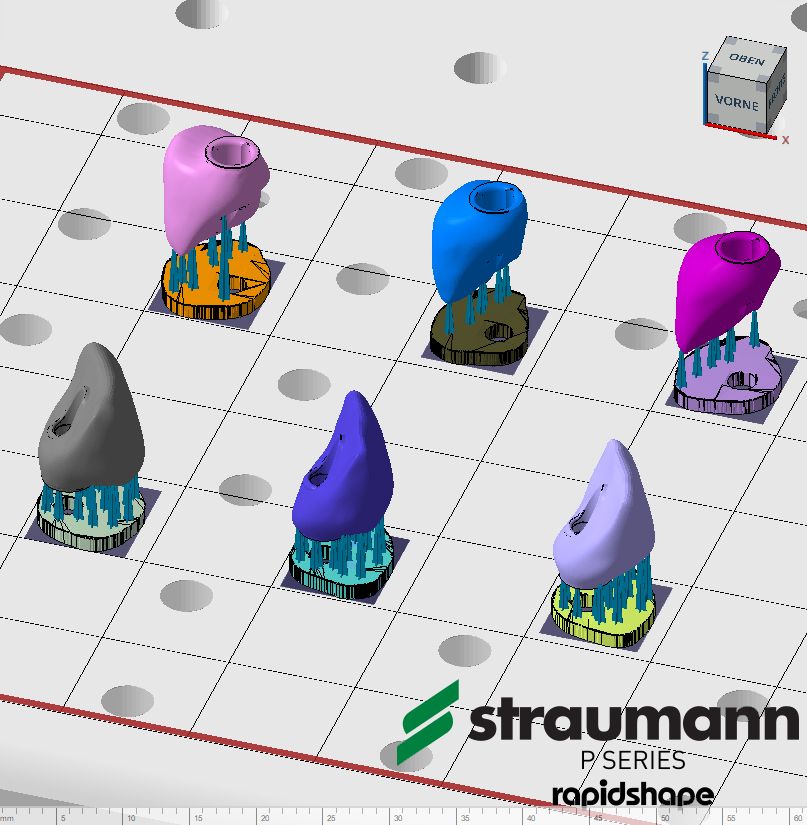
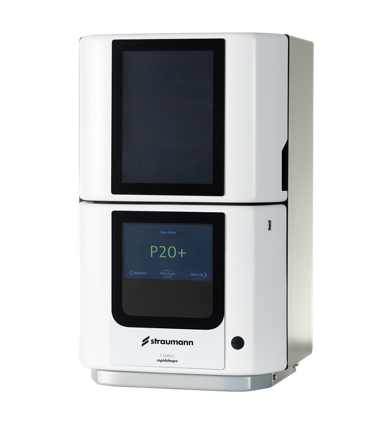
Just as quickly as the design of the crown, the data set from the design software was imported into the printer's CAM software (Autodesk Netfabb) and prepared (Figs. 18,19). The Straumann® CARES® P20 (Fig. 20) is based on force-feedback technology, in which a measuring device monitors the printing process and provides real-time data for motion control. The technology also enables fast printing. The composite resin P pro Crown & Bridge (Straumann) in the color A1 was selected as the material for printing the temporary crown. By means of RFID tags the printer automatically identifies the material and processes the information accordingly.
- Figs. 18,19: Nesting the designed crown in the software of the 3D printer (Netfabb slicing). Preparation for the printing process
- Fig. 19
- Fig. 20: The 3D printing system Straumann® CARES® P20

Want to stay up to date?
youTooth.com is THE PLACE TO BE IN DENTISTRY – subscribe now and receive our monthly newsletter on top hot topics from the world of modern dentistry.
Post-processing
In its process chain, the 3D printing system integrates the devices for the post-processing: the automatic cleaning system (Straumann® CARES® P wash) and the automated light-curing unit (Straumann® CARES® P cure). As a result, printed restorations can be fabricated with a high degree of reliability and excellent material quality. A special feature is the cleaning process. Immediately after the printing operation, the objects are placed in a centrifuge and any excess resin is completely removed by centrifugation. This type of cleaning is an alternative to the standard procedure in which the alcohol used can impair the long-term stability of a printing resin. The cleaning in the centrifuge can have a positive effect on the material quality. This aspect of post-processing should be borne in mind, particularly for objects that remain in the mouth for a long time (temporary crowns) [11, 16]. The final step is the automatically controlled light curing.
Completion and insertion of the temporary implant crown
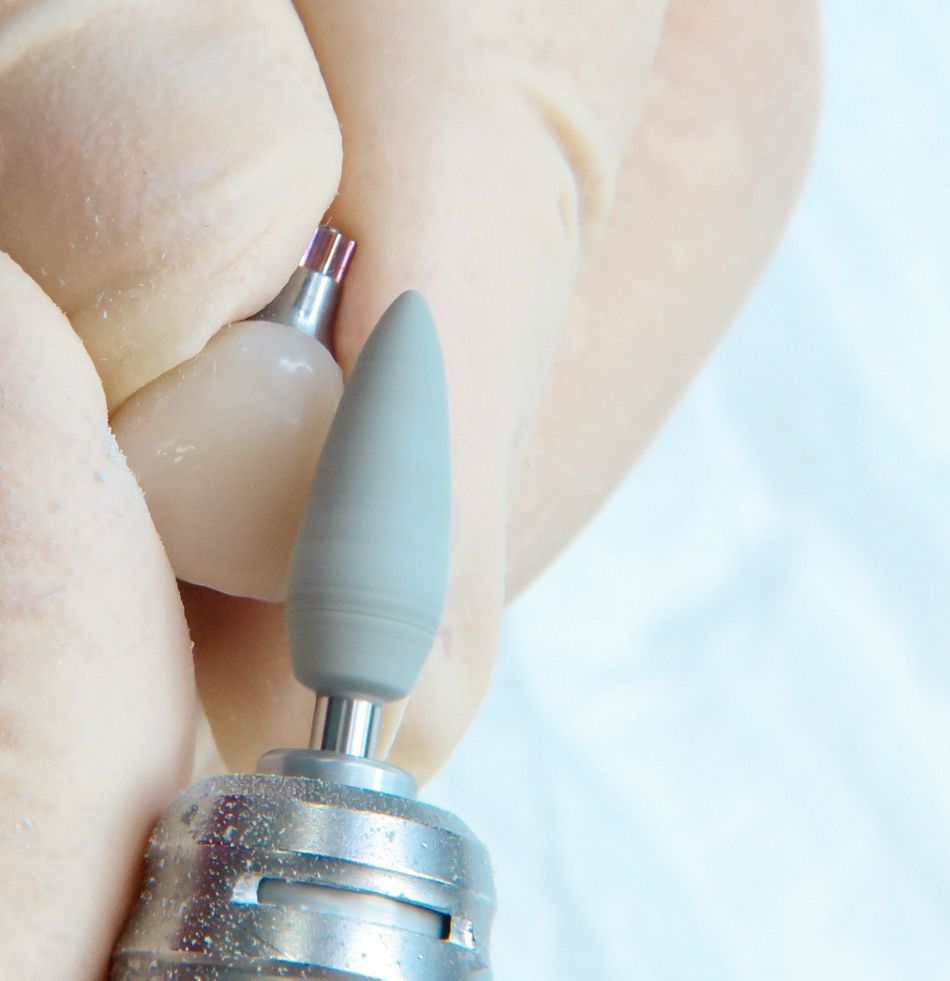
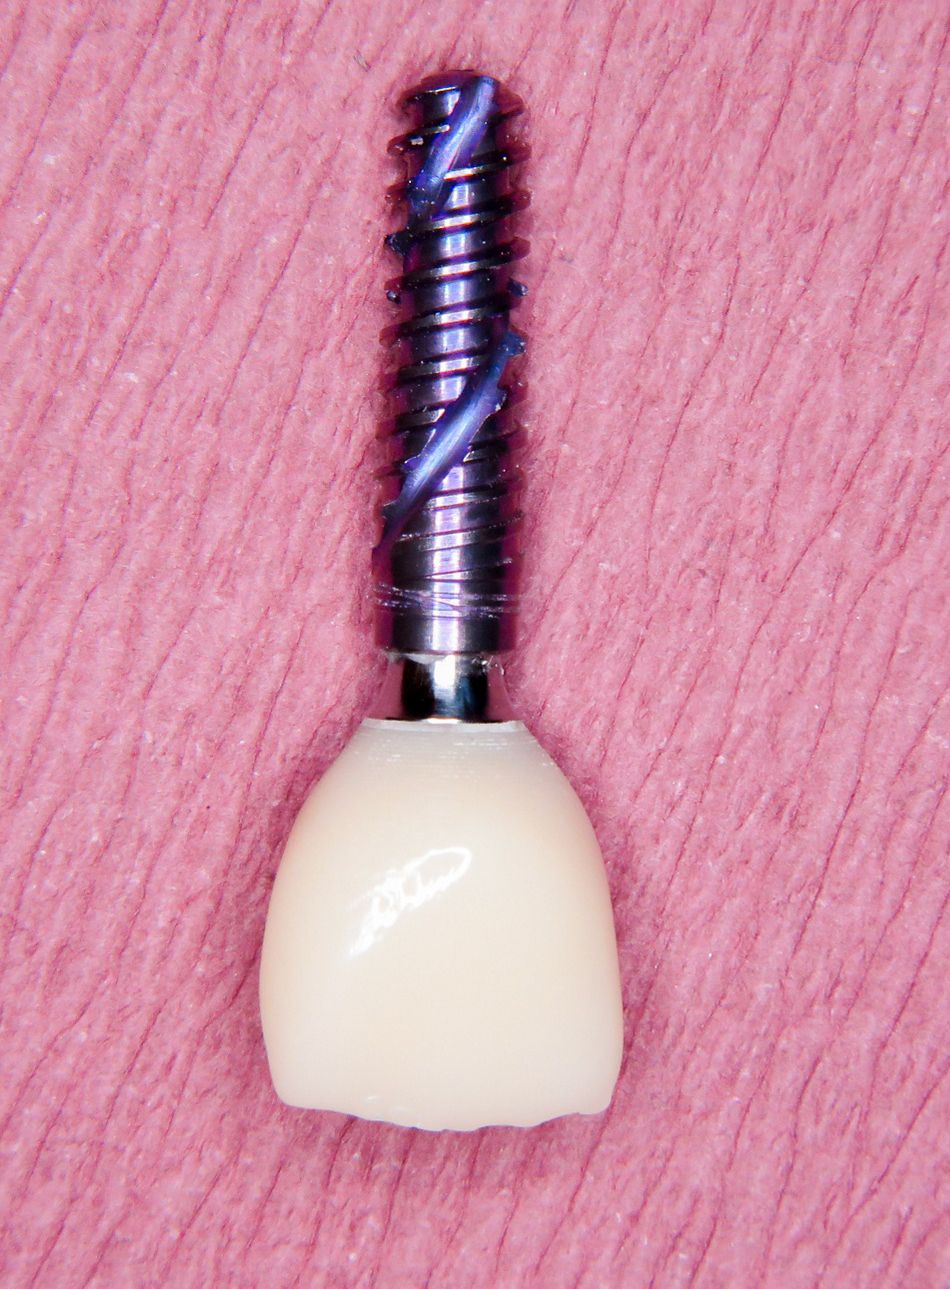
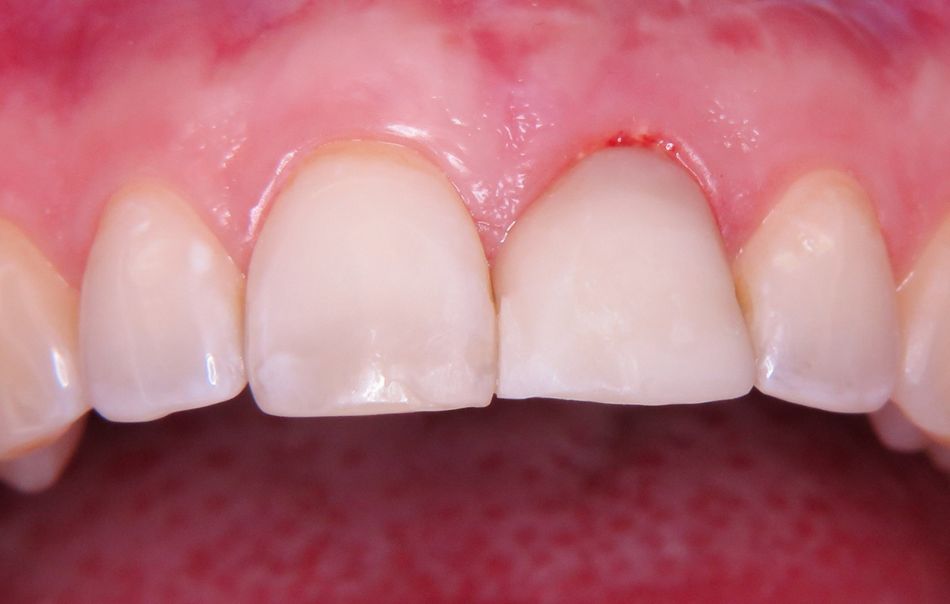
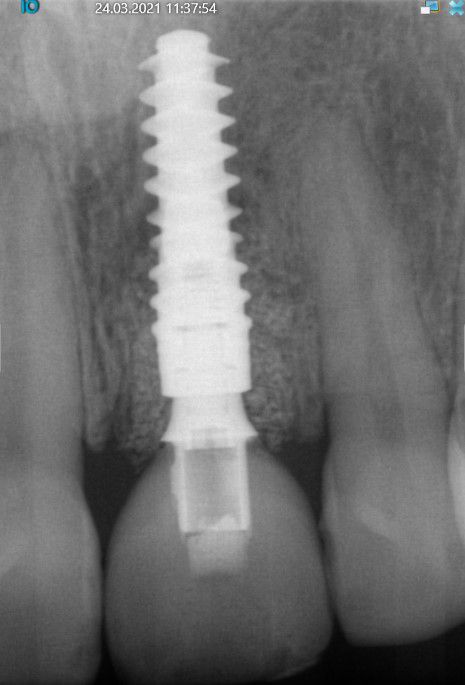
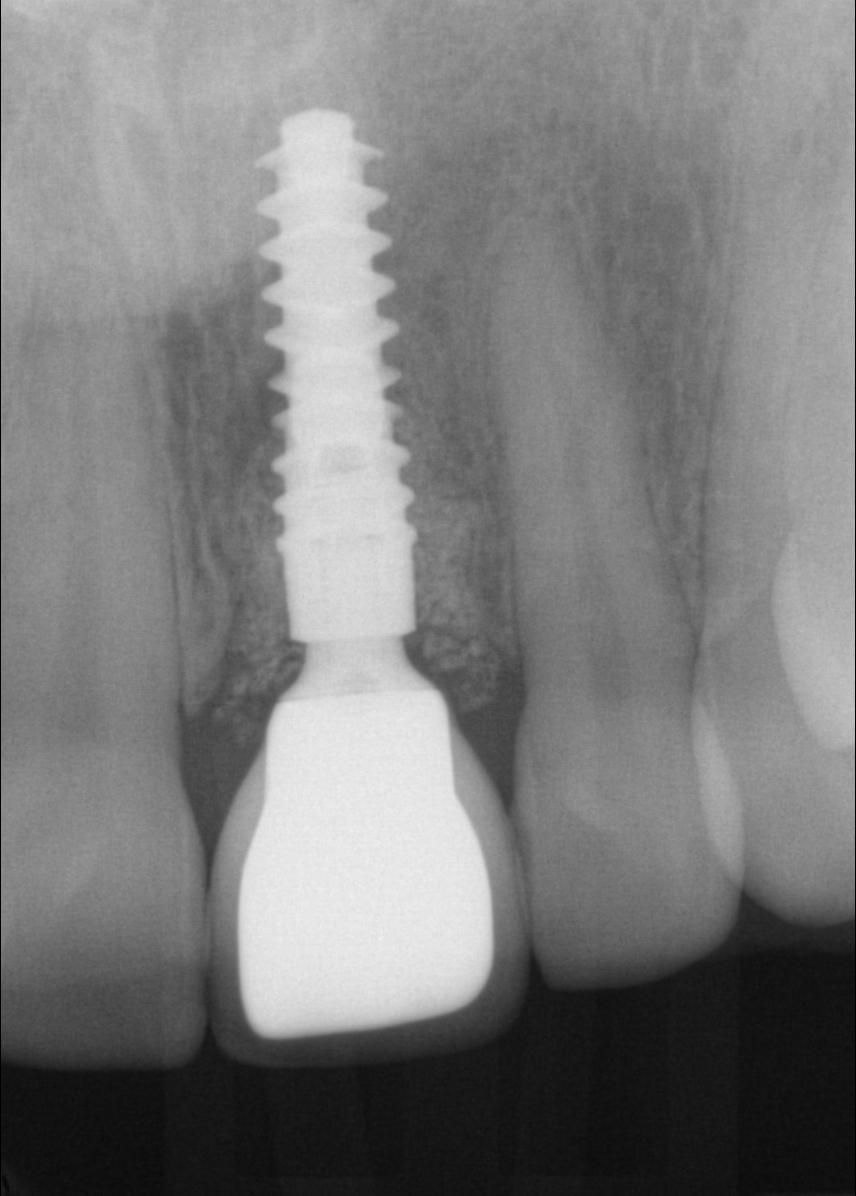
If desired, the printed implant crown can be customized with light-curing laboratory composites or stains. In this case, the temporary crown was merely polished (Fig. 21). Using the Variobase® component (Straumann), the crown could be screwed in the patient's mouth 20 hours after implant insertion in region 21 (Figs. 22-25). Functionally, the restoration was placed out of occlusion both statically and dynamically. The patient was pleased with the final result. In the completely digital workflow, and within a very short time, she could be discharged from the practice with a suitable provisional denture.
- Figs. 21a and b: Final polishing of the printed crown on the auxiliary implant
- Fig. 21b
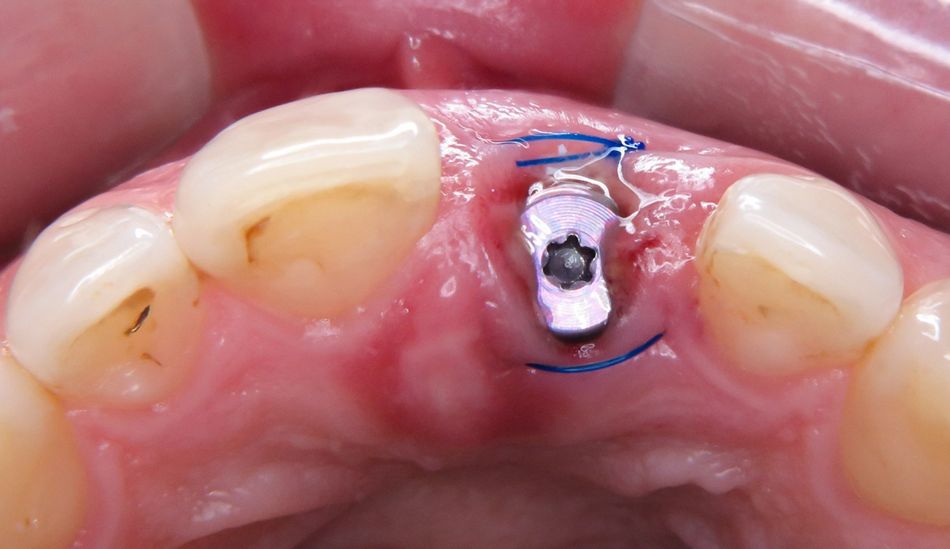
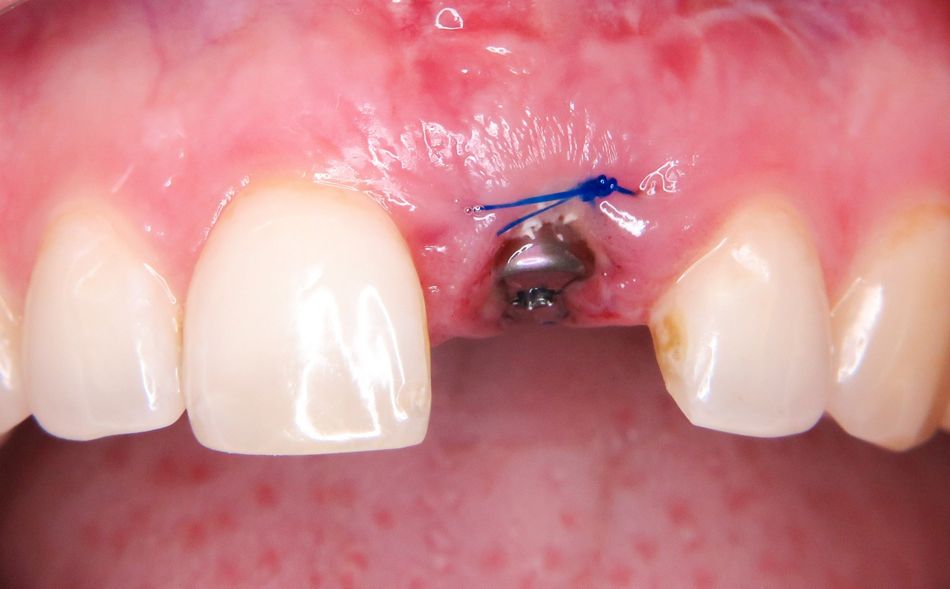
- Figs. 22a and b: Clinical situation approx. 20 hours after the extraction of tooth 21 and the immediate implantation
- Fig. 22b
- Fig. 23: Removal of the healing abutment, gingival situation 20 hours postoperatively
- Fig. 24a: Temporary implant crown after closure of the screw channel
- Fig. 24b: Temporary implant crown fabricated in the 3D printing process approx. 20 hours after insertion of the implant
- Fig. 25: Check x-ray with temporary restoration
There were no complications during the healing phase. For the fabrication of the definitive implant crown, a conventional implant impression was taken in order to enable a precise fit of the impression post on the x-ray (Figs. 26,27). While digital data recording with the intraoral scanner would be possible in theory, precise radiological control would not be possible because the scan posts are not radiopaque. In the dental laboratory, the all-ceramic abutment was produced first and, following a try-in, the all-ceramic crown was fabricated (Figs. 28-30). After the crown was screwed in the mouth, the screw channel was sealed with composite. The result was a stable situation with healthy peri-implant soft tissue and a harmonious gingival contour (Figs. 31a and b).
- Fig. 26: Situation with impression post for the conventional pick-up impression
- Fig. 27: Radiological follow-up of the precise fit of the impression post on the implant
- Fig. 28: Ceramic superstructure with penciled-in gingival contour in the mouth
- Figs. 29a and b: Ideally shaped emergence profile
- Fig. 29b
- Figs. 30a and b: All-ceramic implant crown screwed in the mouth (technical implementation: Lutz Tamaschke dental laboratory, Berlin)
- Fig. 30b
- Figs. 30a and b: All-ceramic implant crown screwed in the mouth (technical implementation: Lutz Tamaschke dental laboratory, Berlin)
- Fig. 31b
Conclusion
Particularly in the anterior region, ceramic restorations and the patient-specific fabrication in the dental laboratory represent the ideal solution from the esthetic and functional standpoints. Nevertheless, 3D printing – in addition to other fabrication processes – has its own merits. In the dental practice, 3D printing can be used to print not only temporary fixed restorations but also, for example, models, impression trays or drill templates. Materials science research is currently focused especially on 3D printing materials. Further applications that are of interest to the dental practice and laboratory are expected to emerge in the foreseeable future, e.g. definitive replacement teeth. Consequently, 3D printing is increasingly supplementing established procedures and can, in some cases, replace time-consuming conventional fabrication processes. With the new 3D printing material P pro Crown & Bridge (Straumann), temporary crowns and bridges can be produced comparatively quickly, e.g. as part of an immediate implant restoration process. In the provisional phase, the biocompatibility of the material used is a key factor, including for soft tissue healing. Another important aspect is reliable post-processing, consisting of cleaning and adequate polymerization. A validated process chain (e.g. Straumann® CARES® P20) is essential for a reliable and efficient workflow. As with the operation of any new equipment and the use of any new technology, a certain learning curve is required for 3D printing. Even if many processes are automated, it is ultimately the user who decides whether a technology becomes a successfully established part of the daily routine.

