#Immediacy 16. Jan 2017

Sealing Socket Abutment technique (SSA) – immediate implant placement in molar site

A clinical case report by Gary Finelle and Antoine Popelut, France

A 65-year old woman presented at our clinic for implant and prosthetic restoration of upper left (#27) and lower left molars (#36, #37) (Fig. 1). The patient’s medical history revealed no contraindications to dental implant therapy and restorative treatment. According to the patient, her lower left molars had been extracted more than 30 years ago. For tooth #27 the patient reported discomfort due to contact with the opposing edentulous crest, sensitivity during mastication and mobility of the tooth.

Conclusion

This case report describes an innovative approach based on a chairside fabrication of a suitable intra-operatively milled CADCAM healing device after immediate implant placement. As more and more clinics and dental offices are equipped with chairside milling machines, the protocols detailed in this article aim to offer a simplified workflow for single molar implant treatment (from extraction until final crown delivery) by reducing the length of treatment and the number of surgeries and clinical steps (and the morbidity).

Treatment planning

Tooth #27 was diagnosed as non-conservable due to localized periodontal disease associated with furcation involvement (degree 2, mobility 2) and a probing depth of more than 10 mm in the distolingual areas (Fig. 2). The tooth was vital but sensitive to percussion. Moreover, the soft tissue position was intact. No signs of acute infection were noted at the time of clinical examination. Based on radiographic examination (Cone Beam Computerized Tomography), the class A septum configuration (Smith & al. 2013) and apical bone volume were favorable and compatible with: 1. predictable sufficient insertion torque 2. adequate 3-dimensional prosthetic position. Immediate implant placement after extraction of #27 was planned (Atieh & al. 2010) in order to reduce length of treatment and number of surgeries in comparison with the delayed approach. The implant selected for this procedure was a Straumann® Tissue Level Implant 4.8 × 12 mm, Wide Neck.

Surgical procedure

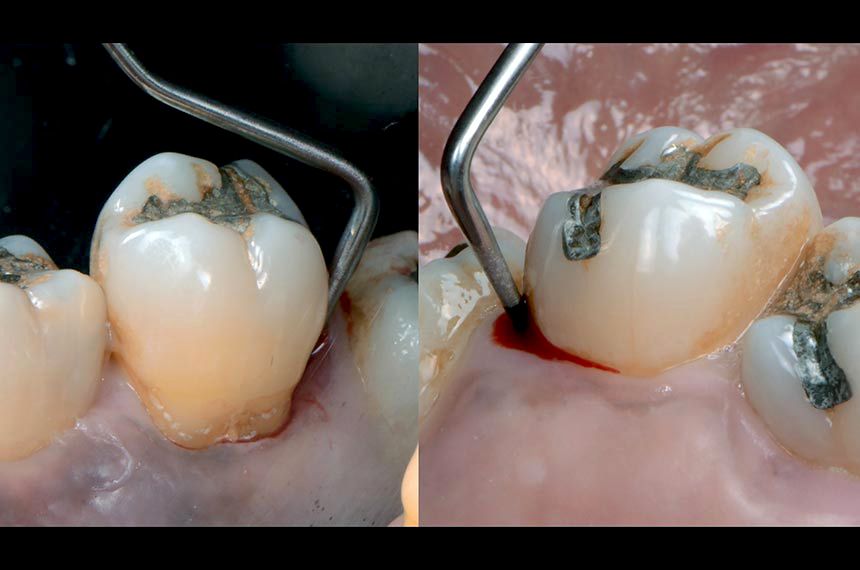
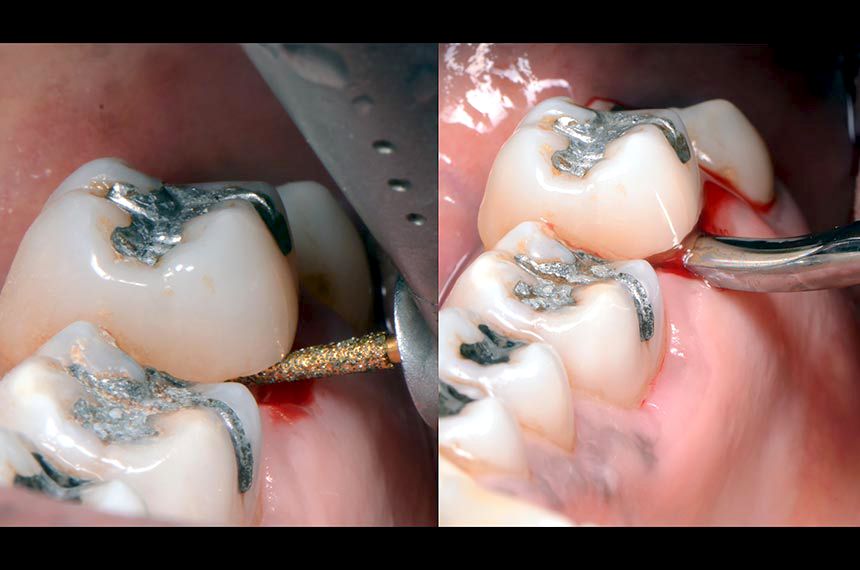
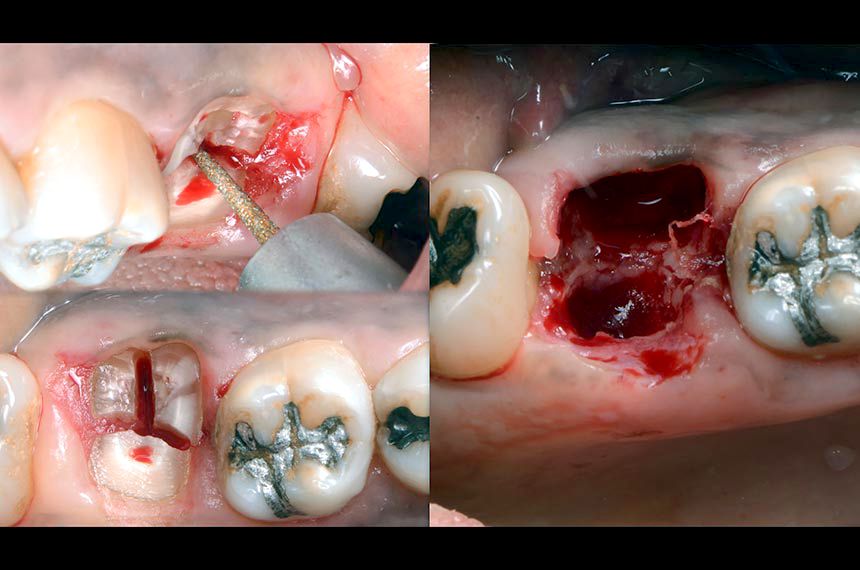
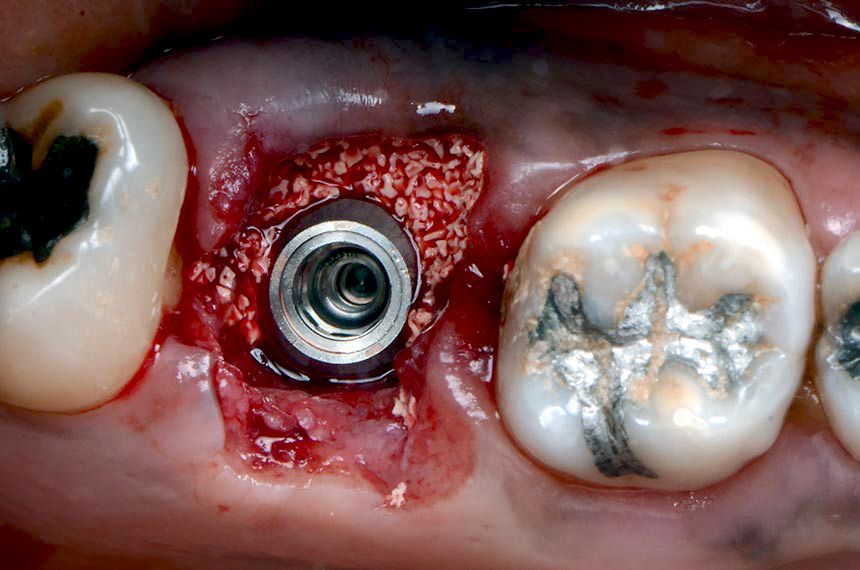
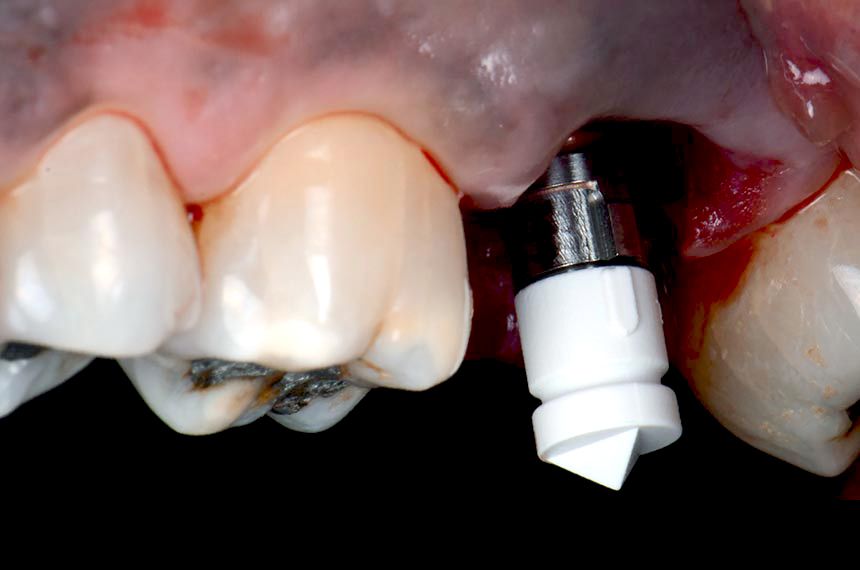
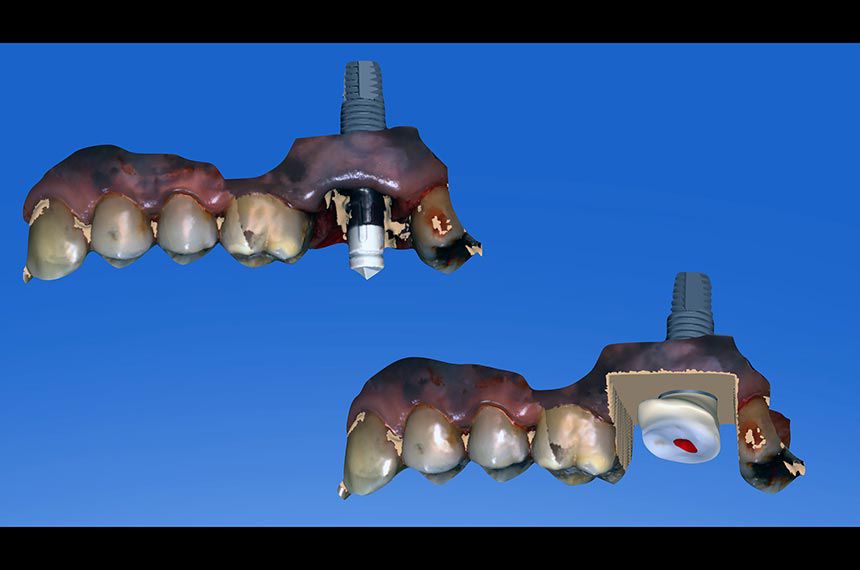
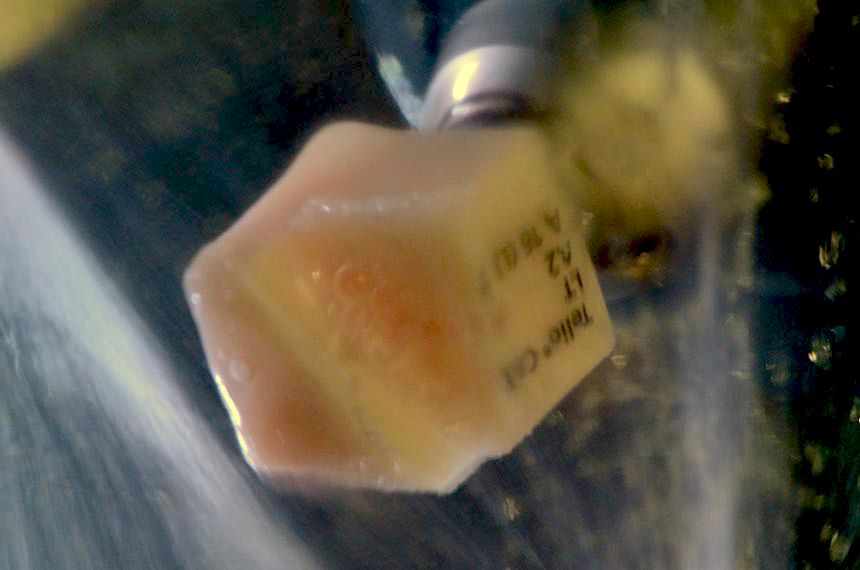
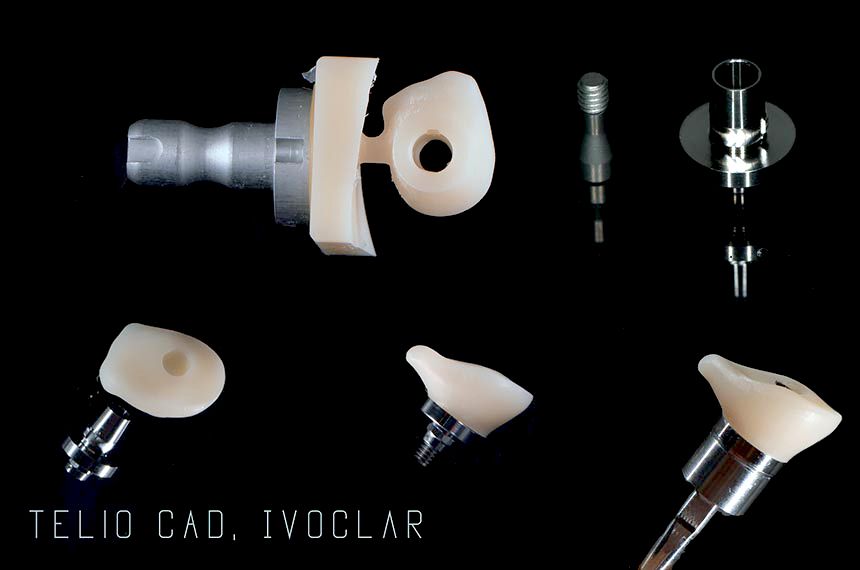
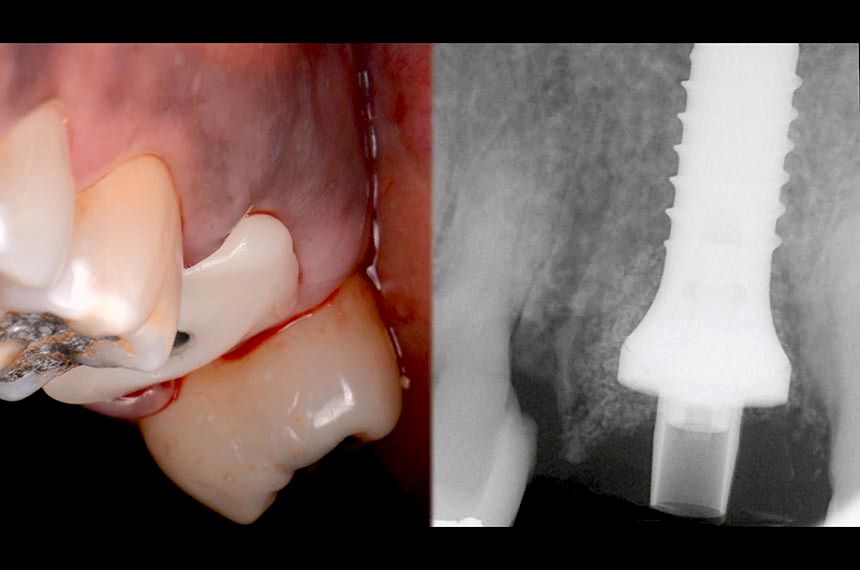
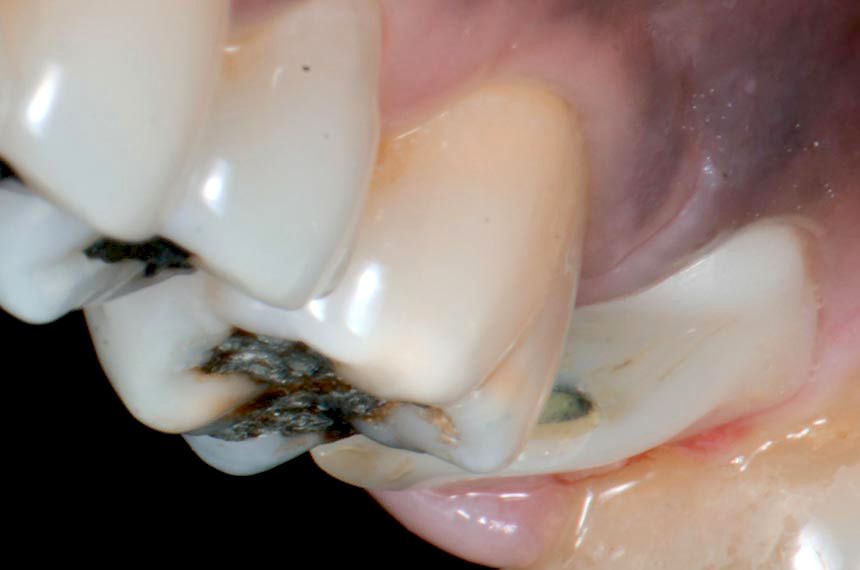
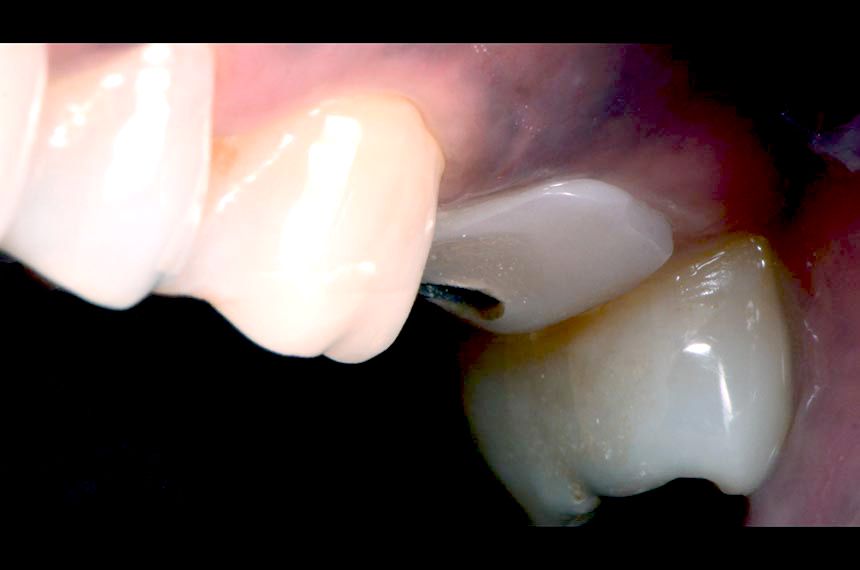
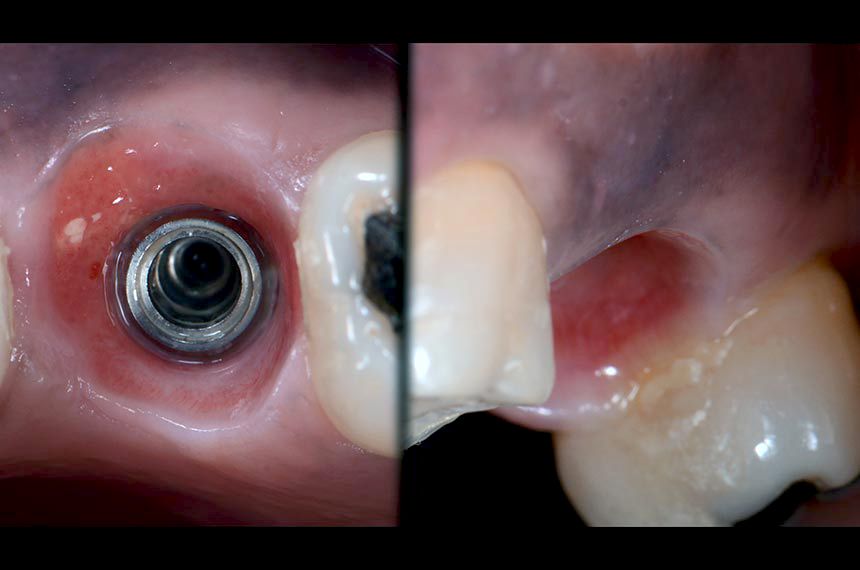
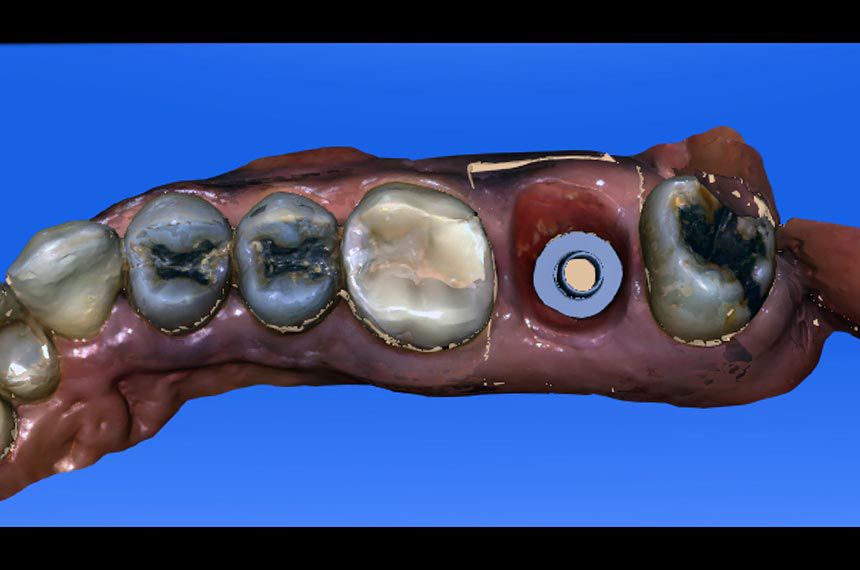
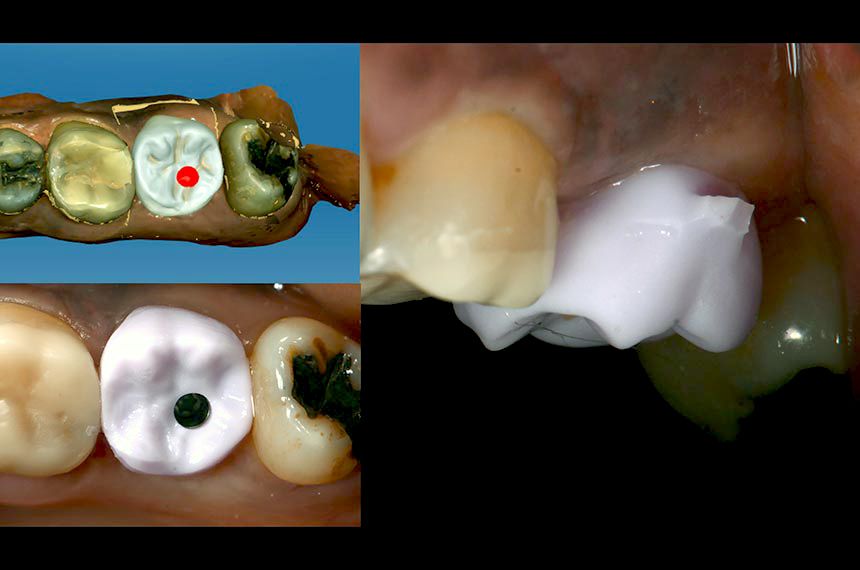
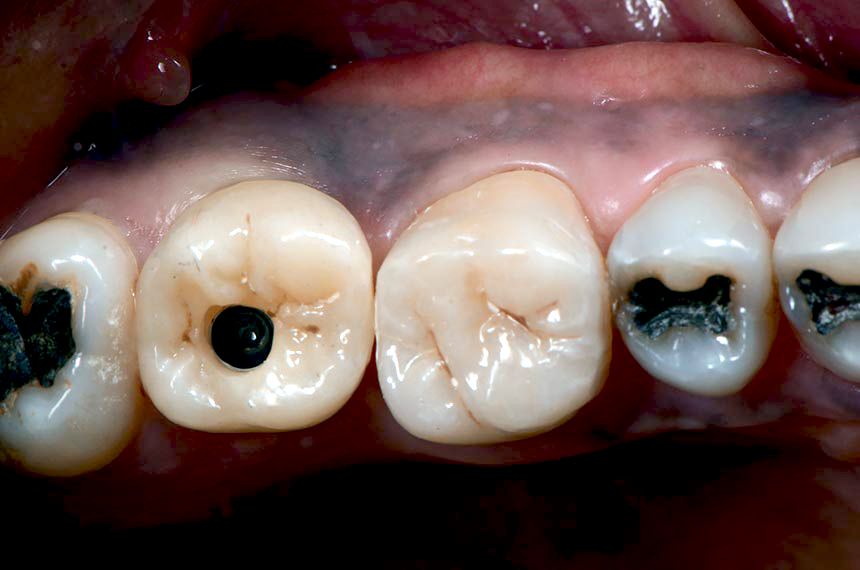
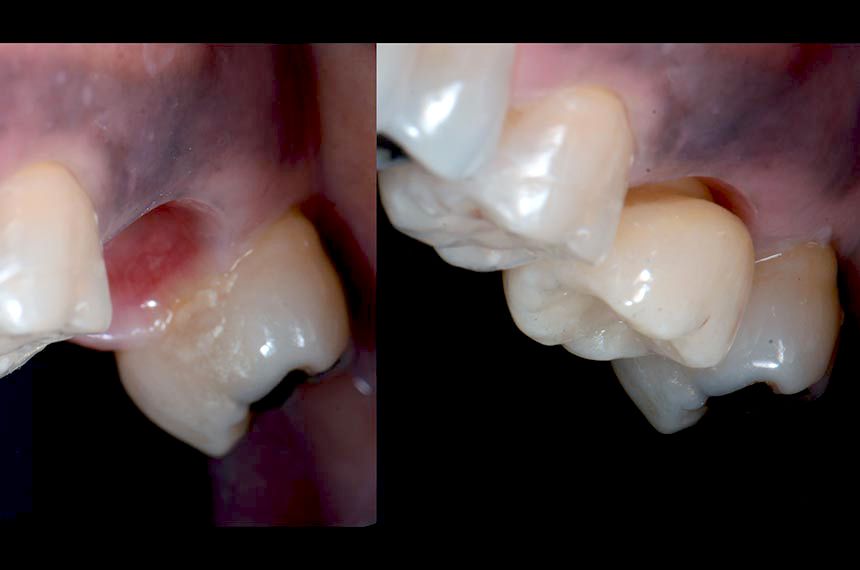
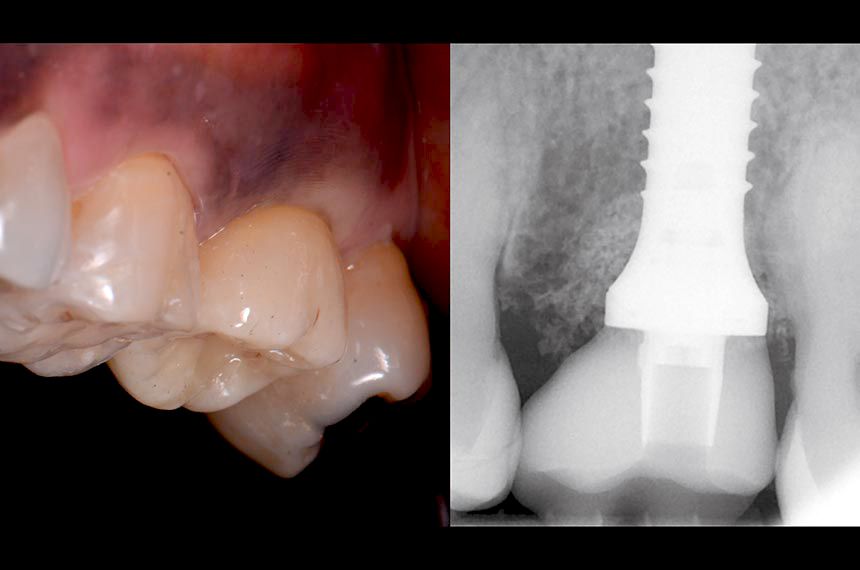
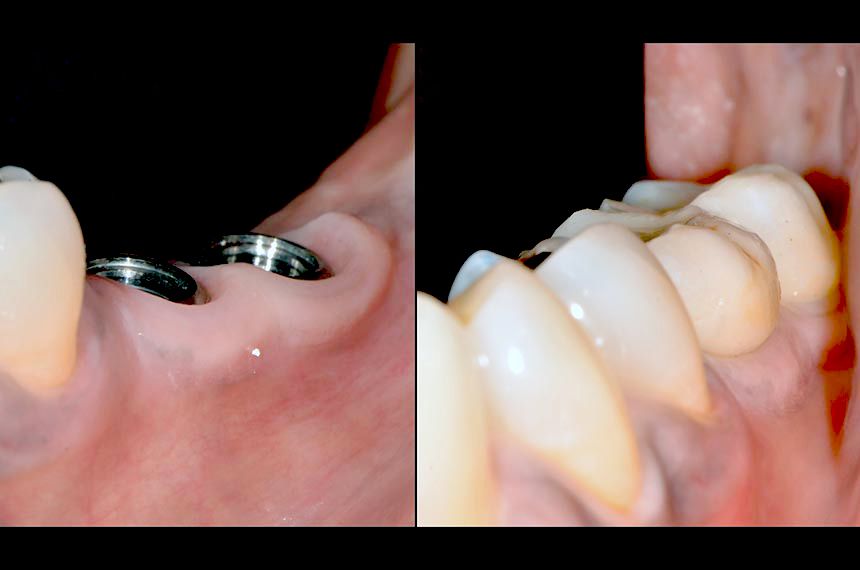
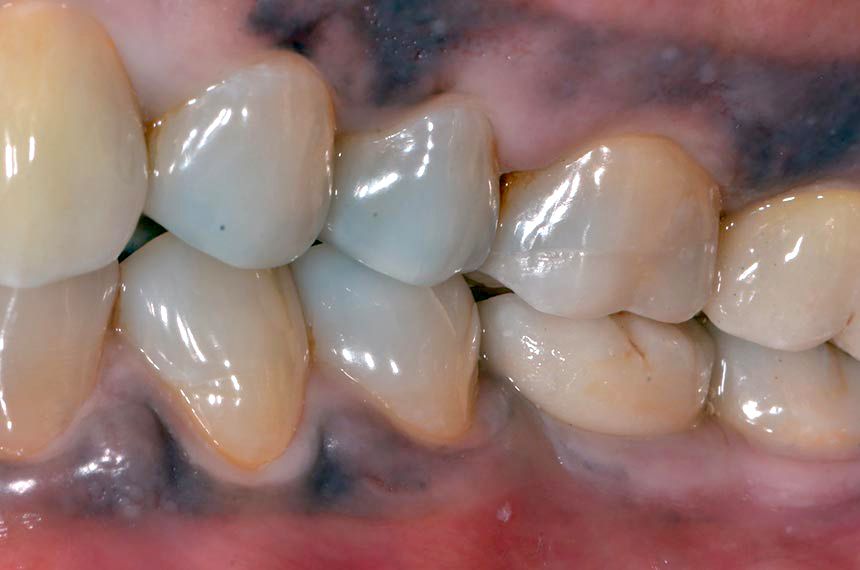
A major challenge encountered while undertaking immediate implantation in the molar area is the complexity of obtaining primary wound closure and coverage of the extraction site. Accordingly, this proposed protocol involves the chairside fabrication of a CADCAM abutment to seal the alveolar socket (SSA: Sealing Socket Abutment) immediately at the time of extraction-implantation (Finelle & al. 2016). Atraumatic flapless tooth extraction was performed by odontosection (Figs. 3,4) and separation of the supracrestal gingival fibers with periotomes. After extraction, the alveolar socket was liberally irrigated with sterile saline solution and cleaned with curettes to remove granulation tissue. A Straumann® Standard Plus Implant 4.8×12 WN was placed according to the instructions for use. The implant bed was prepared in the middle of the septum as virtually planned at the diagnostic stage (Fig. 5). The insertion torque was recorded during the placement and reached 30N/cm. Xenograft bone substitute (botiss cerabone®, granules 0.5-1mm, 1×0.5cc, Botiss) was packed to fill the alveolar socket surrounding the implant (Fig. 6). (Chu et al. 2012). To obtain closure of the socket at the time of extraction, an innovative protocol has been established to allow digital impression and immediate customized CADCAM abutment at the time of the surgery. A scan body (Cerec, Sirona) was connected to the platform of the implant to allow the intra-oral scanner (Omnicam, Sirona) to capture virtually the 3D position of the implant (Fig. 7). Immediately after acquisition, the SSA was designed on the prosthetic software (Fig. 8). The design process consists of: 1. Reproducing the outline of the previous freshly extracted molar in order to create a mechanical seal between the oral cavity and surgical site. The transmucosal portion is designed with a concave shape in order to accommodate for proper biological space (Finelle 2011, COIR). 2. Creating an ideal emergence profile to guide soft healing and positioning during the maturation process (Dual Zone concept Tarnow, Chu). The digital file was then exported to an in-office milling system (MCXL, Sirona) for fabrication of the SSA abutment (telio CAD 16, Ivoclar) in a chairside manner (Fig. 9). During the milling (15 minutes), sterile gauze was placed on the surgical site and post-operative recommendations were given to the patient. After milling, adhesive cement (Multilink abutment, Ivoclar) was used to assemble the SSA device onto the Variobase abutment for Cerec (Variobase C WN, Straumann) (Fig. 10). Finally, the SSA was inserted into the implant (with manual insertion torque) to support the surrounding soft tissues and provide a seal to the bone substitute material without the use of a biological membrane (Fig. 11)(Chu & al. 2012). Immediately after the surgery, post-operative periapical radiographs were taken to verify the proper position of the implant (Fig. 11). At the one week follow-up, the patient reported an uneventful post-operative recovery. The clinical examination at one week showed favorable soft tissue healing with minor inflammation (Fig. 12). After 12 weeks of osseointegration, soft tissue around the SSA abutment was healthy, and the buccal contour was maintained (Fig. 13). Removal of the abutment at the time of impression-taking showed a healthy and anatomical prosthetic emergence profile and a well-designed transmucosal portion (Fig. 14). A digital impression (Omnicam, Cerec, Sirona) using Scanbody for Cerec was taken for implant-supported restoration (Fig. 15). Finally, an implant screw-retained crown was designed (Fig. 16) on the Cerec Software (Cerec 4.4) and milled out of a monolithic lithium disilicate block (Emax CAD, Ivoclar) (Kapos & al. 2014). Before sintering, a blue CAD crown was tried in to validate the shape, contact point and occlusion (Figs. 16). The emergence of the implant screw axis allowed for a screw-retained prosthesis as originally planned (Fig. 17). The crown was stained and the occlusal grooves were readjusted to improve occlusal anatomy. The implant crown was bonded to a titanium base abutment adapted for the Cerec implant block (Variobase C, Straumann) with a resin cement (Multilink Hybrid Abutment, Ivoclar). At the time of final crown delivery (Fig. 18), we noticed the adequate emergence profile of the peri-implant soft tissues precisely fitting with the transmucosal anatomy of the ceramic crown. Final insertion torque (35N/cm) was applied, and the access hole was covered with restorative composite (Gænial A2, GC) (Fig. 19). A post-operative periapical radiograph was taken to verify the seating and marginal integrity after insertion (Fig. 19). While #27 was undergoing restoration, #36 and #37 were treated by surgical and restorative procedures, and two screw-retained single crowns were inserted (Fig. 20) in order to restore adequate prosthetic space (Fig. 21).

Final result

At the 6 month follow-up, the clinical situation was stable. No biological or technical complications were reported. Clinical assessment showed a stable soft tissue position and volume (buccal contour and papilla). This case report demonstrates the clinical benefits in terms of the surgical and prosthetic aspects of the molar treatment after extraction: 1. Surgically, the CADCAM device behaves as a mechanical barrier that ensures stabilization of the blood clot in a confined alveolar socket space favorable for the regeneration process. The SSA aims to “seal” the socket without the use of invasive techniques such as flaps, incisions and sutures. As there is no attempt at a primary closure procedure, the mucogingival junction is not displaced and the papilla architecture is maintained in its original anatomical position. Consequently, post-operative discomfort is expected to be very low. 2. From a prosthetic standpoint, the transmucosal portion of the SSA is shaped as described: a. Submergence profile (closer to the implant) with a narrow portion to accommodate for biological space and proper soft tissue healing (Finelle & al. 2015). B. Emergence profile (closer to the cervical margin) matching the anatomy of the previous existing natural crown (Chu & al. 2012).

References

  1. Smith RB1, Tarnow DP. Classification of molar extraction sites for immediate dental implant placement: technical note. Int J Oral Maxillofac Implants. 2013 May-Jun;28(3):911-6. doi: 10.11607/jomi.2627.
  2. Finelle G, Papadimitriou DE, Souza AB, Katebi N, Gallucci GO, Araújo MG. Peri-implant soft tissue and marginal bone adaptation on implant with non-matching healing abutments: micro-CT analysis. Clin Oral Implants Res. 2015 Apr;26(4):e42-6
  3. Atieh MA, Payne AG, Duncan WJ, de Silva RK, Cullinan MP. Immediate placement or immediate restoration/loading of single implants for molar tooth replacement: a systematic review and meta-analysis. Int J Oral Maxillofac Implants. 2010;25:401–15
  4. Chu SJ, Salama MA, Salama H, Garber DA, Saito H, Sarnachiaro GO, Tarnow DP.
  5. The dual-zone therapeutic concept of managing immediate implant placement and provisional restoration in anterior extraction sockets. Compend Contin Educ Dent. 2012 Jul-Aug;33(7):524-32, 534
  6. Finelle G, Papadimitriou DE, Souza AB, Katebi N, Gallucci GO, Araújo MG. Peri-implant soft tissue and marginal bone adaptation on implant with non-matching healing abutments: micro-CT analysis. Clin Oral Implants Res. 2015 Apr;26(4):e42-6
  7. Finelle G, Popelut A Immediate implantation after extraction: focus on the use of CAD-CAM Sealing Socket Abutment (SSA) – JPIO -2016 (Accepted for Publication, French)
  8. Kapos T, Evans C. CAD/CAM technology for implant abutments, crowns, and superstructures. Int J Oral Maxillofac Implants. 2014;29 Suppl:117–36
  9. Smith RB1, Tarnow DP. Classification of molar extraction sites for immediate dental implant placement: technical note. Int J Oral Maxillofac Implants. 2013 May-Jun;28(3):911-6.