Computer-assisted implant placement and full-arch immediate loading with digitally prefabricated provisional prosthesis
A clinical case report by Nikolay Makarov, Italy
Treating patients with a Straumann® Pro Arch concept requires the procedure of immediate loading. In author’s opinion, in edentulous patients and patients with hopeless dentition it is also fundamental to place the implants with computer-guidance in prosthetically-oriented planned positions. There are several options to deliver an immediate prosthesis: either a conventional impression is taken for lab manufacturing, or conversion of a pre-existing or immediate removable denture. Both techniques are time consuming and depending on the material can carry risk of prosthesis fracture. In this case report the alternative treatment modality is presented. The new Smile in a Box TM service from Straumann can be used in a flexible way e.g. for creation of the provisional prosthesis by a centralized service and delivered on the day of surgery. It becomes possible with planning the case and treating the patient with digital technologies and aims to be beneficial in terms of clinical outcome, treatment time, but also of the durability of the material.
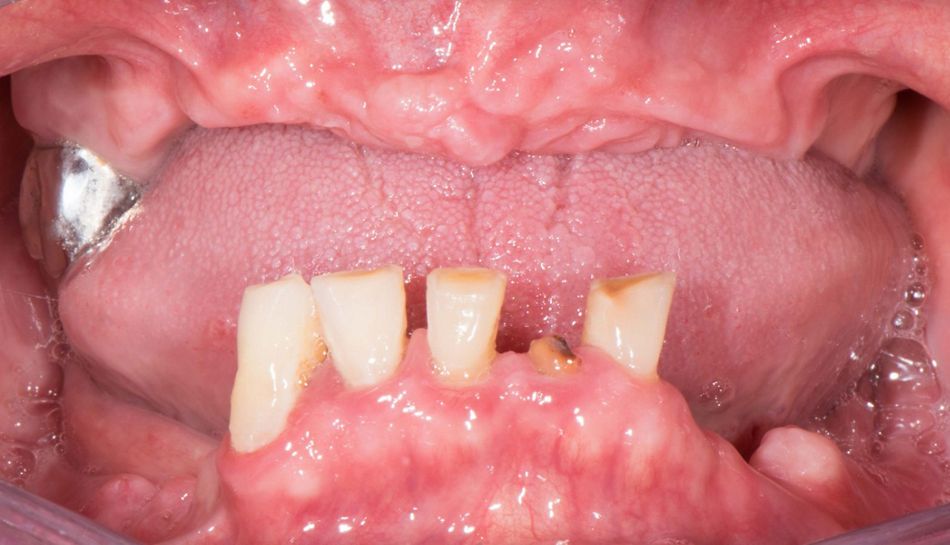
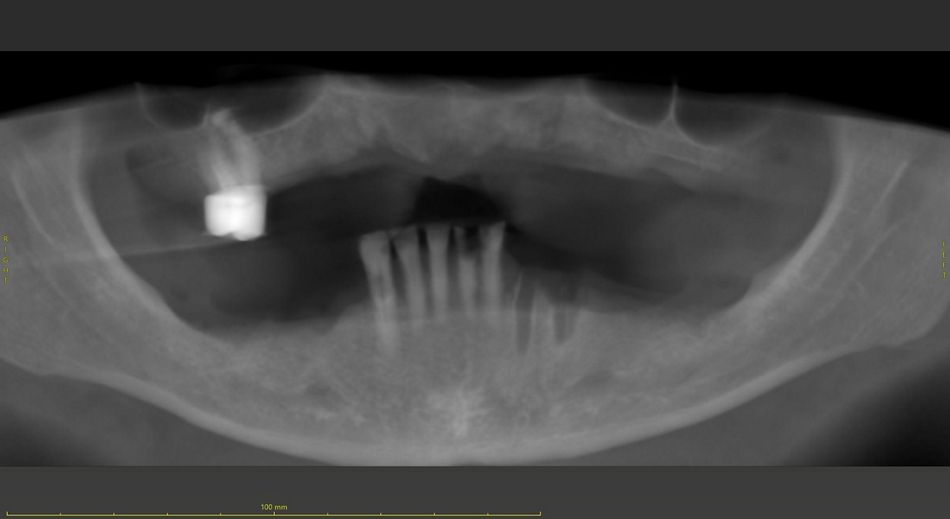
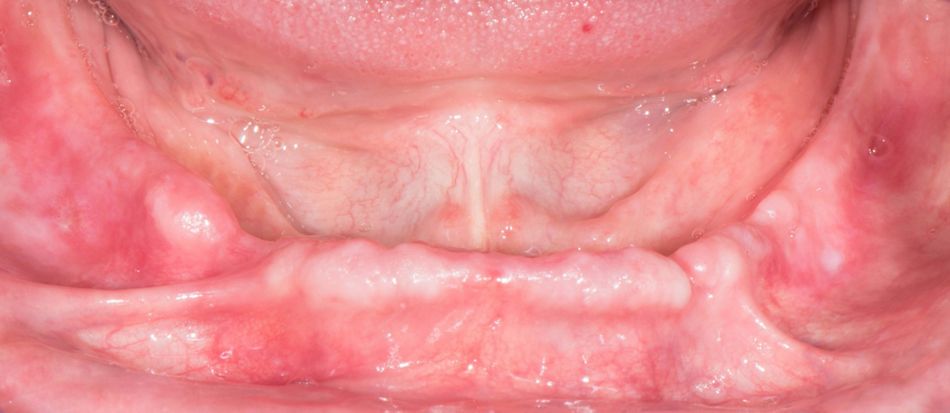
A 65 y.o. patient in good health required a full mouth rehabilitation. He presented with failing dentition both in maxilla and in mandible (Fig. 1). At this stage, the first CBCT was performed to evaluate the possibility of implant placement (Fig. 2). The situation in maxilla revealed an extremely thin crest which required large GBR procedures to place the implants; this treatment scenario was refused by the patient; a removable complete denture was chosen as a treatment option. While in the mandible bone conditions allowed placement of six implants and further restoring them with a fixed prosthesis. The tooth in the maxilla was out of the occlusal plane, and the teeth in the mandible were mobile, which did not allow the precise fit of a surgical template. So, it was decided to go for a staged approach. The remaining teeth were extracted (Fig. 3), and the patient then received immediate complete dentures for both maxilla and mandible.
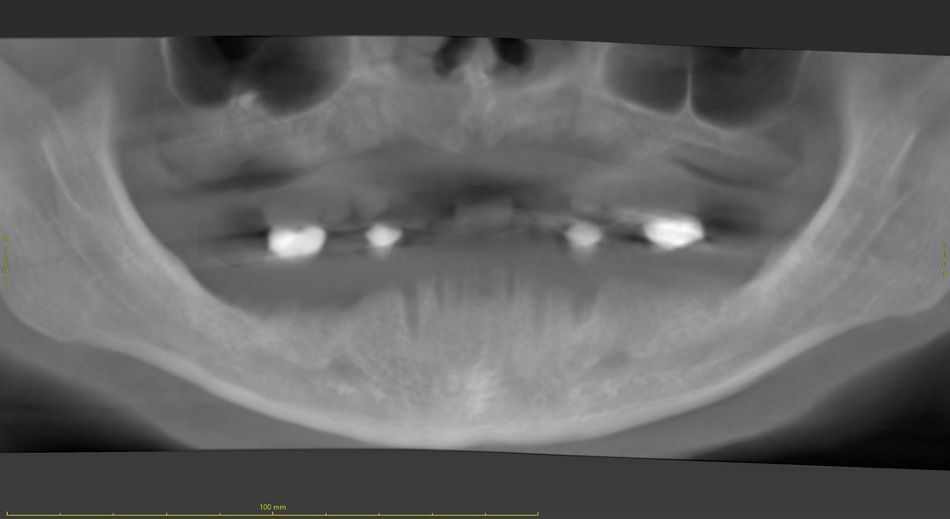
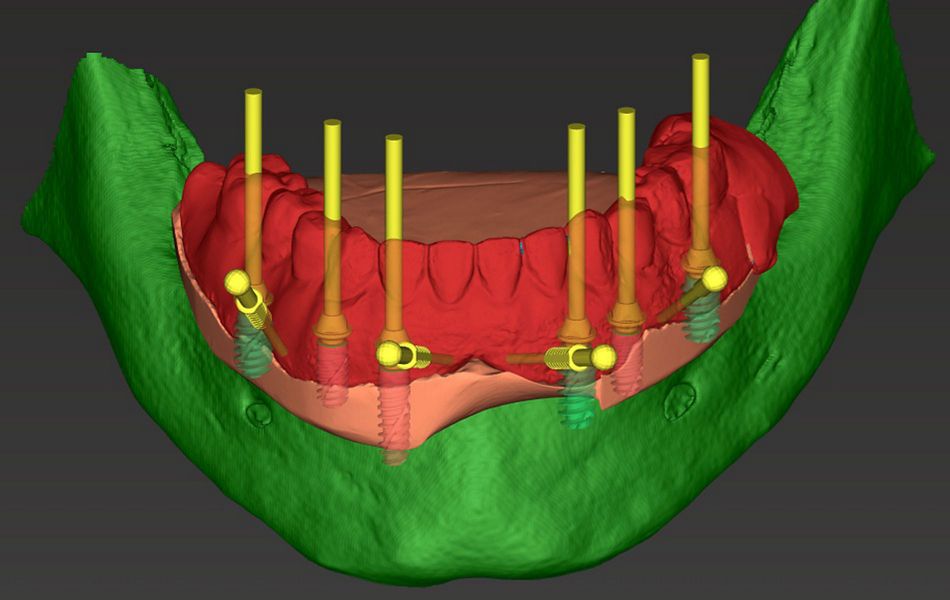
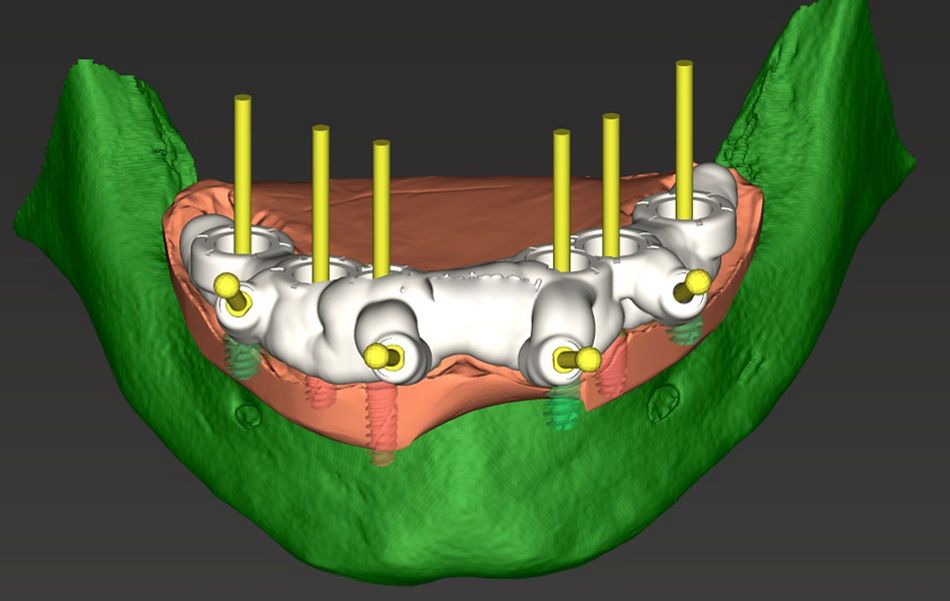
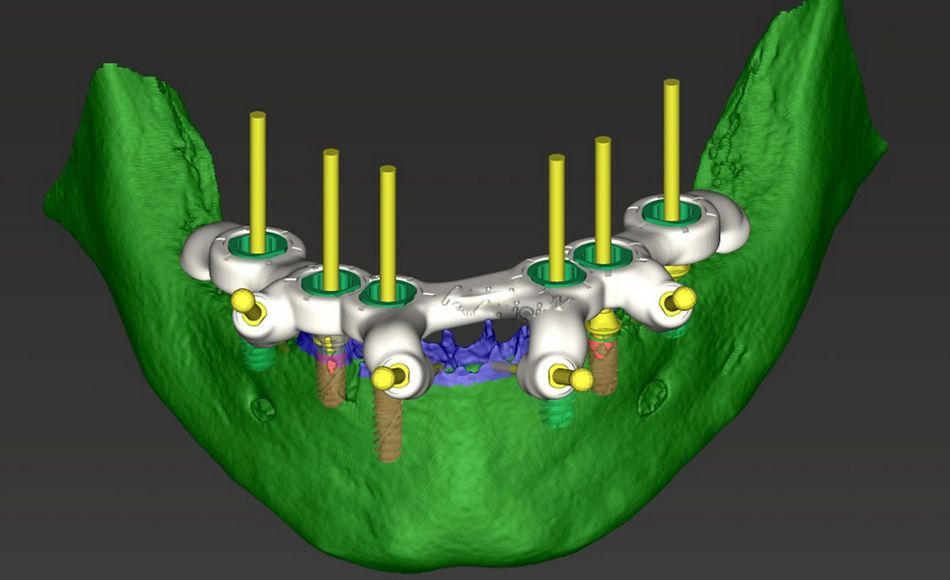
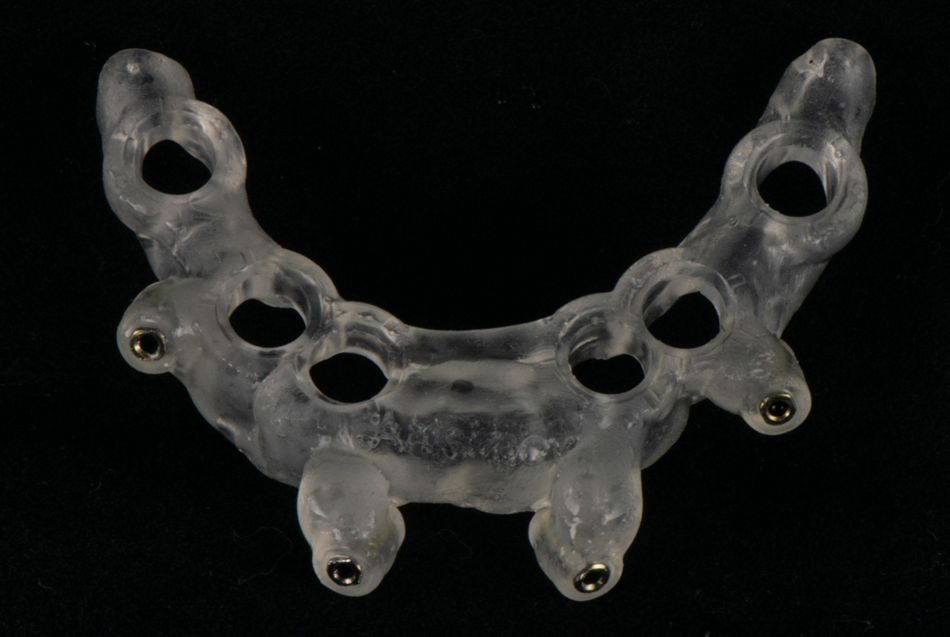
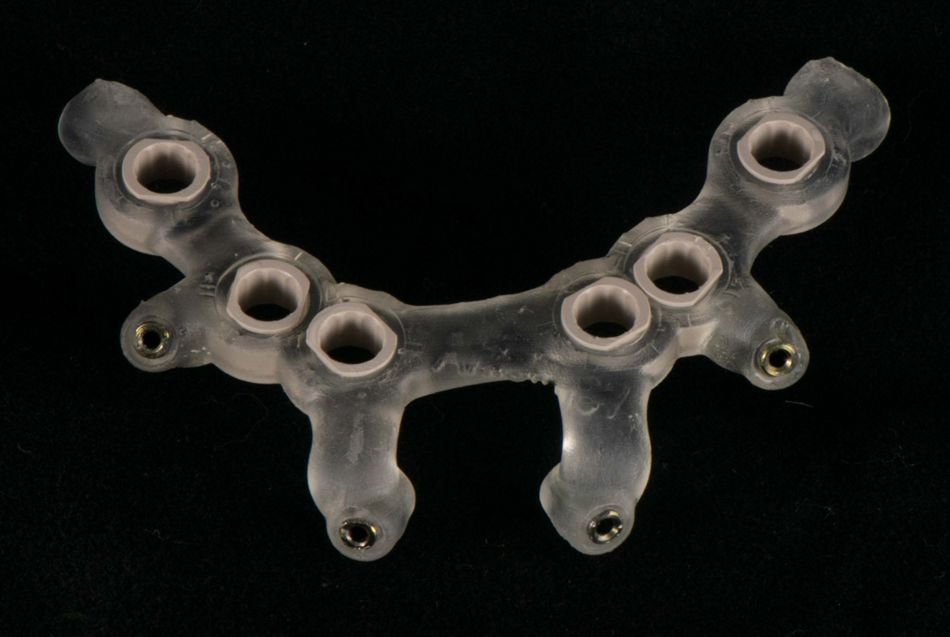
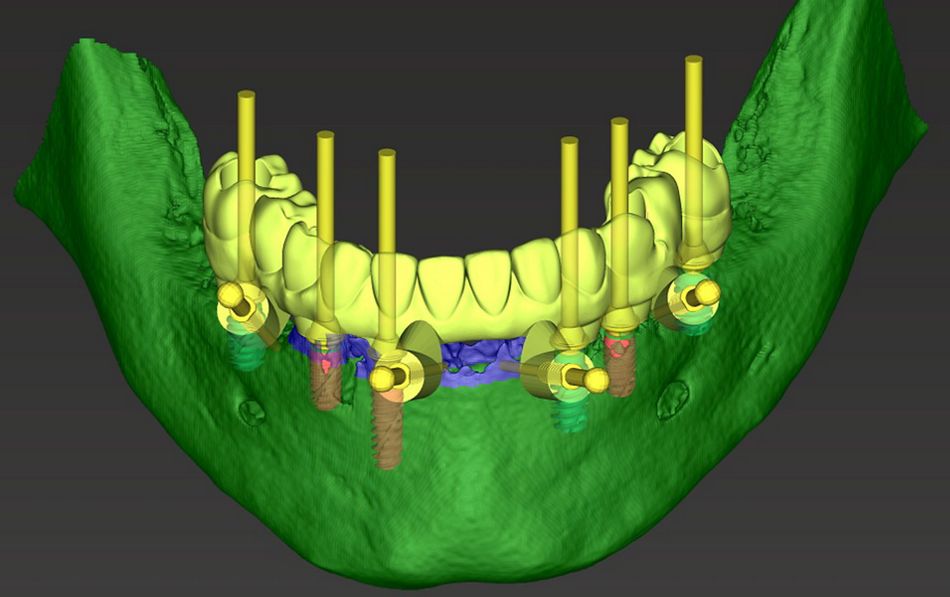
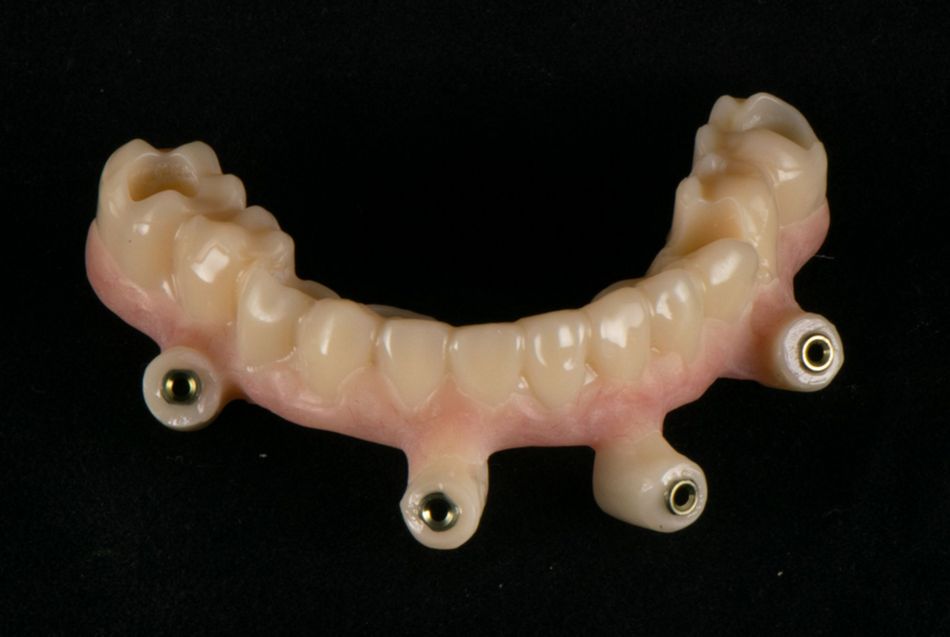
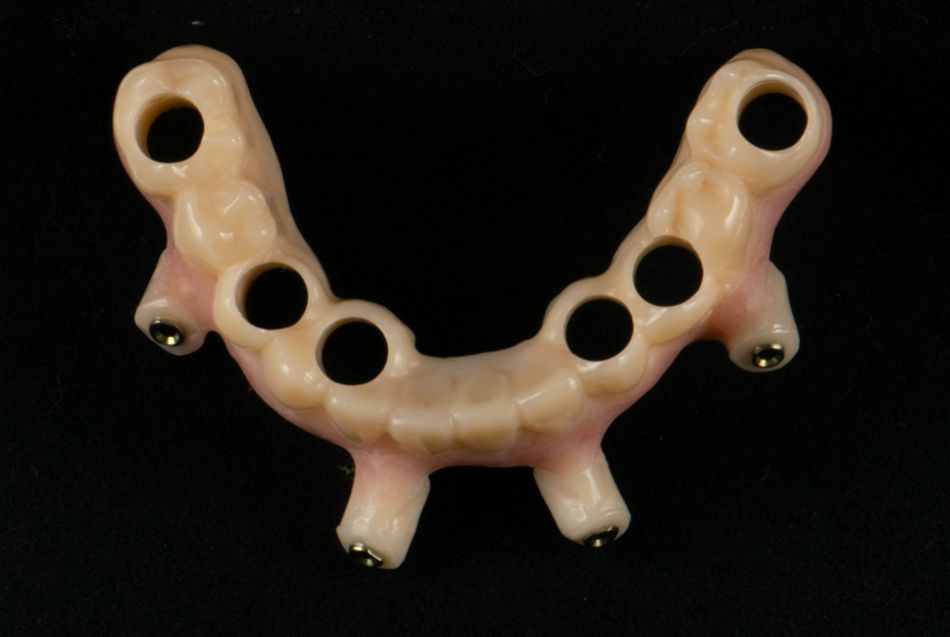
After two months of healing the dentures were further relined before the acquisition of the second CBCT scan for precise transition of actual soft tissue of the patient in the CAD. The protocol described previously (https://www.straumann.com/en/discover/youtooth/article/edentulous/2019/straumann-pro-arch-concept-with-fully-guided-implant-and-abutment-placement.html) was, then, implemented in order to prosthetically orient implant positions and create a surgical template for computer-assisted implant placement: a second CBCT scan was performed at the patient wearing the radiographic template (Fig. 4); the radiographic template alone was scanned separately in a laboratory scanner. Conventional impressions of the radiographic template and the opposing arch were made. Working casts were poured and scanned by means of a Straumann 7 Series laboratory scanner to obtain STL files. CBCT data of the patients in DICOM format, STL files of radiographic templates were inserted and matched in a surgical planning software coDiagnostiX®. All acquired data in STL format were superimposed, the implants and Screw-retained Abutments (SRA) were planned in prosthetically oriented positions (Fig. 5), surgical templates with lateral fixation pin support and retention were designed for guided implant placement (Fig. 6, 7). Surgical templates were then exported as STL files and 3D-printed (Fig. 8, 9). The connection was established between dentists’ and dental technicians’ software with the “Synergy” function implemented in both software, which allowed them to work on the same patient in their software and introduce minor changes to planning. The planning in surgical software was matched with the dental laboratory software Cares Visual through caseXchange™ data transfer channel. The dental technician designed the fixed provisional prosthesis for immediate loading following the anatomy of STL files obtained of the dentures, opposing arch, occlusion index, implants and SRA position (Fig. 10). The access holes were designed considering the planned SRA positions. The connectors of the prostheses were designed to be fixed in the same position by the same fixation pins of the surgical templates, to reproduce the same exact position planned in CAD in the mouth. The template was designed by the author, the prosthesis was designed and milled of PMMA-based resin blocks with subsequent pink resin veneering by Smile in a Box TM – a flexible treatment planning and manufacturing service. (Fig. 11, 12).
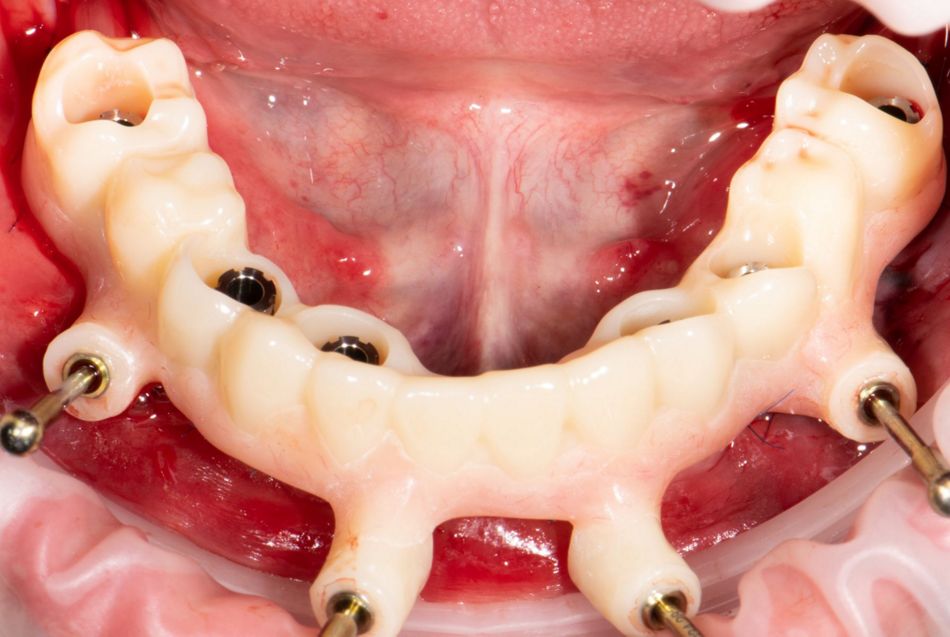
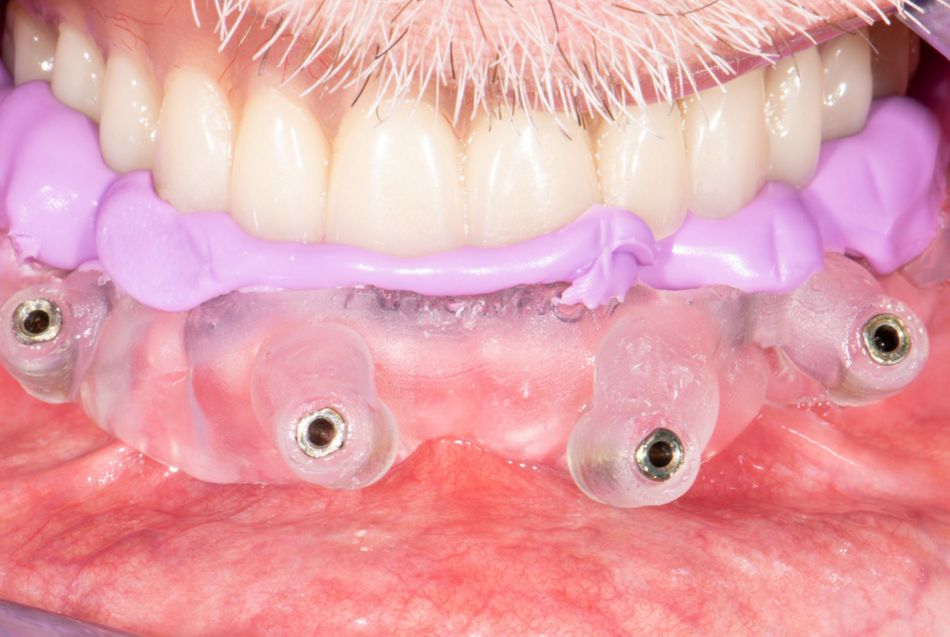
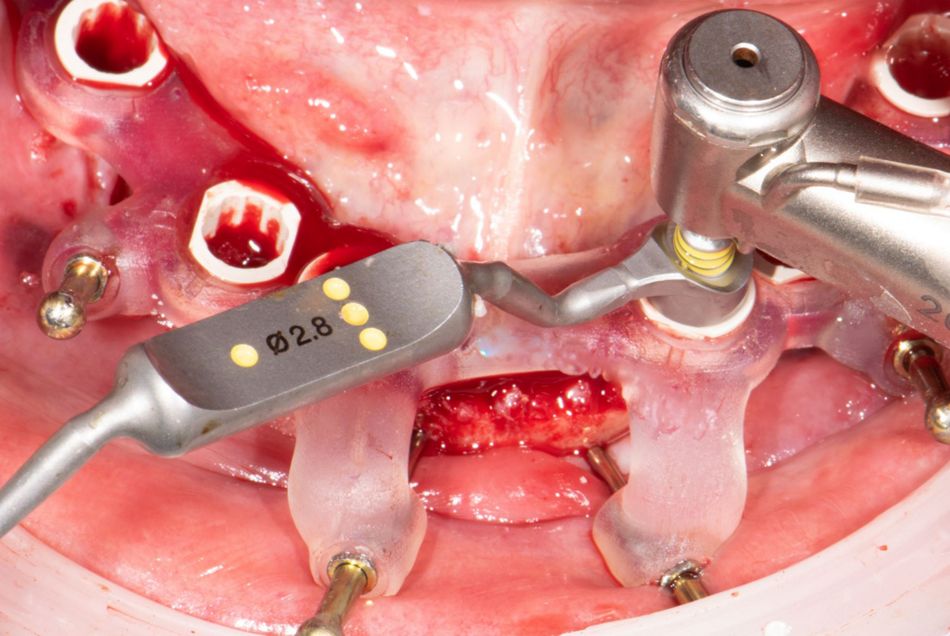
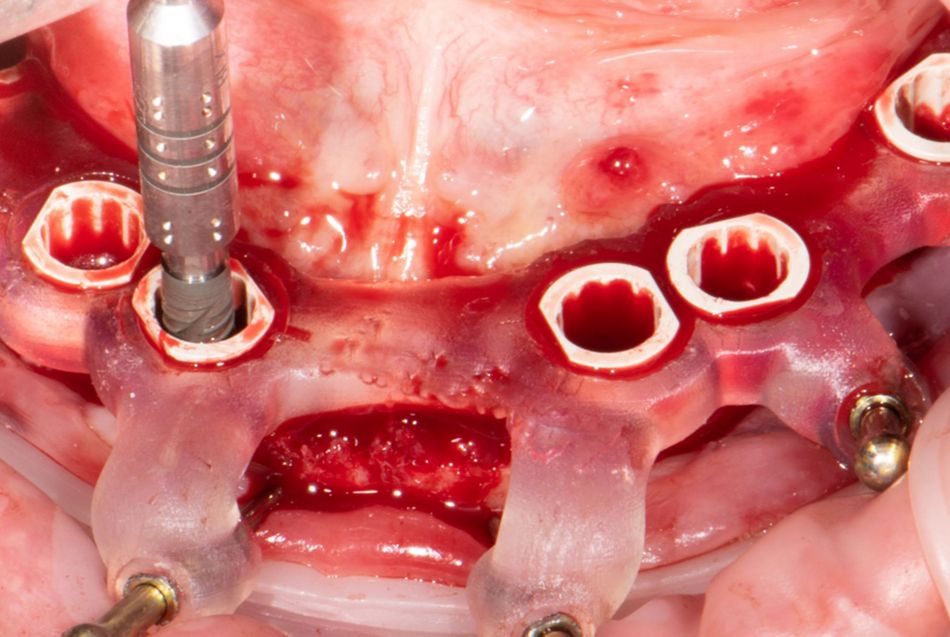
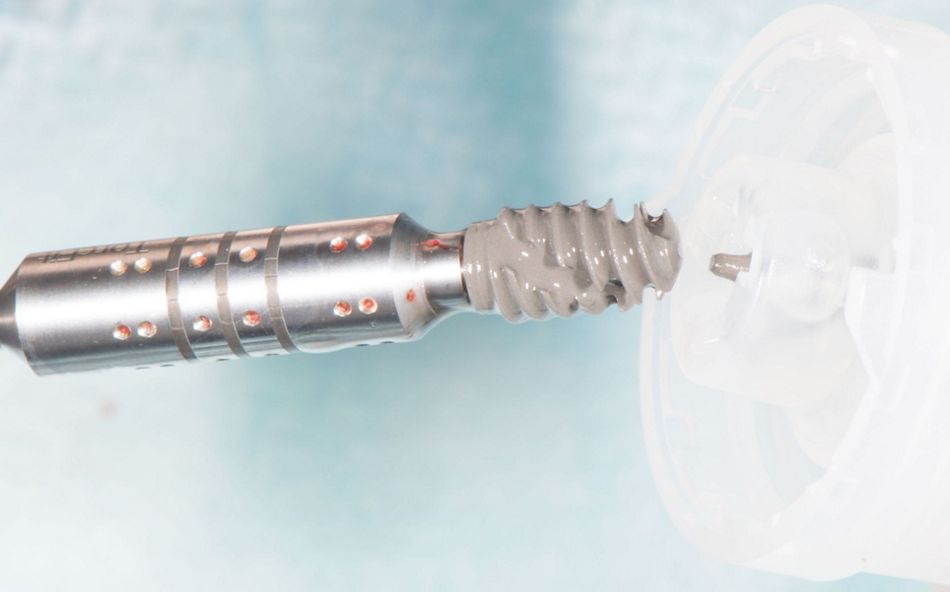
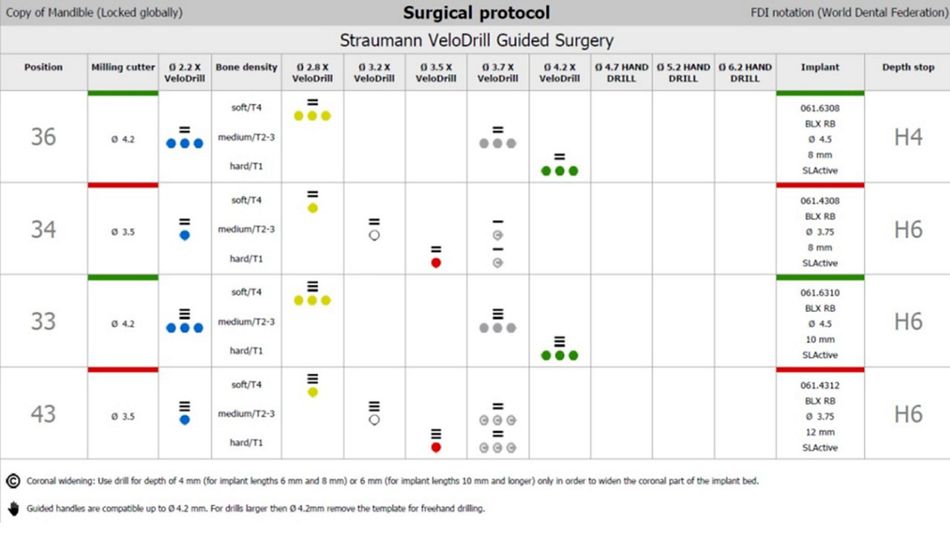
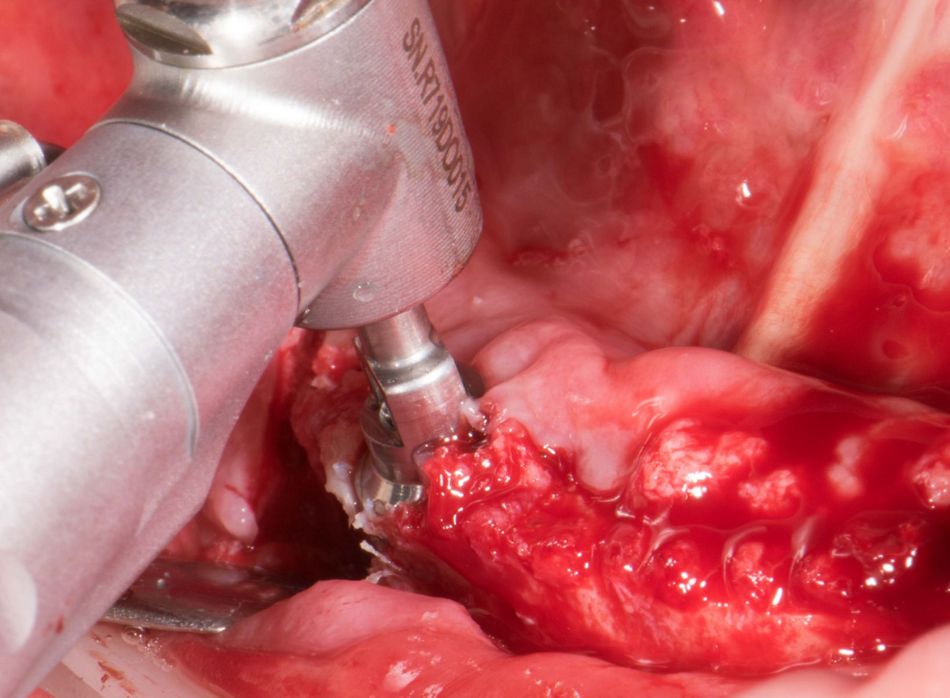
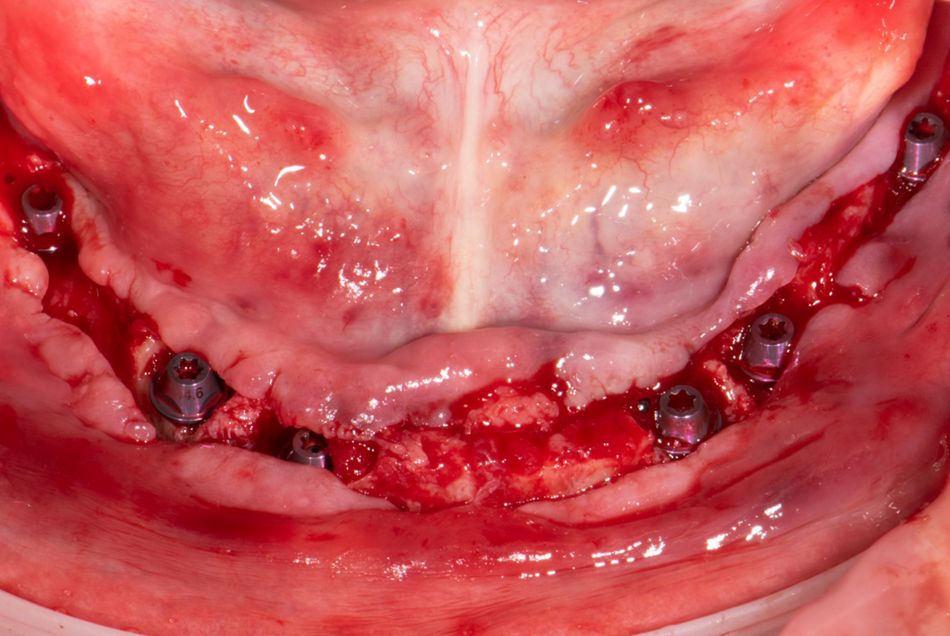
The protocol involved the use of two surgical templates: the first was mucosa-supported to drill the holes for fixation pins (Fig. 13); the second template was placed after raising a full-thickness flap and was supported by pins and hard tissue distal support. Minor bone reduction in the frontal area was performed. Osteotomies (Fig. 14) and implant placement (Fig. 15) were performed through the surgical template. Six Straumann® BLX implants with SLActive® surface (Fig. 16) were inserted following the surgical protocol generated by coDiagnostiX® (Fig. 17). All dental implants reached a minimum insertion torque of 35 Ncm. Straumann Bone Profiler was used to create adequate space for SRA placement (Fig. 18).
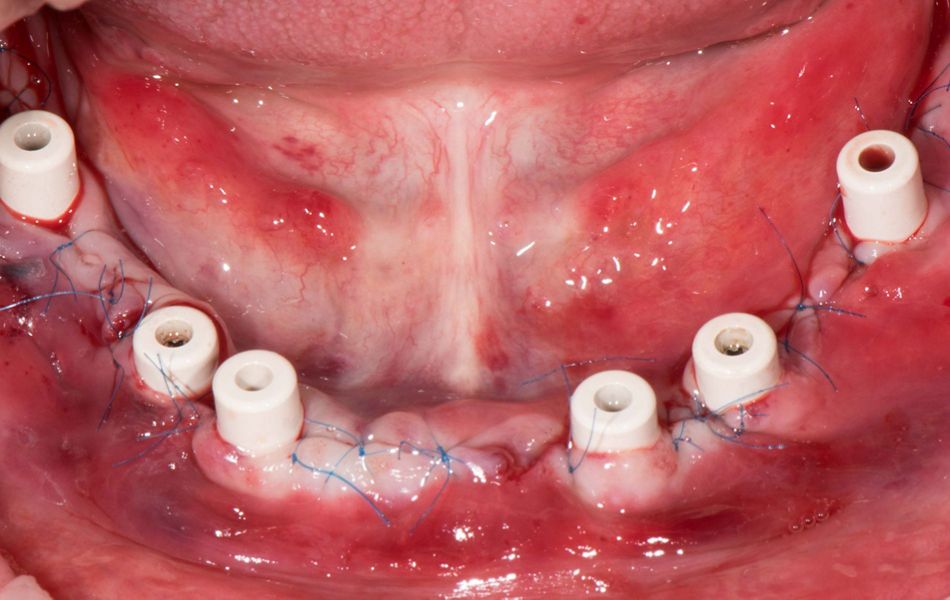
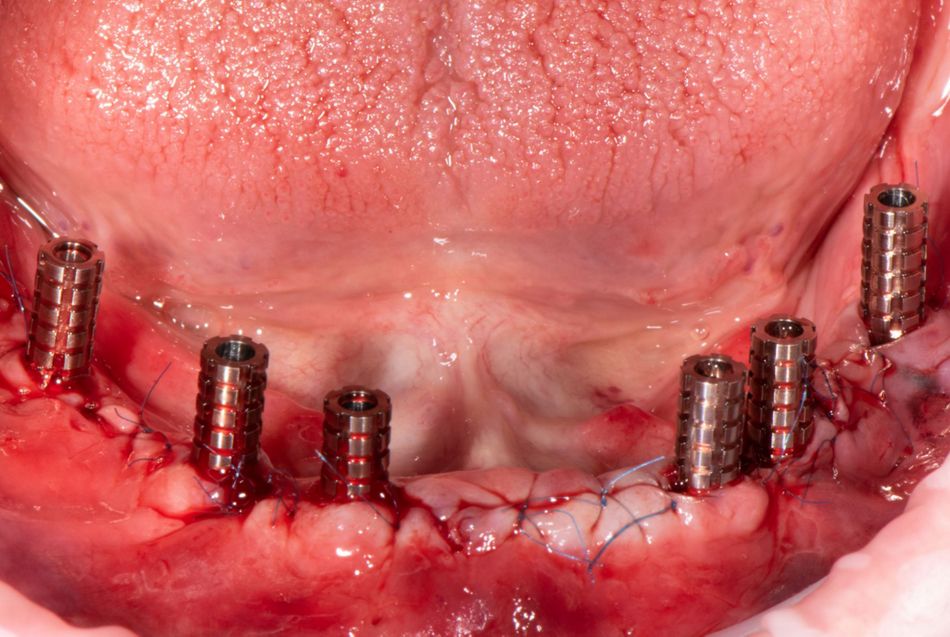
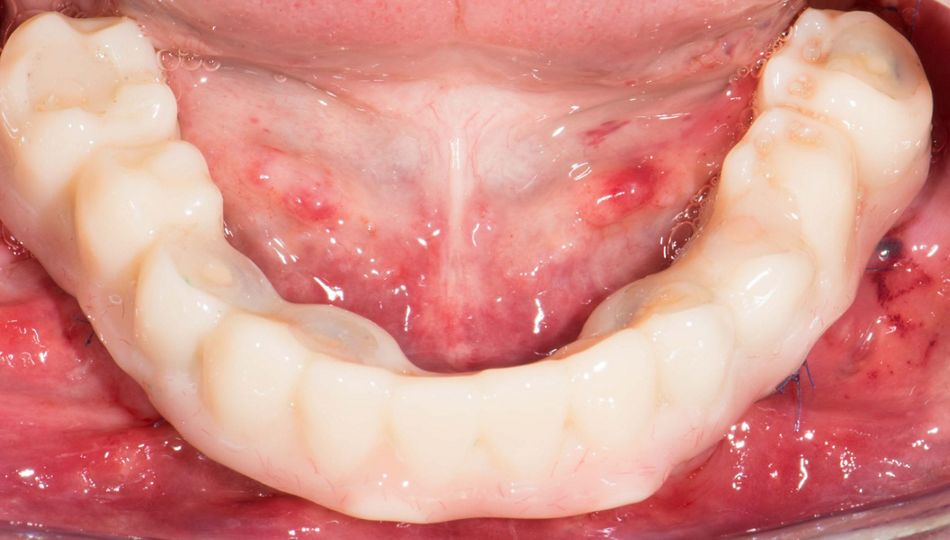
Following the Straumann® Pro Arch concept, the Screw-retained Abutments (SRA) previously selected in coDiagnostiX®, were tightened to the implants at 35 Ncm (Fig. 19). Healing caps were positioned (Fig. 20), the flaps were sutured. Interim titanium copings were, then, screwed on SRA abutments (Fig. 21). The prefabricated interim prosthesis was positioned with the same pins as the surgical templates (Fig. 22). Prosthesis was directly connected to titanium copings with the autopolymerizing resin. The prosthesis was then unscrewed. Prosthesis as polished, the connectors to the pins were removed. Prosthesis was delivered to the patient, occlusion was checked, minor adjustments were made. The screws were tightened with 15 Ncm. Screw access holes were sealed with PTFE tape and a flowable composite resin (Fig. 23). Patient left the clinic with the interim fixed prosthesis the same day of surgery.
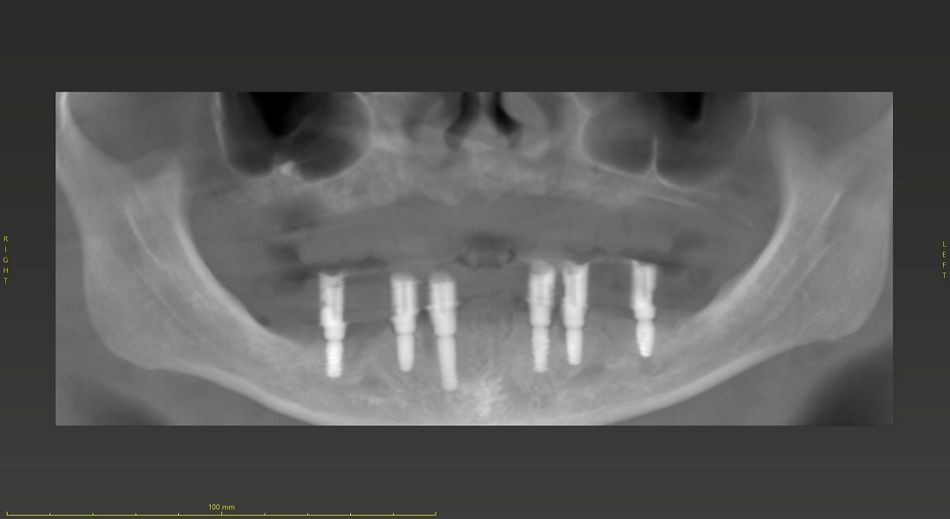
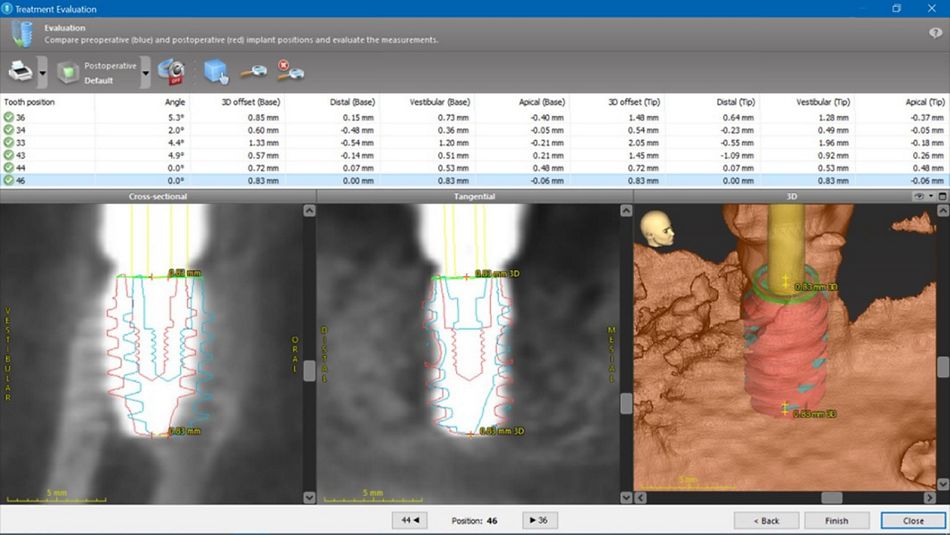
The third CBCT was performed after three months (Fig. 24) to assess post-treatment data with coDiagnostiX® Treatment Evaluation Tool (Fig. 25). The prosthesis was firstly removed at the three months check-up to verify implants’ osseointegration. None of the implants failed. The prosthesis was stable and in good function. No fracture of any kind occurred during the whole period of the prosthesis in situ.
Treating the patients with a Straumann® Pro Arch concept and Smile in a Box TM , enables the clinician to place the implants in prosthetically-oriented position and to load them immediately with a durable prefabricated temporary prosthesis.
Learn more about Smile in a BoxTM
Learn more about Straumann® Pro Arch