Introduction
Compared to traditional implant workflows that rely heavily on manual planning and decisions on execution made during the surgical treatment, the Restorative Dentistry 360 (RD360) digital workflow offers significant advantages in terms of precision, predictability, and time efficiency. By integrating advanced digital tools like CBCT, intraoral scanners, precise planning software, and 3D printing, clinicians can minimize the risks of human error and deliver more accurate and effective treatments. The RD360 digital end-to-end workflow solution offers an aid in the assessment, planning and effective execution of implant cases, enhancing precision, eliminating errors, and streamlining the process to improve both efficiency and the patient’s experience.
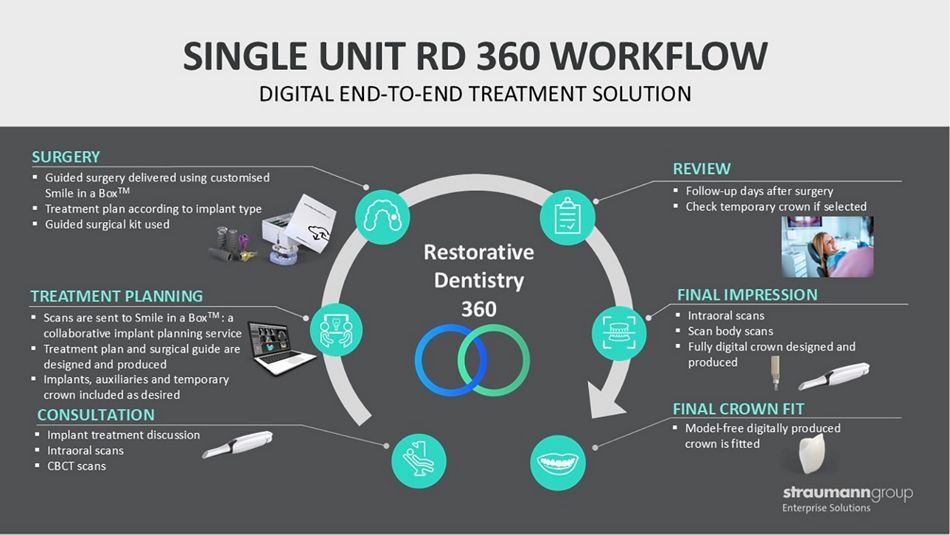
The RD360 digital workflow integrates advanced technologies to streamline the process of dental implant placement and restoration (Fig. 1). Digital imaging, such as CBCT and intraoral 3D scans, is used to create detailed digital models of a patient’s existing anatomy for virtual planning. The clinician collaborates with Straumann® Smile in a Box™ to determine the ideal positioning of implants and restorations. Based on this plan, a custom guide is 3D-printed, enabling the precise placement of the implants. After implant placement or healing, digital impressions are taken, and CAD/CAM technology is used to design and manufacture the custom final restoration. This approach improves accuracy, efficiency, communication, and overall treatment outcomes.
This clinical case report describes the successful replacement of a mandibular molar using the RD360 digital end-to-end workflow solution for immediate implant placement. In this case, the use of digital planning allowed for the precise assessment of bone volume, ensuring the necessary anchorage for the implant’s primary stability after tooth extraction. A printed surgical stent guided the implant placement, and an individualized socket sealing abutment provided closure of the extraction socket, protecting the implant and biomaterials, as well as guiding the soft tissue to maintain its contour. The final restoration was completed using individualized CAD/CAM abutment and a monolithic zirconia crown with conventional loading finalizing the digital workflow.
Initial situation
A 22- year-old woman attended a consultation to replace a critically failed carious and endodontically compromised mandibular first molar tooth #36 with an implant. Medically healthy and otherwise dentally fit, the patient had no contraindications for implant treatment and wanted to maintain the full function and esthetics of her dentition.
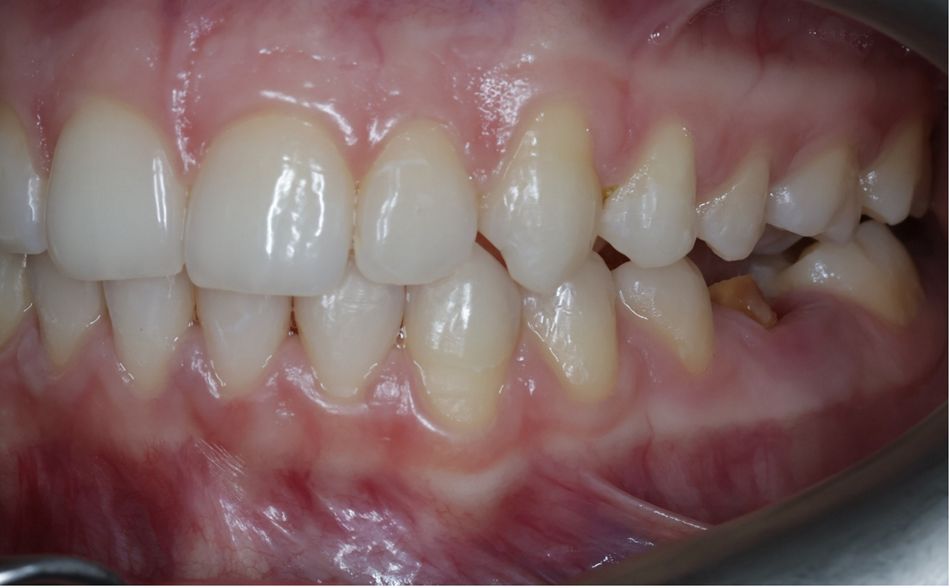
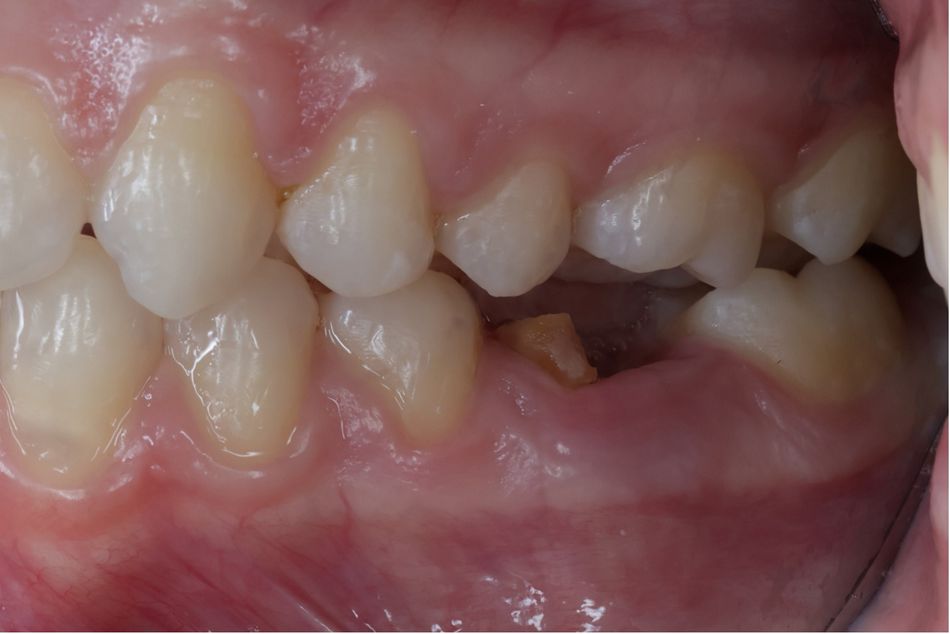
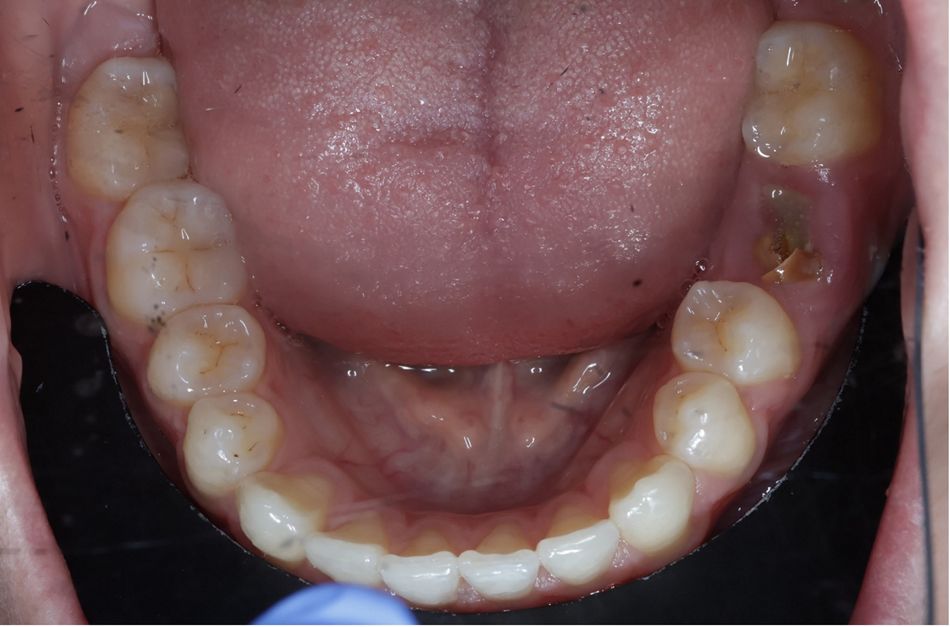
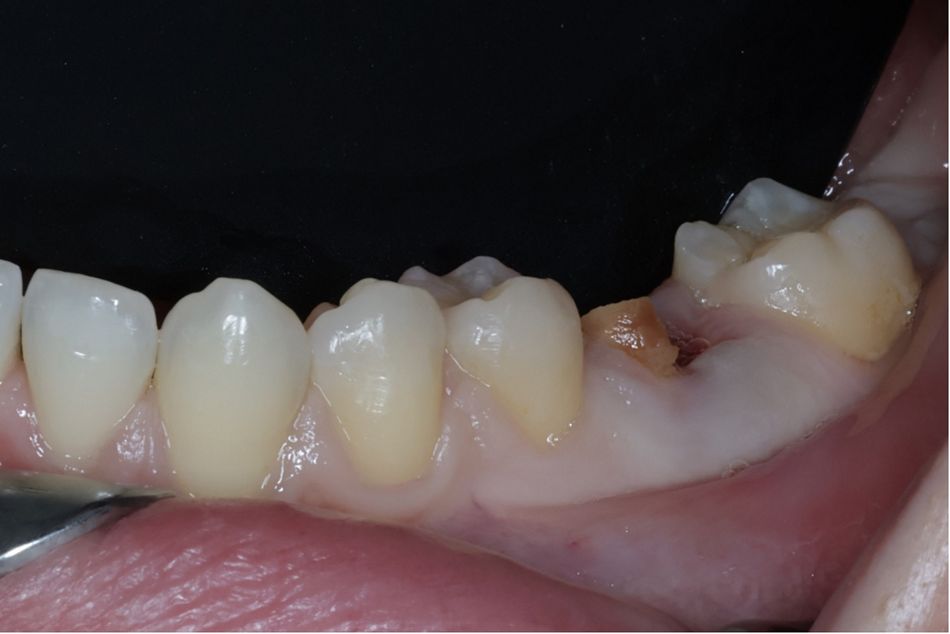
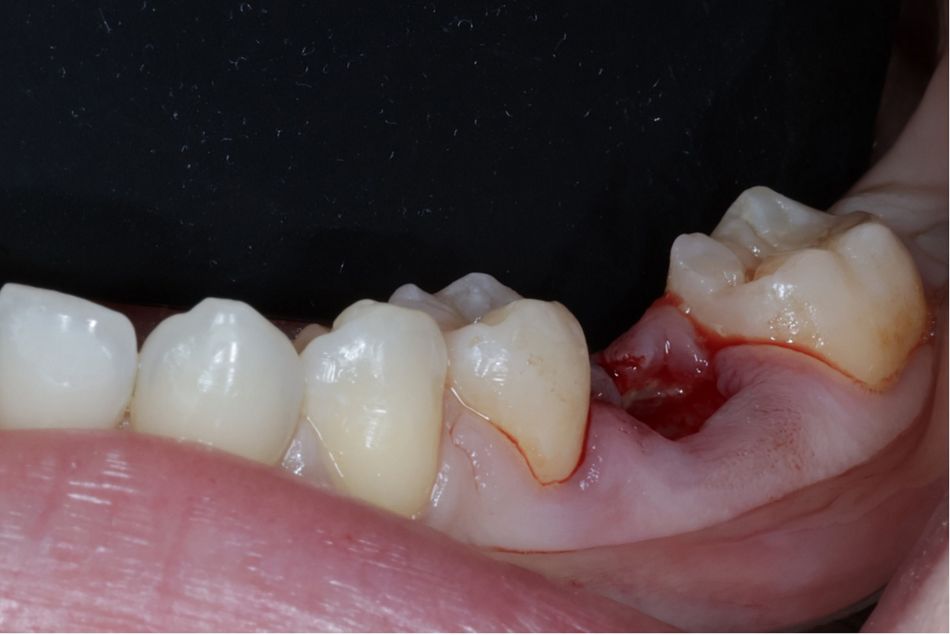
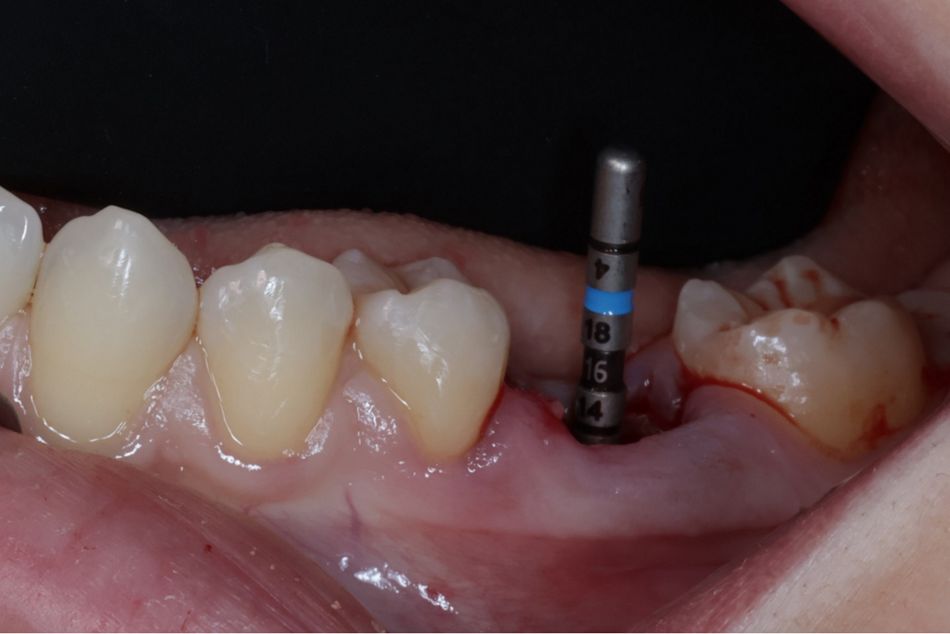
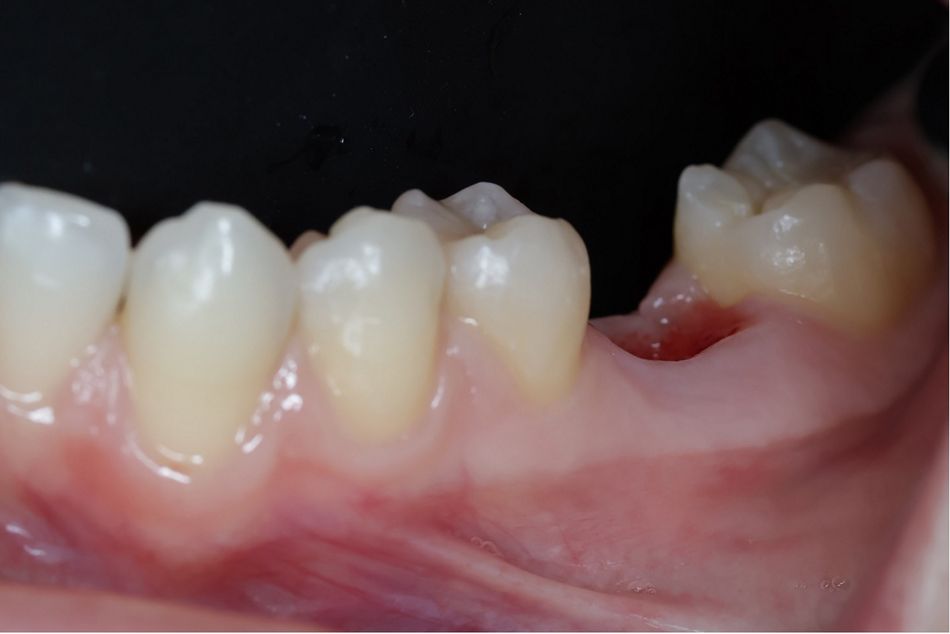
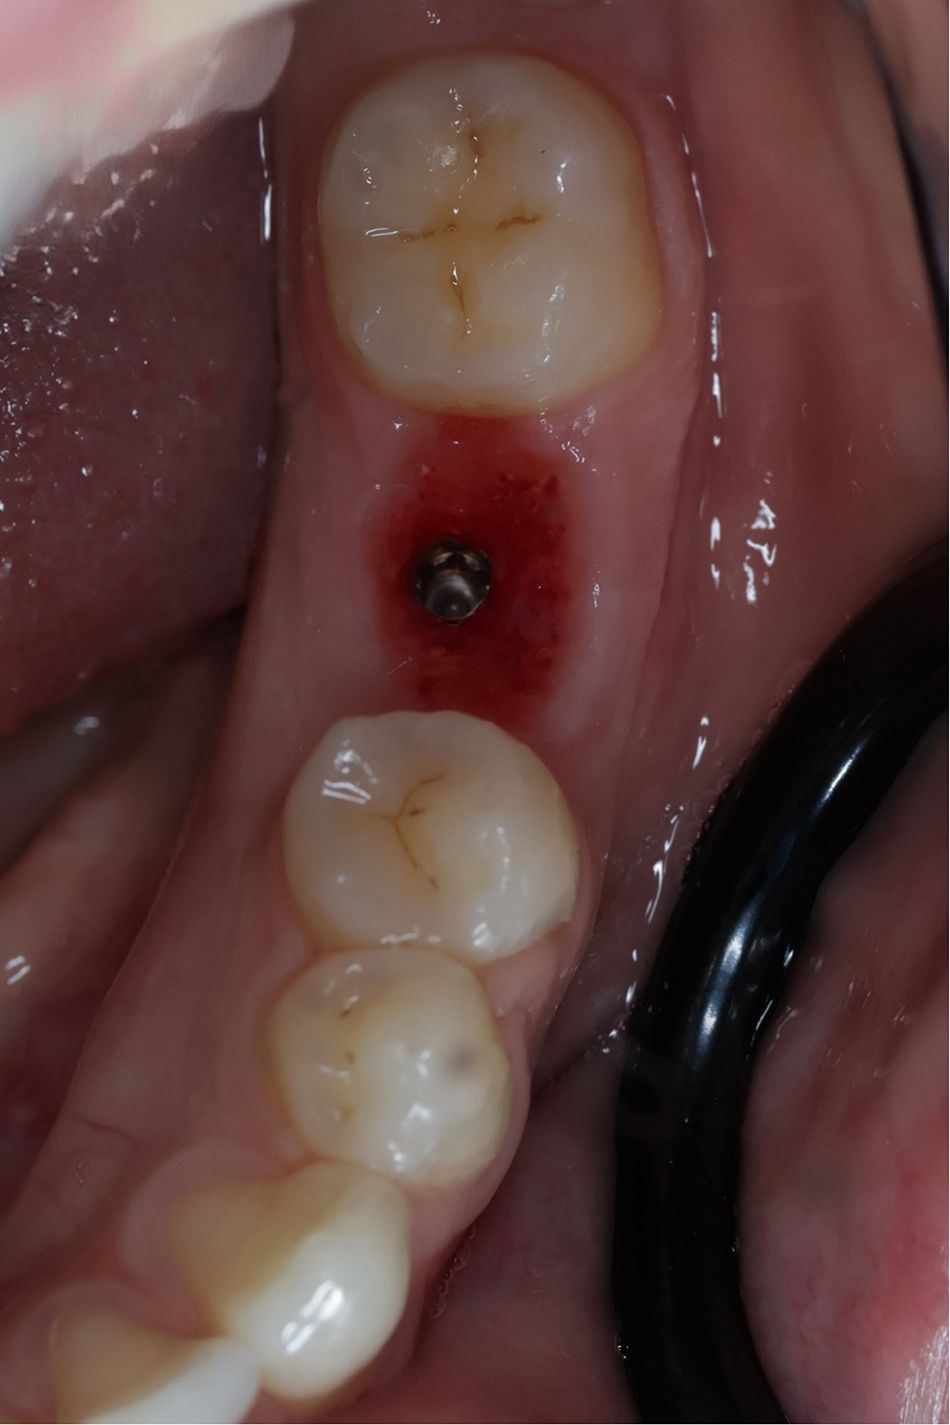
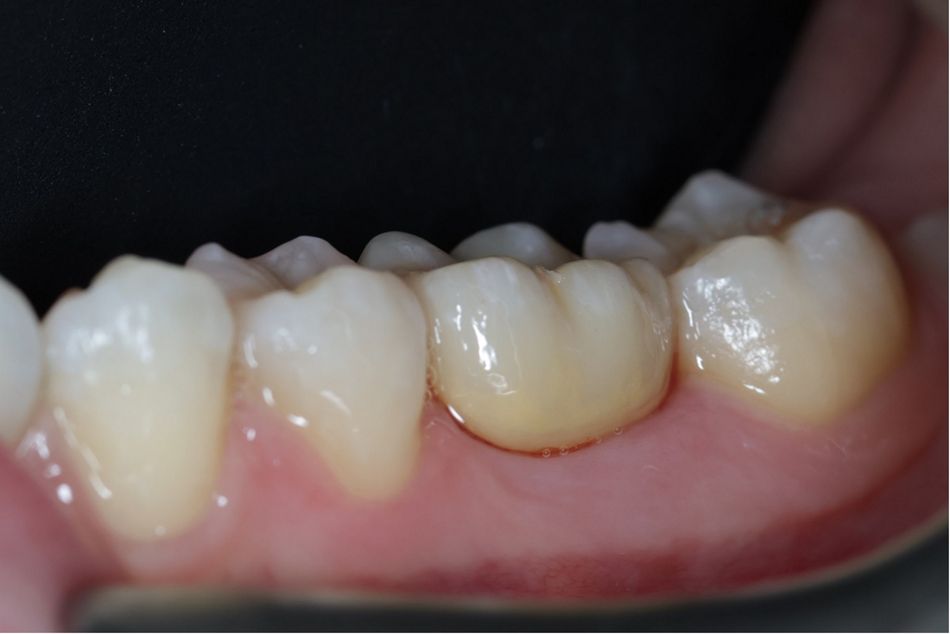
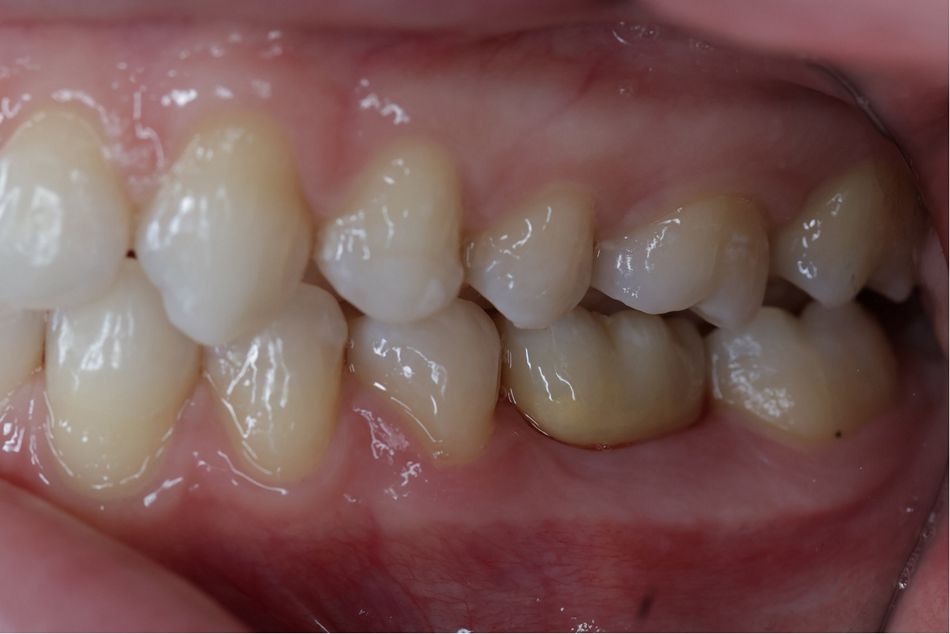
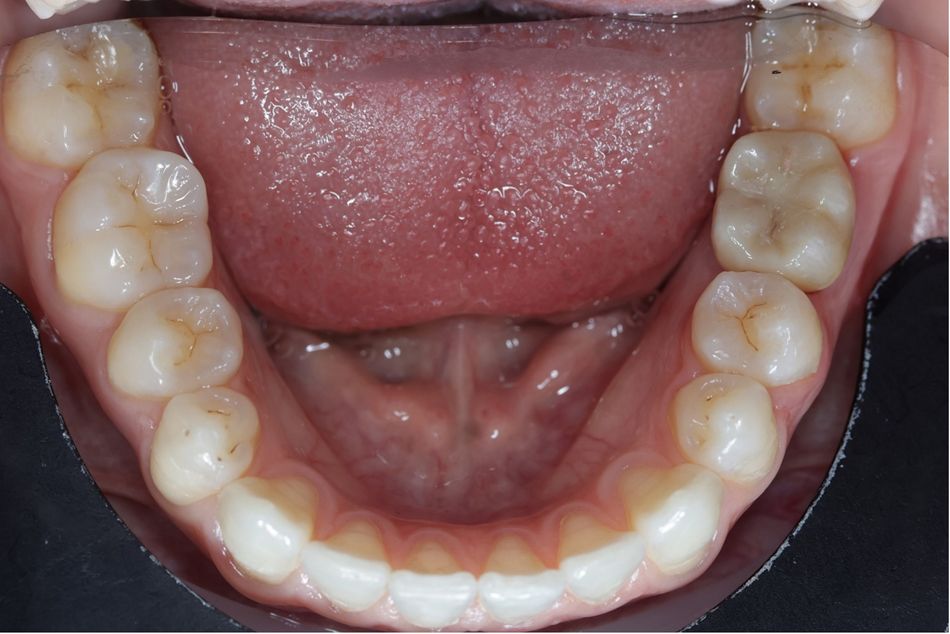
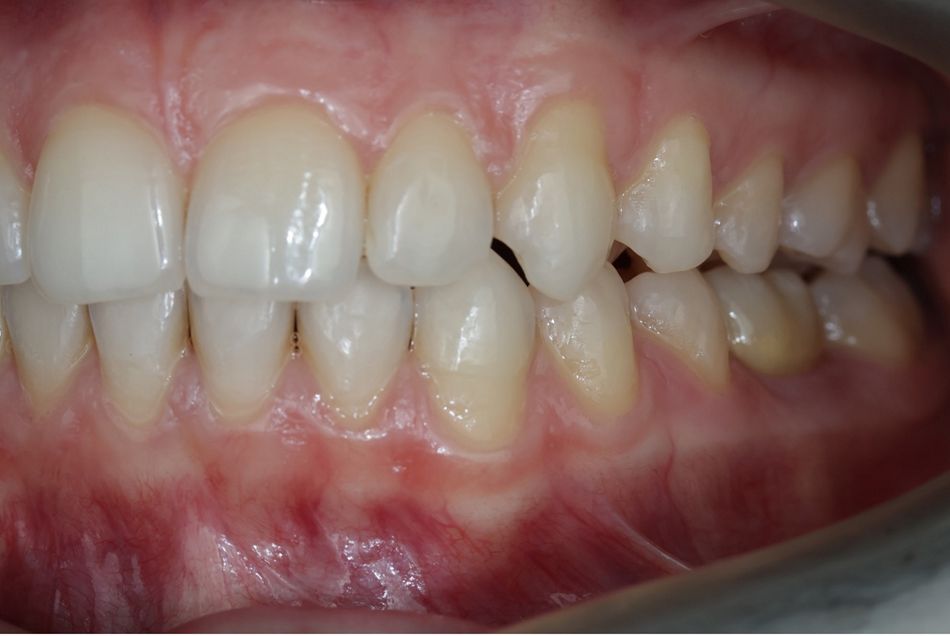
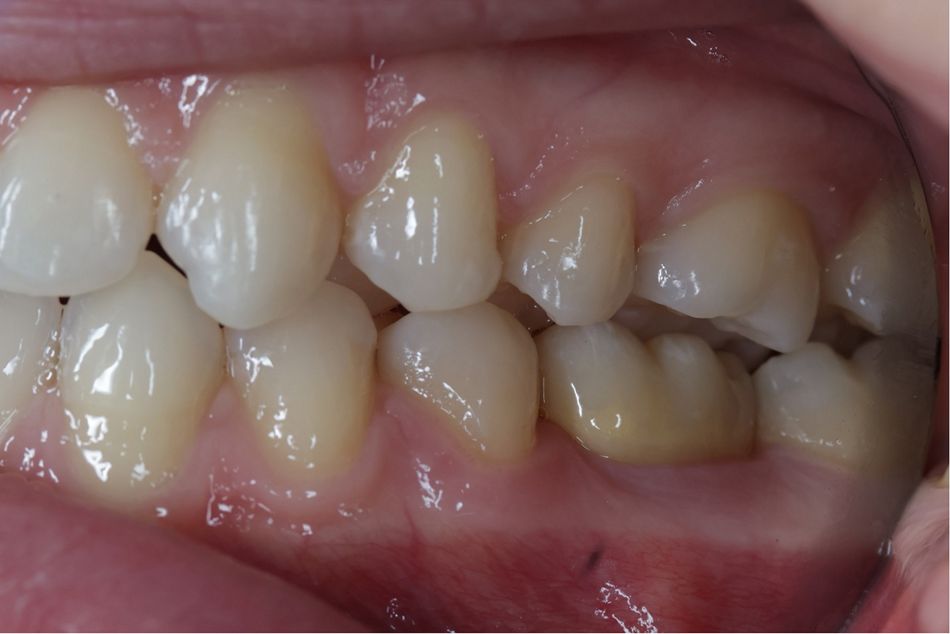
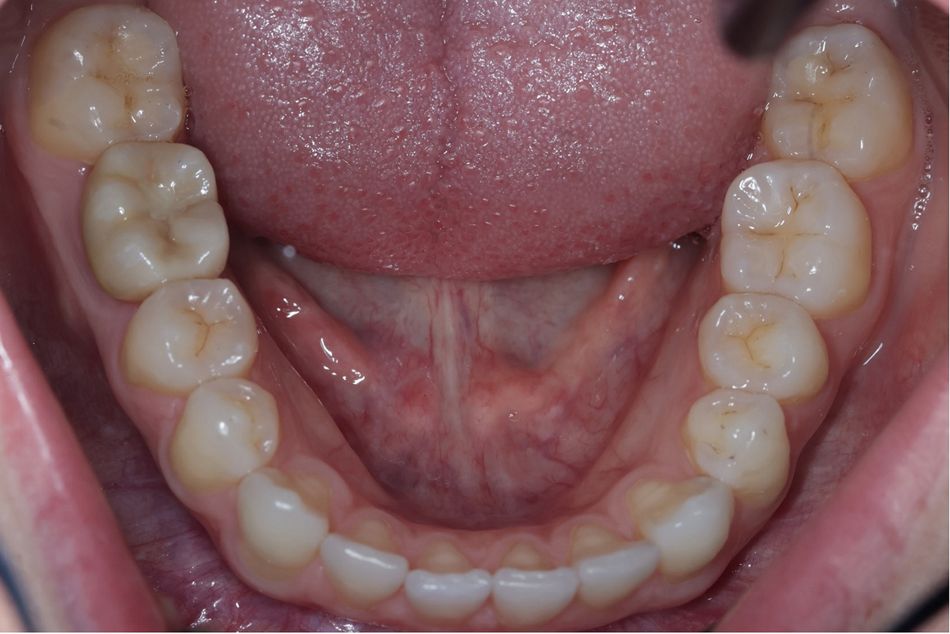
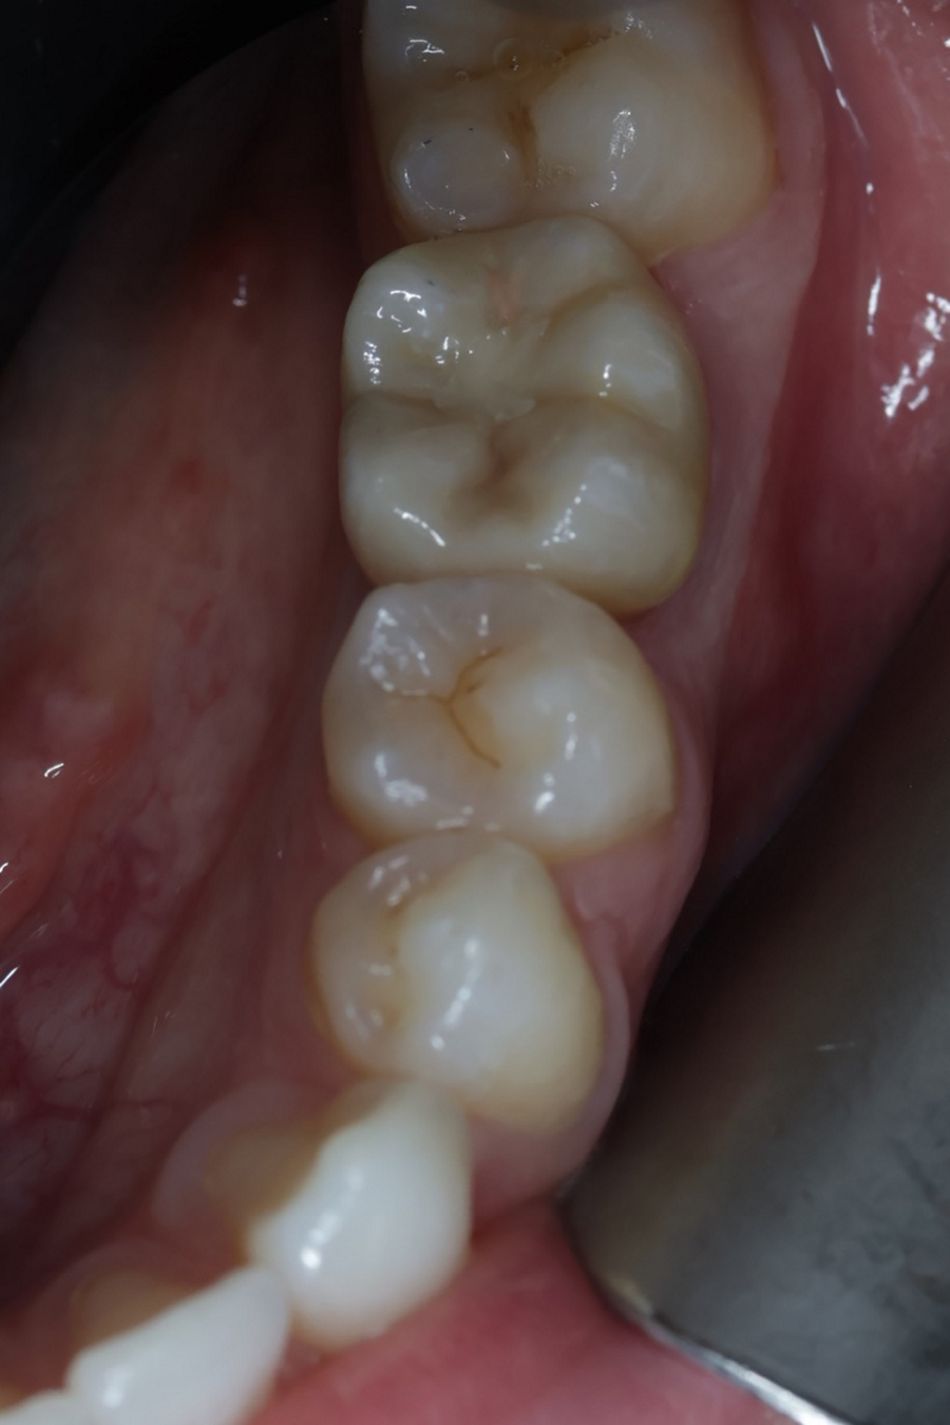
Clinical examination revealed a healthy periodontal status, with plaque scores below 20% and good oral hygiene. The lower left mandibular molar had insufficient coronal structure for restoration, though it was asymptomatic for the patient (Figs. 2-4).
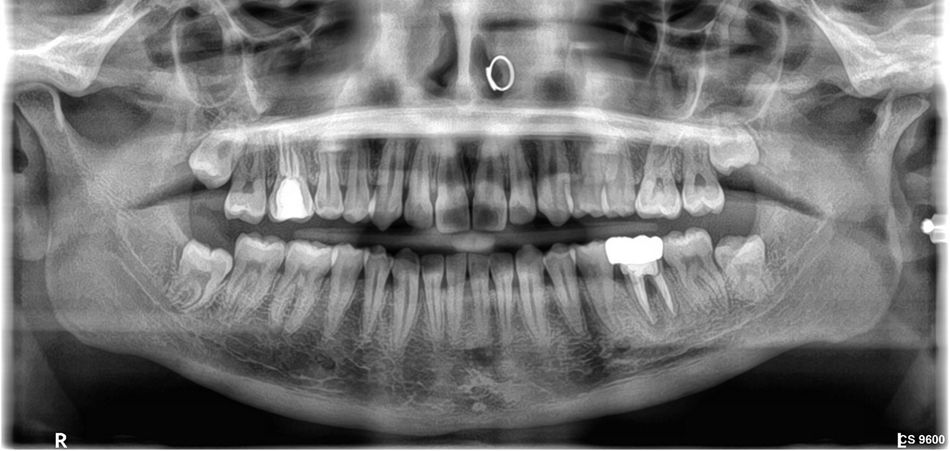
Radiographic examination showed a periapical radiolucency consistent with chronic apical periodontitis, and the tooth was deemed unrestorable (Fig. 5).
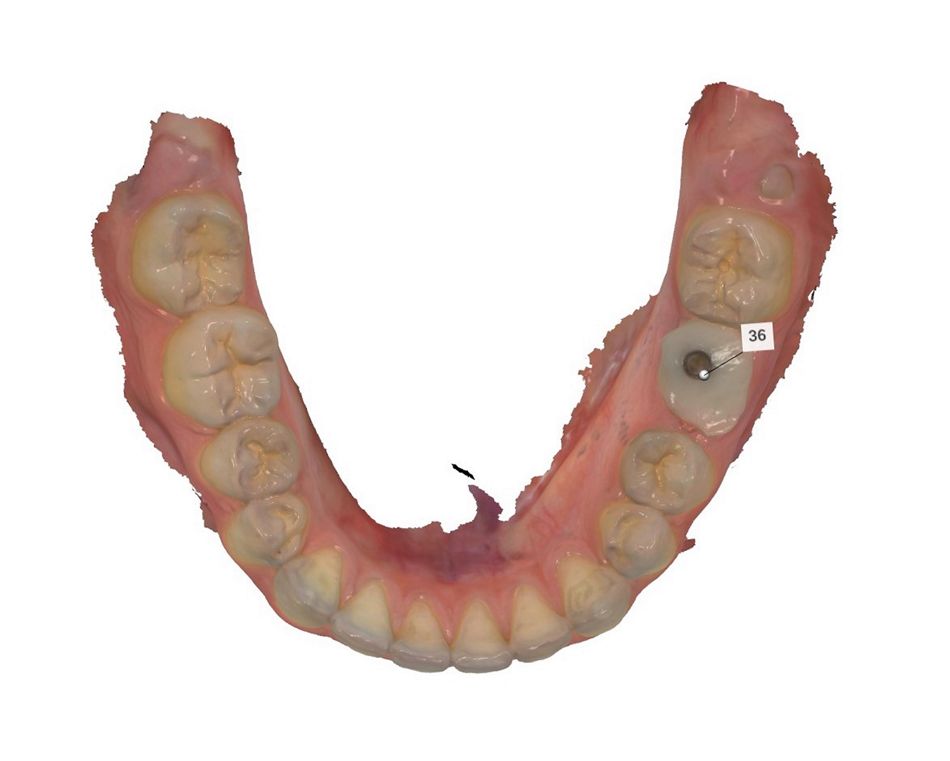
A CBCT scan revealed a well-sized interradicular septum, intact buccal and lingual walls, and favorable proximity to the inferior dental nerve canal. A preoperative digital intraoral scan was captured using TRIOS 3 (3Shape). Based on the ITI risk assessment for immediate implant placement, the case was considered low risk, with only one medium-risk factor (chronic periapical infection). After discussing treatment options, the patient opted for immediate implant placement with an individualized socket sealing abutment, followed by conventional loading with a final crown.
Treatment planning
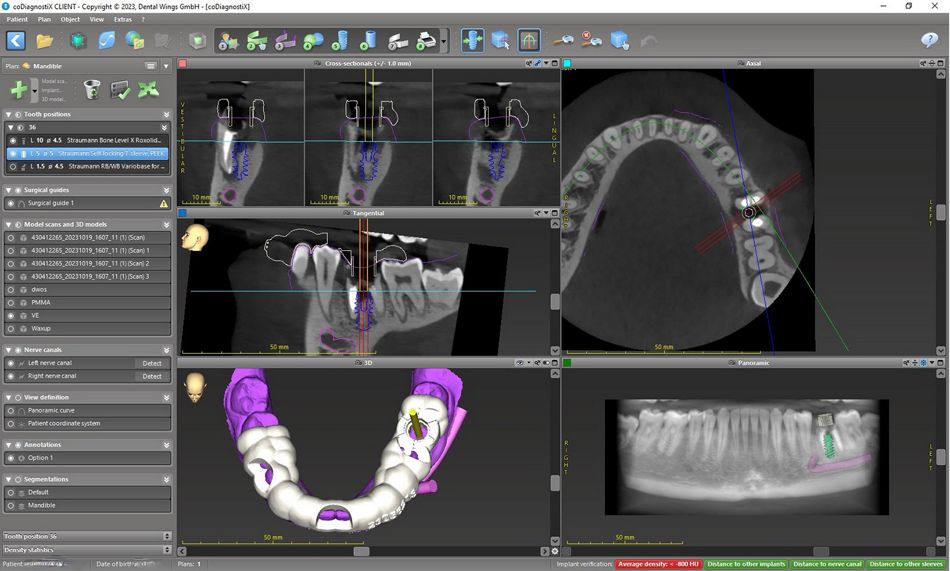
The digital impression (IOS scan) and CBCT images were forwarded to Straumann® Smile in a Box™ for planning and digital guide production services (part of the RD360 workflow solutions). The initial digital plan was presented within a day and, after an interactive meeting, was finalized. According to the produced plan, the implant was digitally positioned in an ideal three-dimensional position, ensuring sufficient apical anchorage for primary stability, as well as engaging the interradicular septum for stabilization and maintaining ≥ 2 mm distance from the buccal bone (Fig. 6). These conditions allowed for a flapless approach.
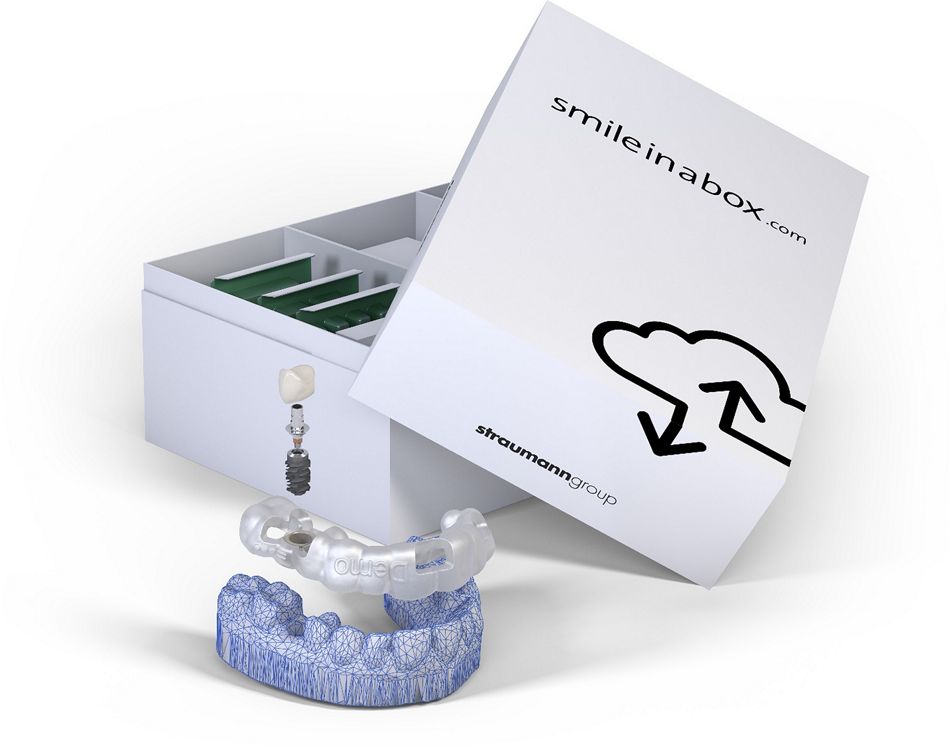
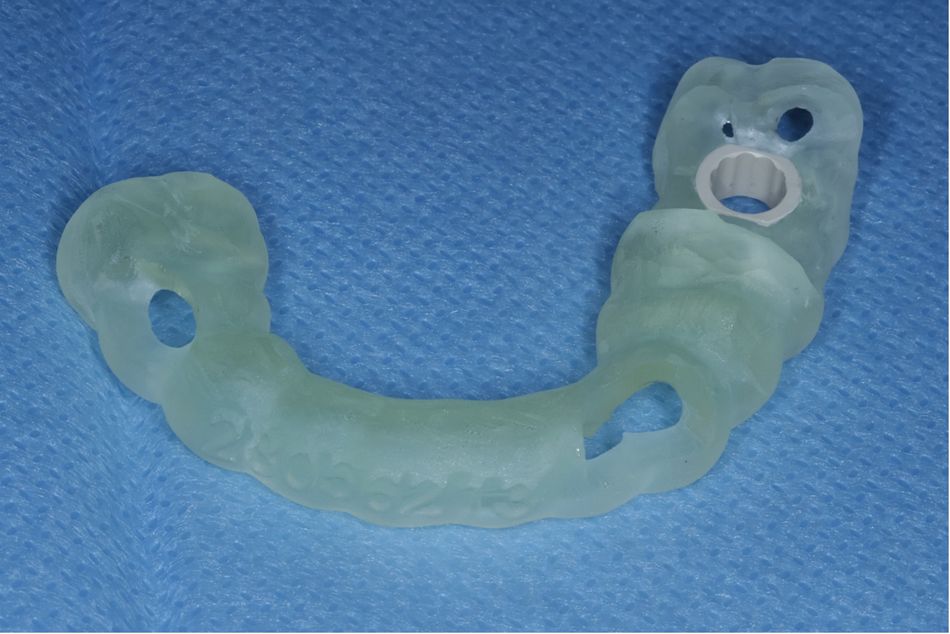
The implant selected was a Straumann® BLX, diameter 4.5 mm, RB, length 10 mm, Roxolid SLA®. A surgical stent guide was digitally designed to ensure stability during surgery and provide visual control of guide seating. Once the digital plan was approved, the autoclavable guide was printed and delivered to the clinic with all required components (including implants, closure cap, Variobase® abutment of the desired height, and biomaterials) (Fig. 7). An individualized socket sealing abutment was planned for the day of surgery to protect the biomaterials in the sealed socket and stabilize the soft tissues.
A conventional loading protocol was planned for the final restoration to mitigate the risks associated with immediate loading, which provided fewer benefits in the posterior mandible.
Surgical procedure
The patient received 2 g of amoxicillin preoperatively. An ID block with mepivacaine 3% and infiltration anesthesia with articaine 4% (1:100,000) was administered (Fig. 8). A minimally invasive approach was used to extract the tooth, preserving the interradicular septum, buccal plate and surrounding soft tissues. The socket was thoroughly irrigated with saline and degranulated using curettes and degranulation burs (Fig. 9).
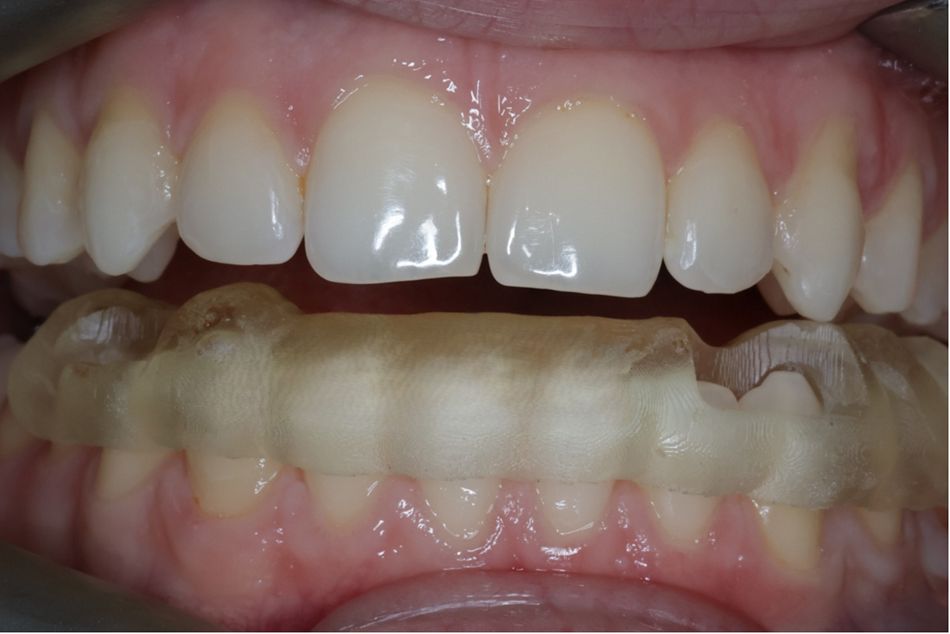
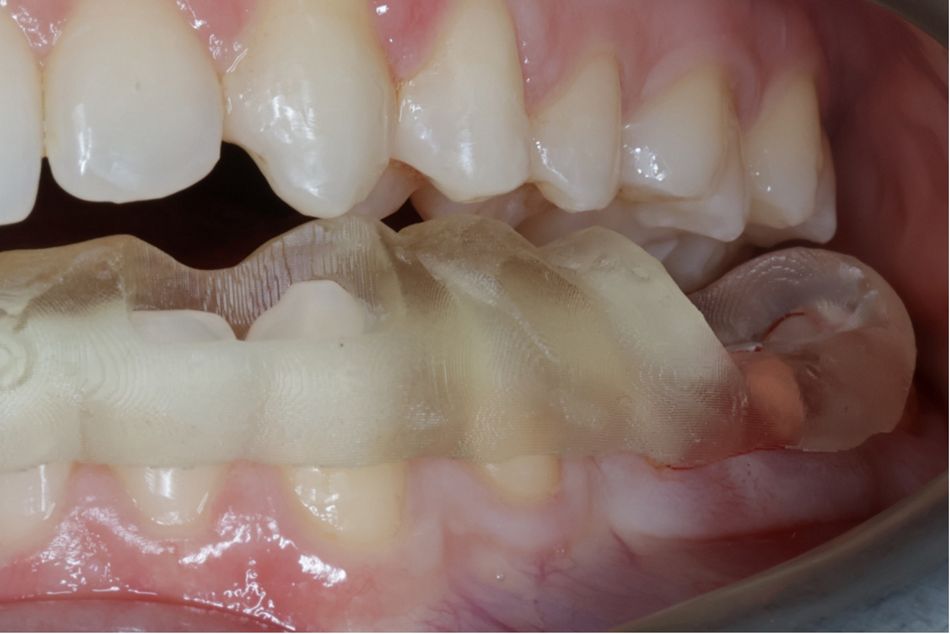
The seating of the autoclaved guide was visually and tactilely inspected (Figs. 10-12). The osteotomy was prepared according to the virtual plan, with digitally guided implant bed preparation and implant placement performed as prescribed.
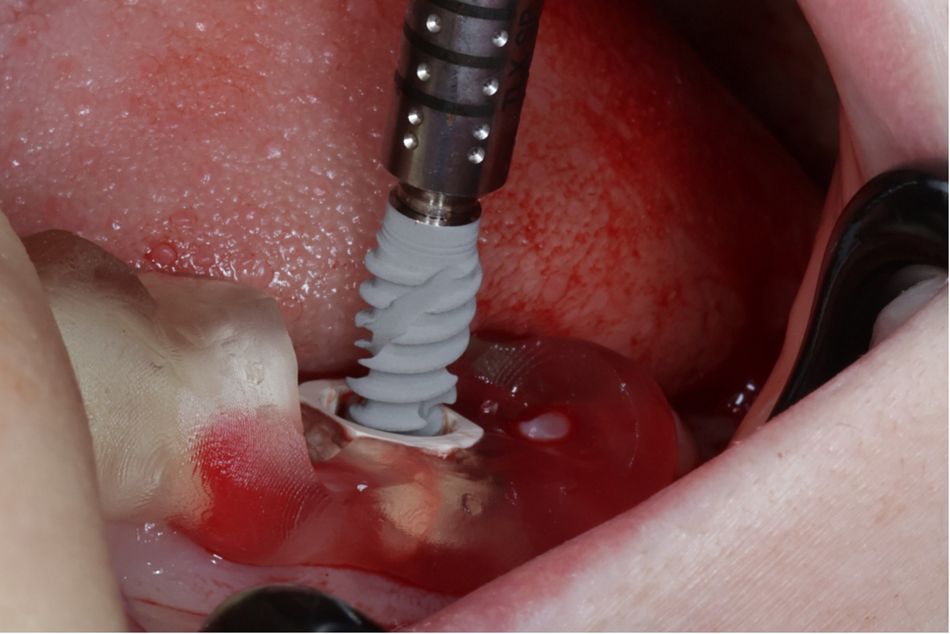
The Straumann® BLX, diameter 4.5 mm, RB, length 10 mm, Roxolid® SLA® implant was placed as planned with an insertion torque approaching 45 Ncm (Figs. 13-15).
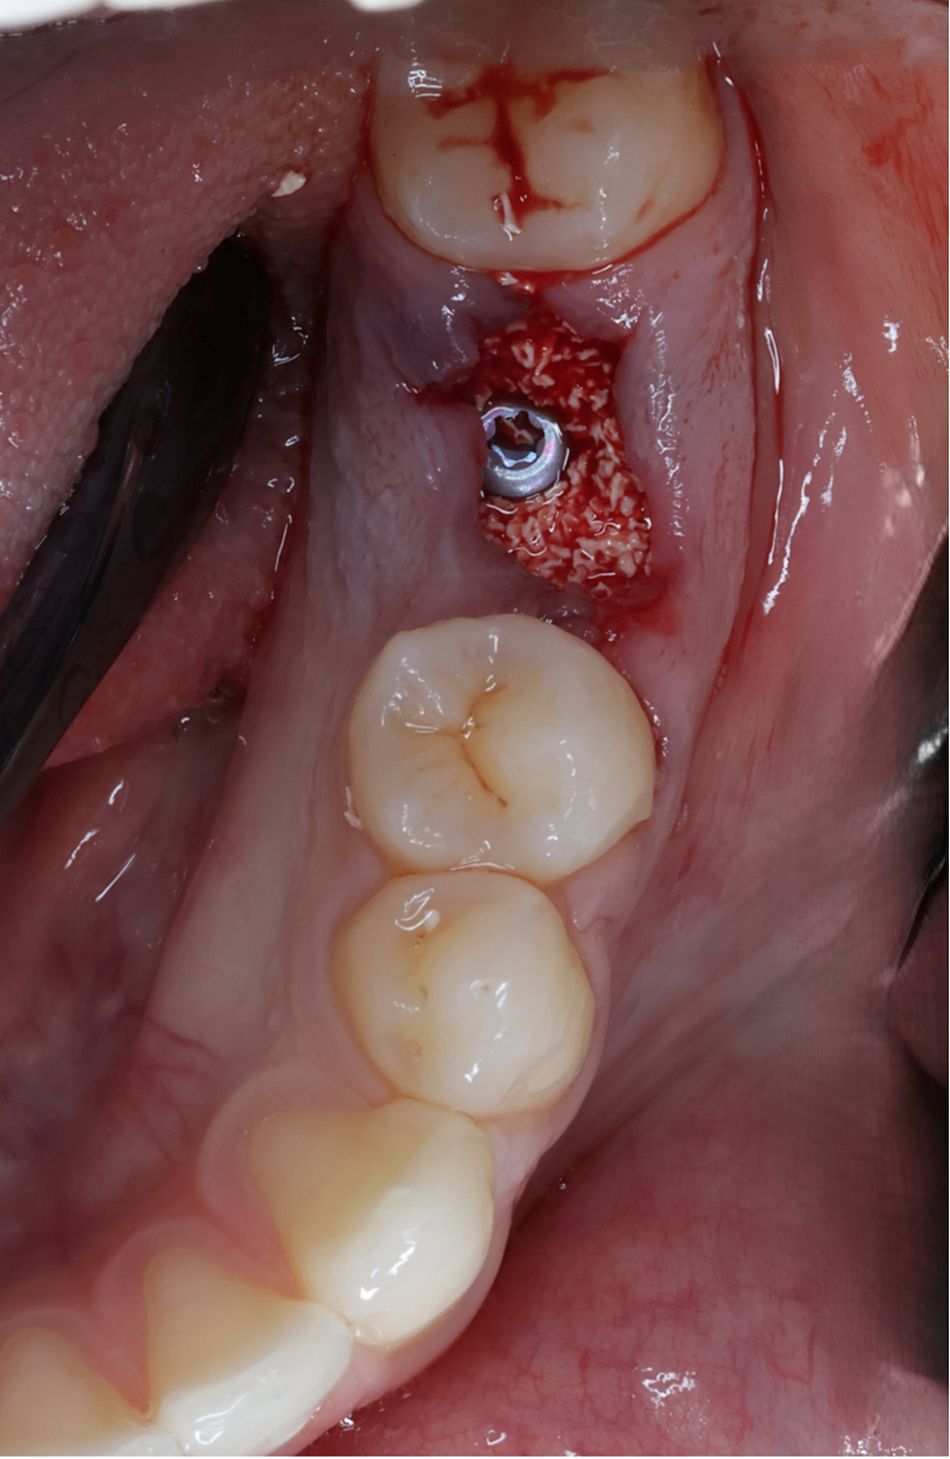
Xenograft biomaterials (cerabone® , 0.5-1.0 mm granules) were used to fill the residual gap within the alveolar socket to the level of intact bone (Figs. 16,17).
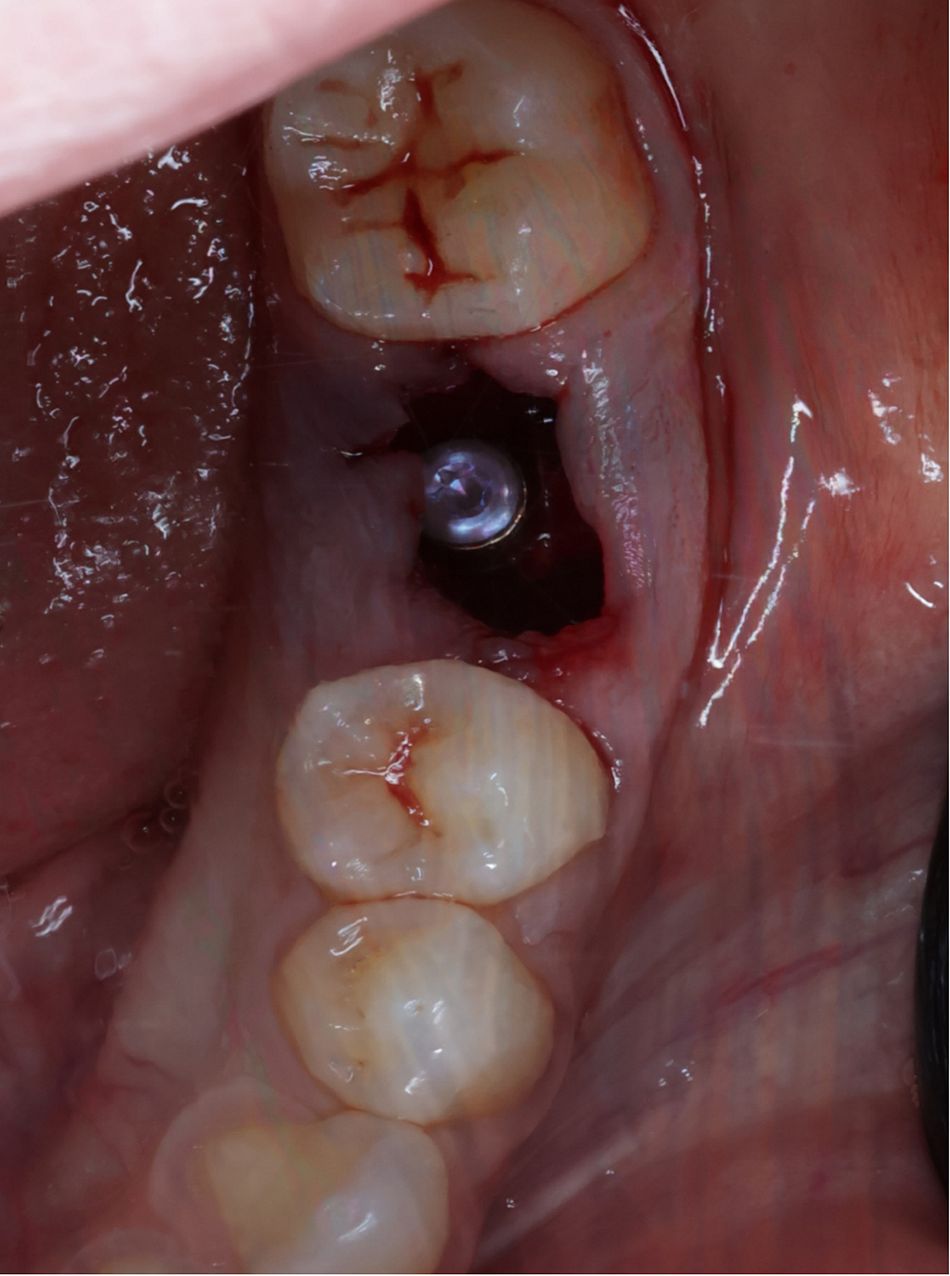
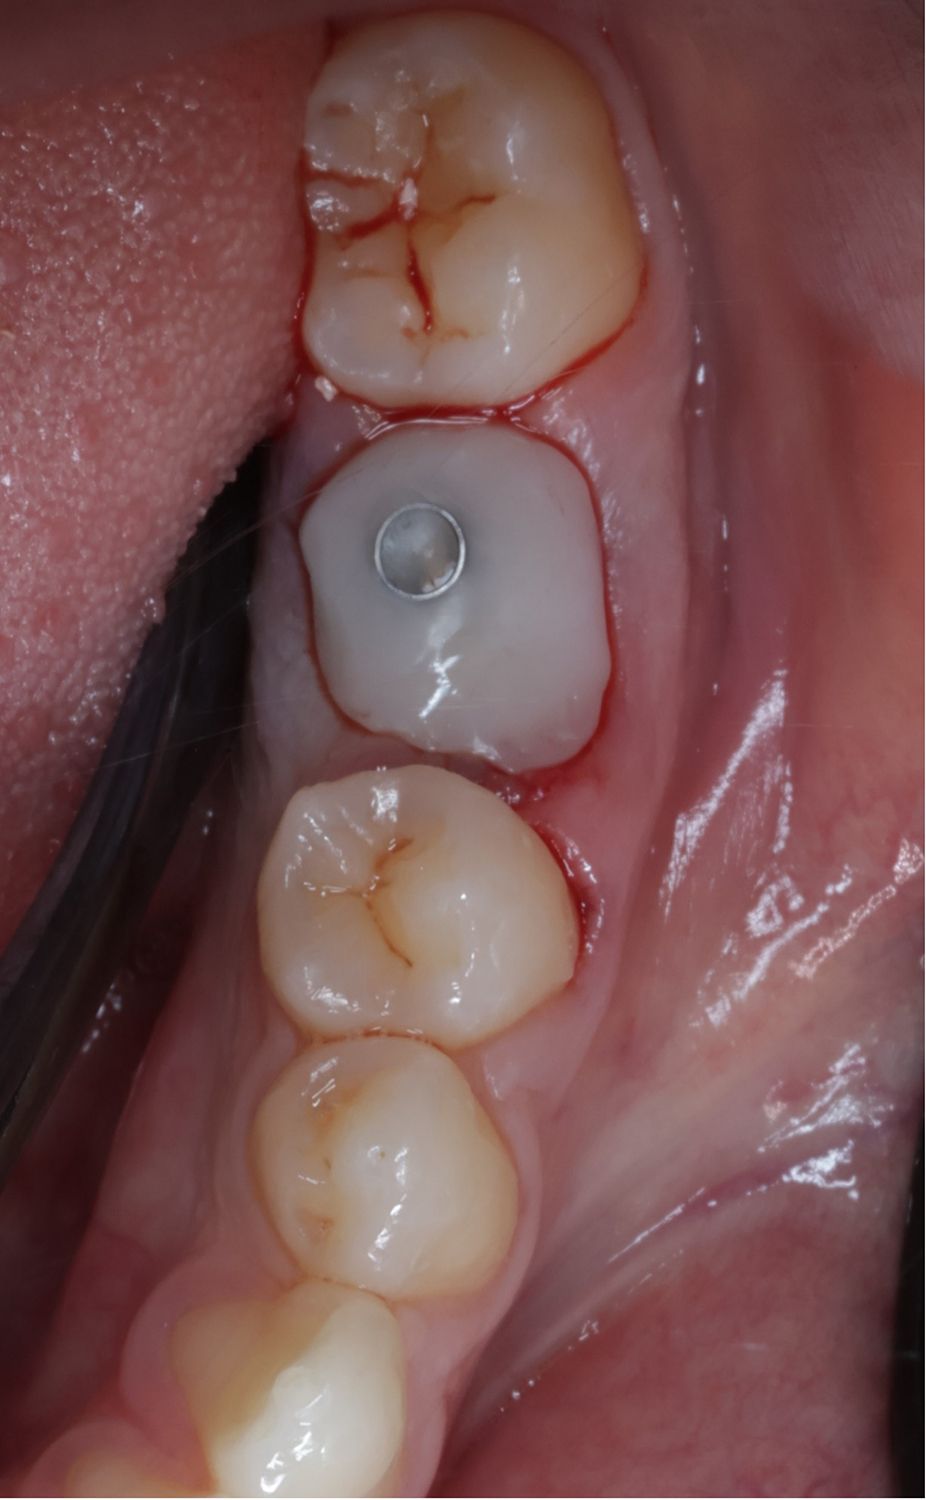
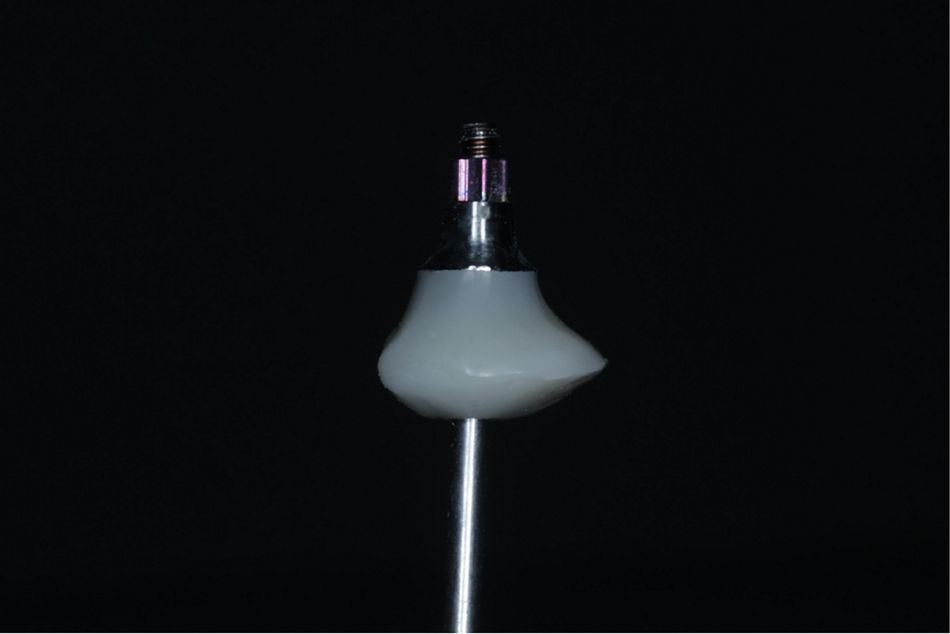
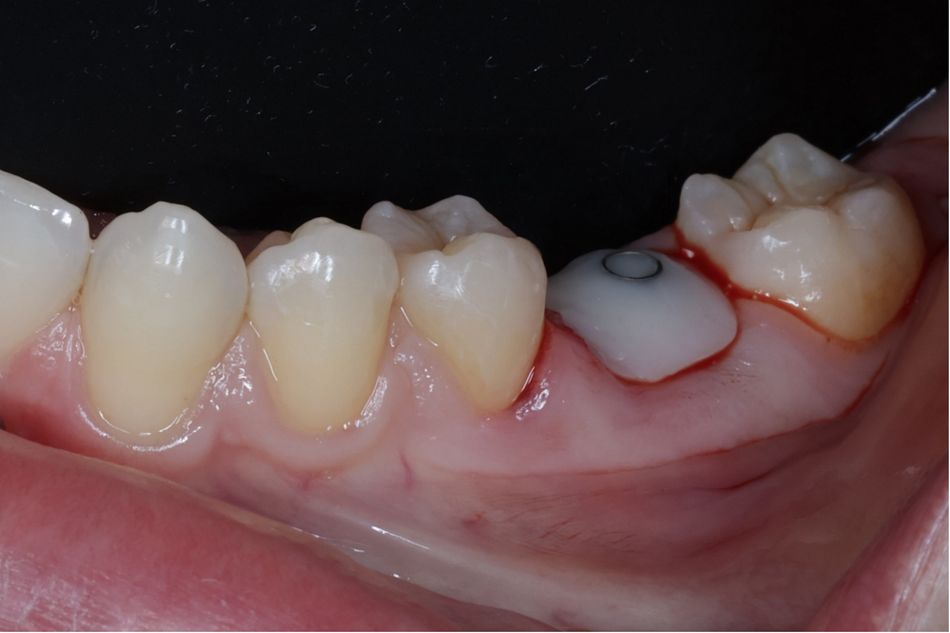
Since immediate placement presents challenges for closing the site, an individualized socket sealing abutment was constructed chairside to complete the closure of the site. A Straumann® Variobase® abutment (RB/WB Variobase® for crown, diameter 4.5 mm, GH 1.5mm, AH 5.5 mm, TAN) was sandblasted, primed and incrementally built up with flowable composite circumferentially at the perceived gingival height. After connecting this abutment to the implant, the outline of the socket gingival margin was customized intraorally using flowable composite to the desired margin. The transmucosal emergence profile was completed extraorally before final thorough polishing and insertion of the finished individualized socket sealing abutment with 15Ncm torque (Figs. 18-21).
The patient was prescribed a postoperative course of amoxicillin 500 mg three times a day for 5 days, along with paracetamol for pain and chlorhexidine oral rinse. A follow-up review 2 weeks later showed no signs of inflammation and, overall, uneventful healing. The use of the digital guide ensured precise placement, preserving the integrity of the alveolar socket and surrounding structures. The individualized abutment provided excellent soft tissue management, while the biomaterials supported the osseointegration process.
Prosthetic procedure
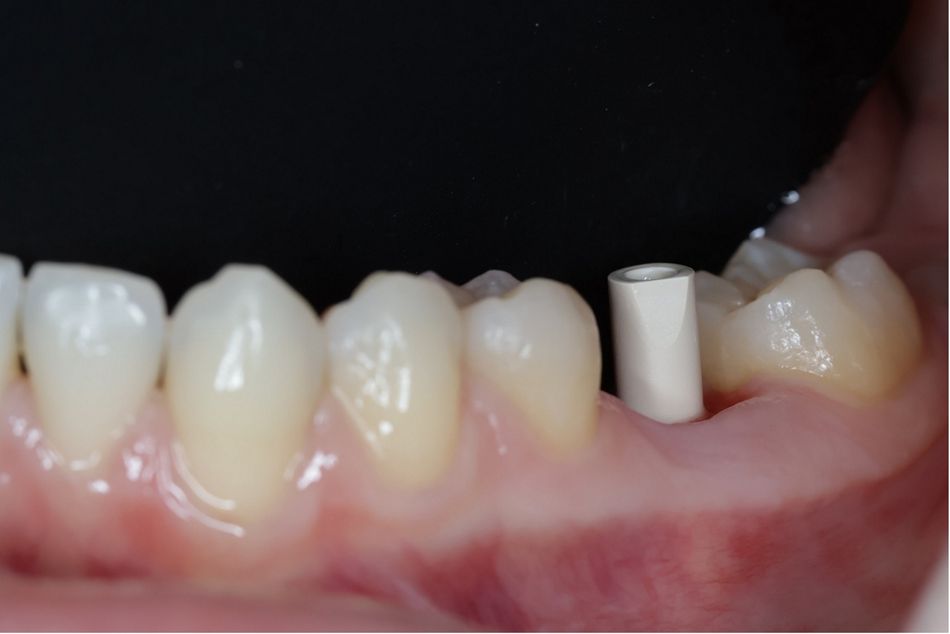
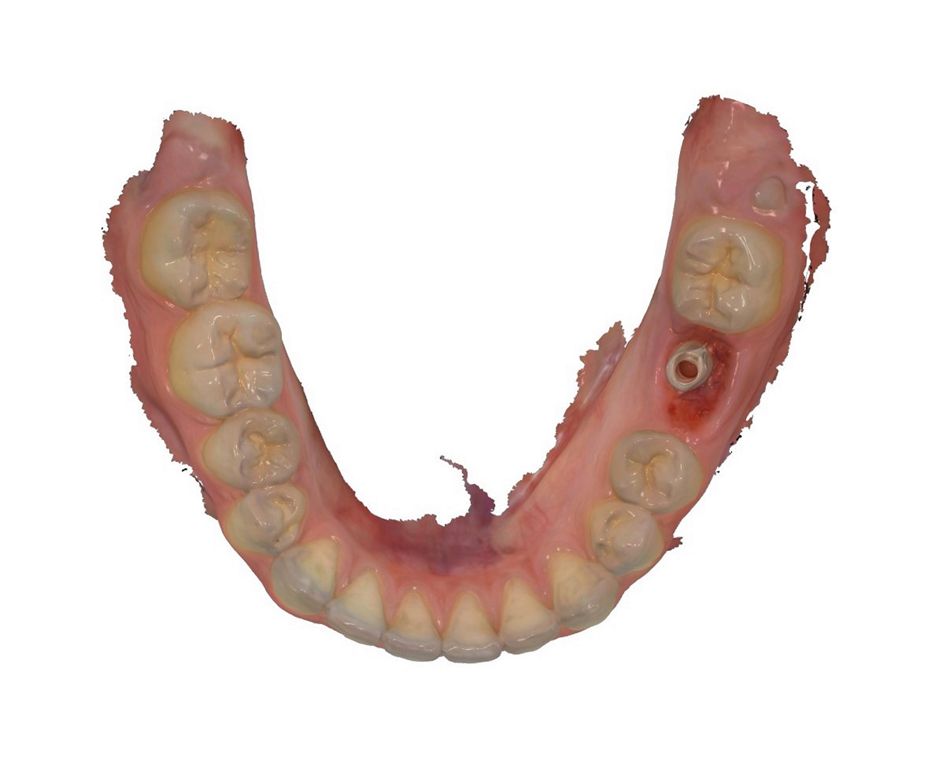
After a 12-week healing period, the patient returned for the crown preparation digital impression. The soft tissue around the customized healing abutment appeared healthy with a preserved gingival contour and a resulting recession of about 0.5 mm from initial placement (Figs. 22-24).
A fully developed anatomical transmucosal emergence profile and implant position was captured using the Trios scanner and a Straumann® scanbody (CARES® RB/WB Mono Scanbody, diameter 3.8 mm, height 10 mm, PEEK/TAN) (Figs. 25-30). This data was transferred to a Straumann-partnered dental laboratory to follow the complete RD360 solution to produce the final restoration.
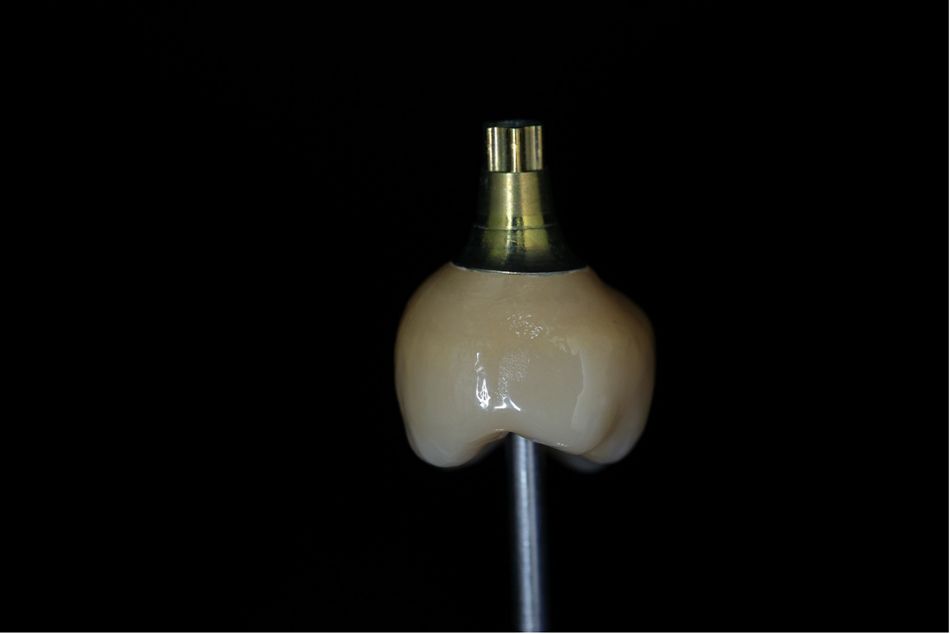
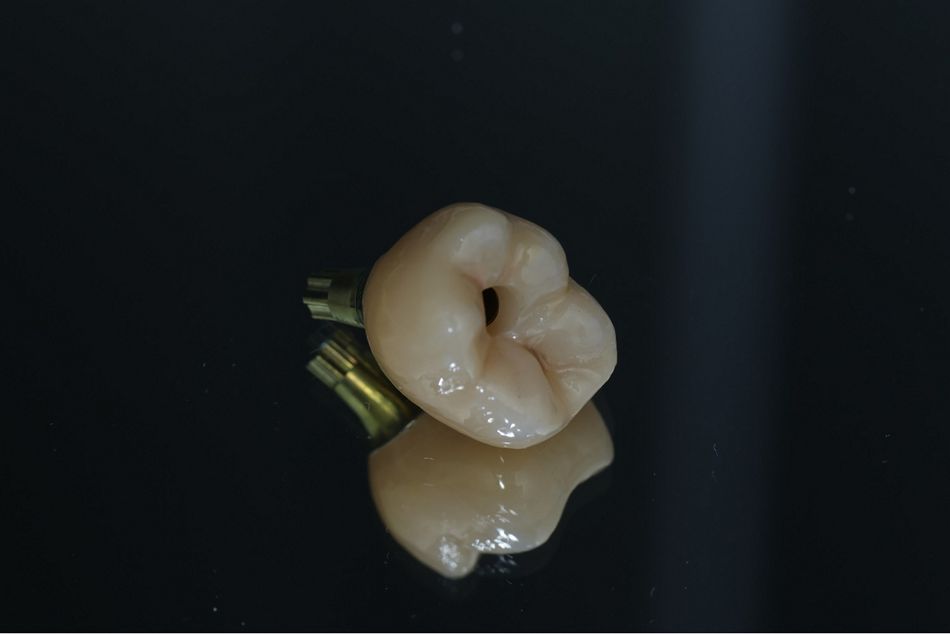
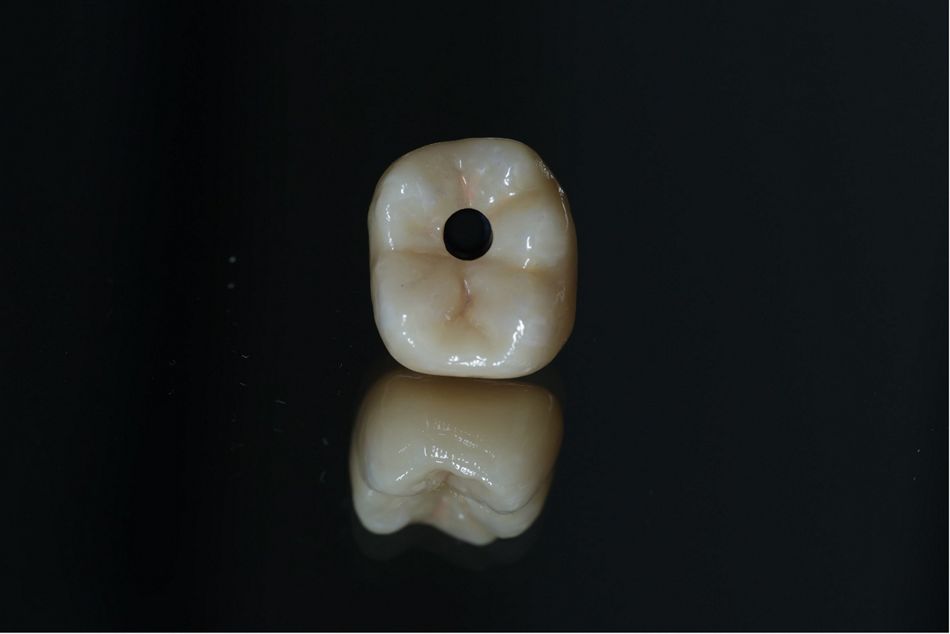
A monolithic zirconia, screw-retained crown on a CAD/CAM individualized abutment was produced to match the emergence profile of the individualized socket sealing abutment. The crown was delivered to match the created gingival outline and inserted with 35 Ncm torque (Figs. 31-33).
The access hole was sealed with PTFE and closed with composite material and polishing (Figs. 34-36).
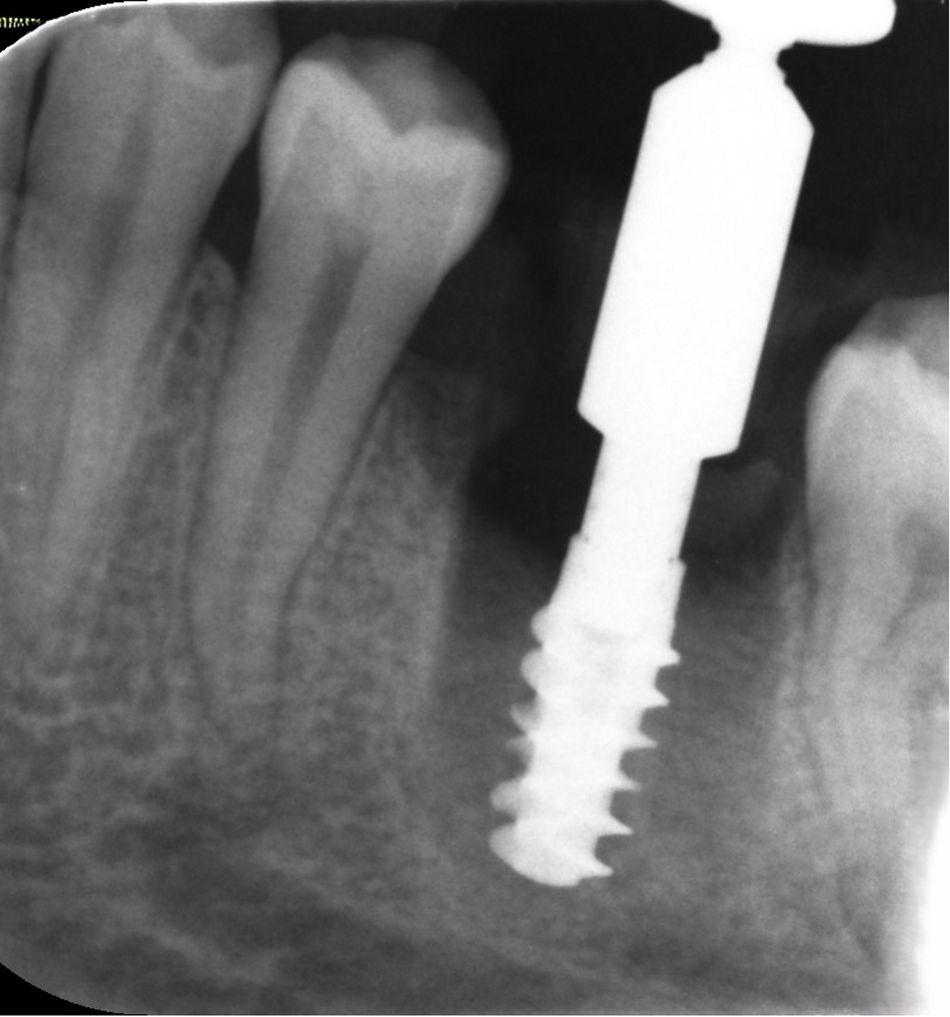
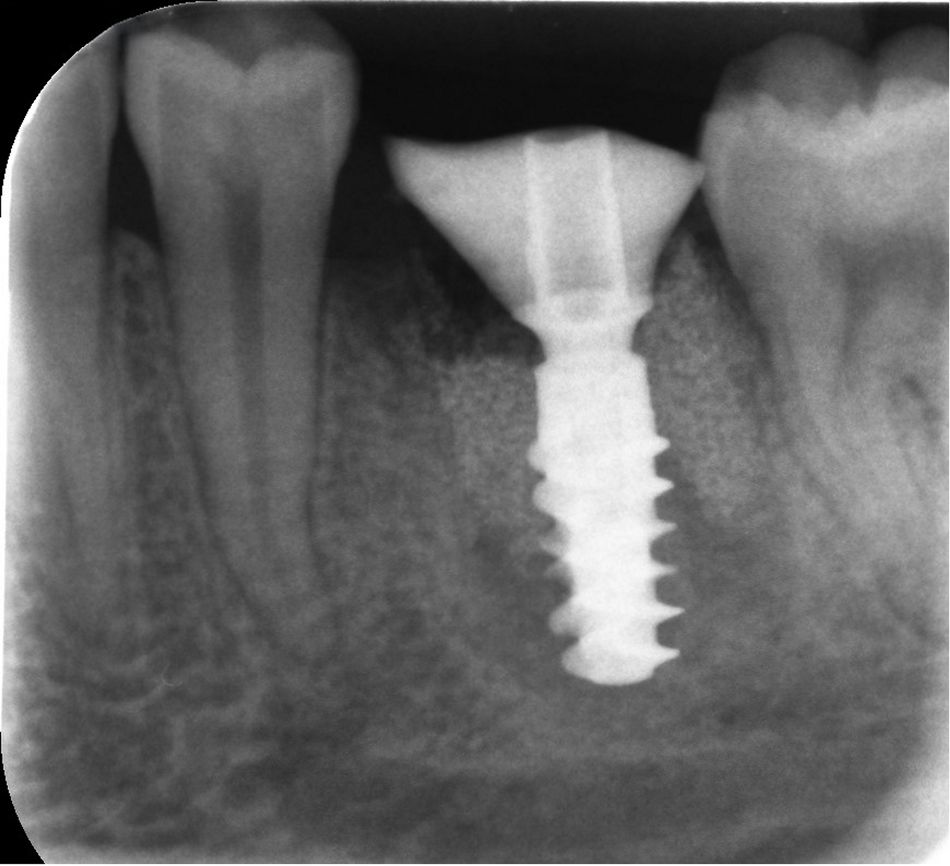
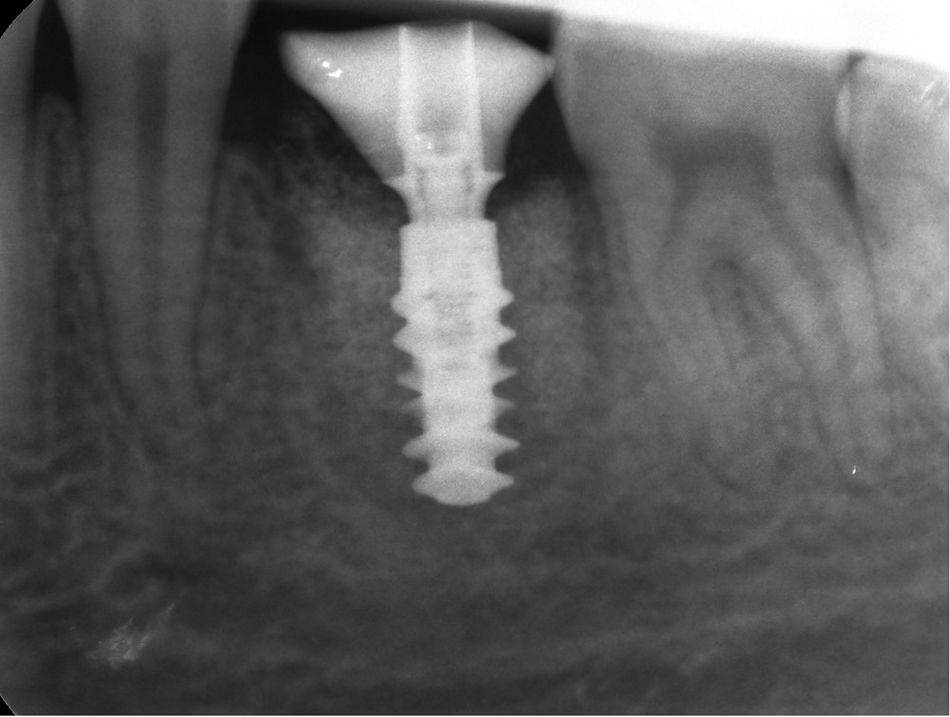
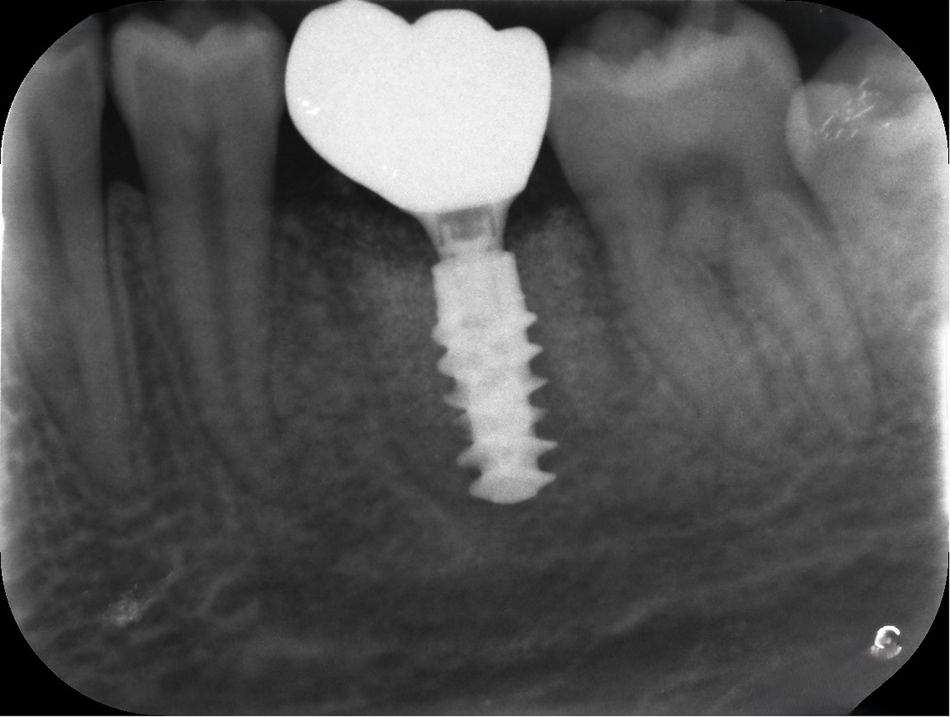
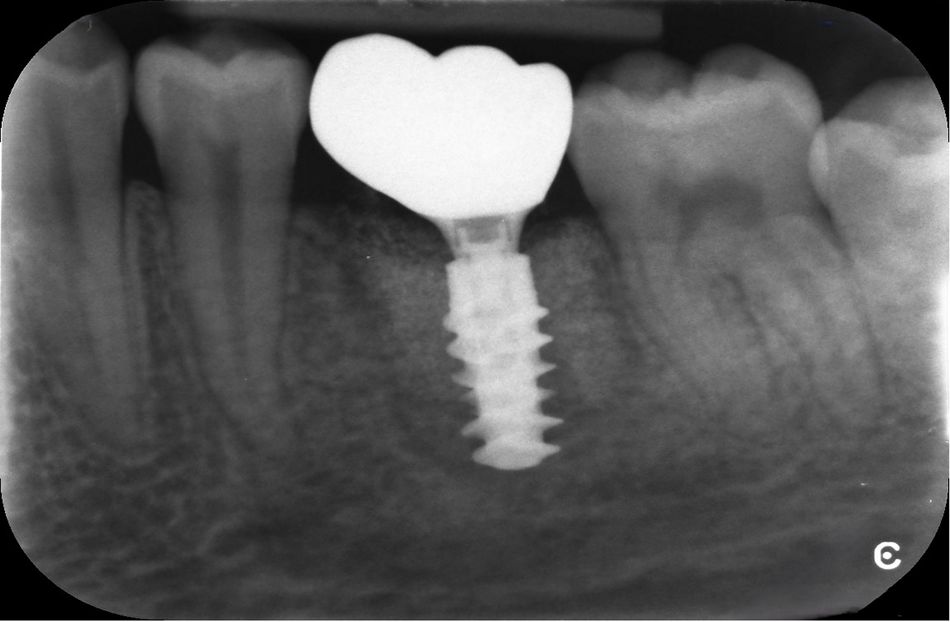
Final occlusal checks were carried out, and a postoperative radiograph was taken to verify the seating and establish baseline bone levels (Fig. 37).
The precise capture of the implant position and the customized abutment and the use of CAD/CAM technology ensured a seamless fit for the final restoration. The patient’s soft tissue had maintained excellent health, with no further adjustments needed for the final crown.
Treatment outcomes
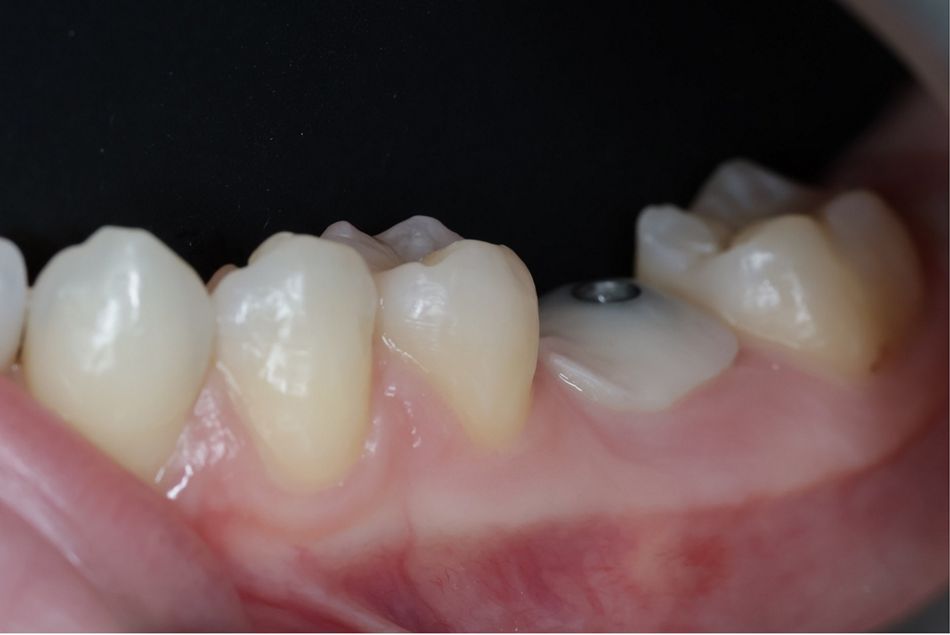
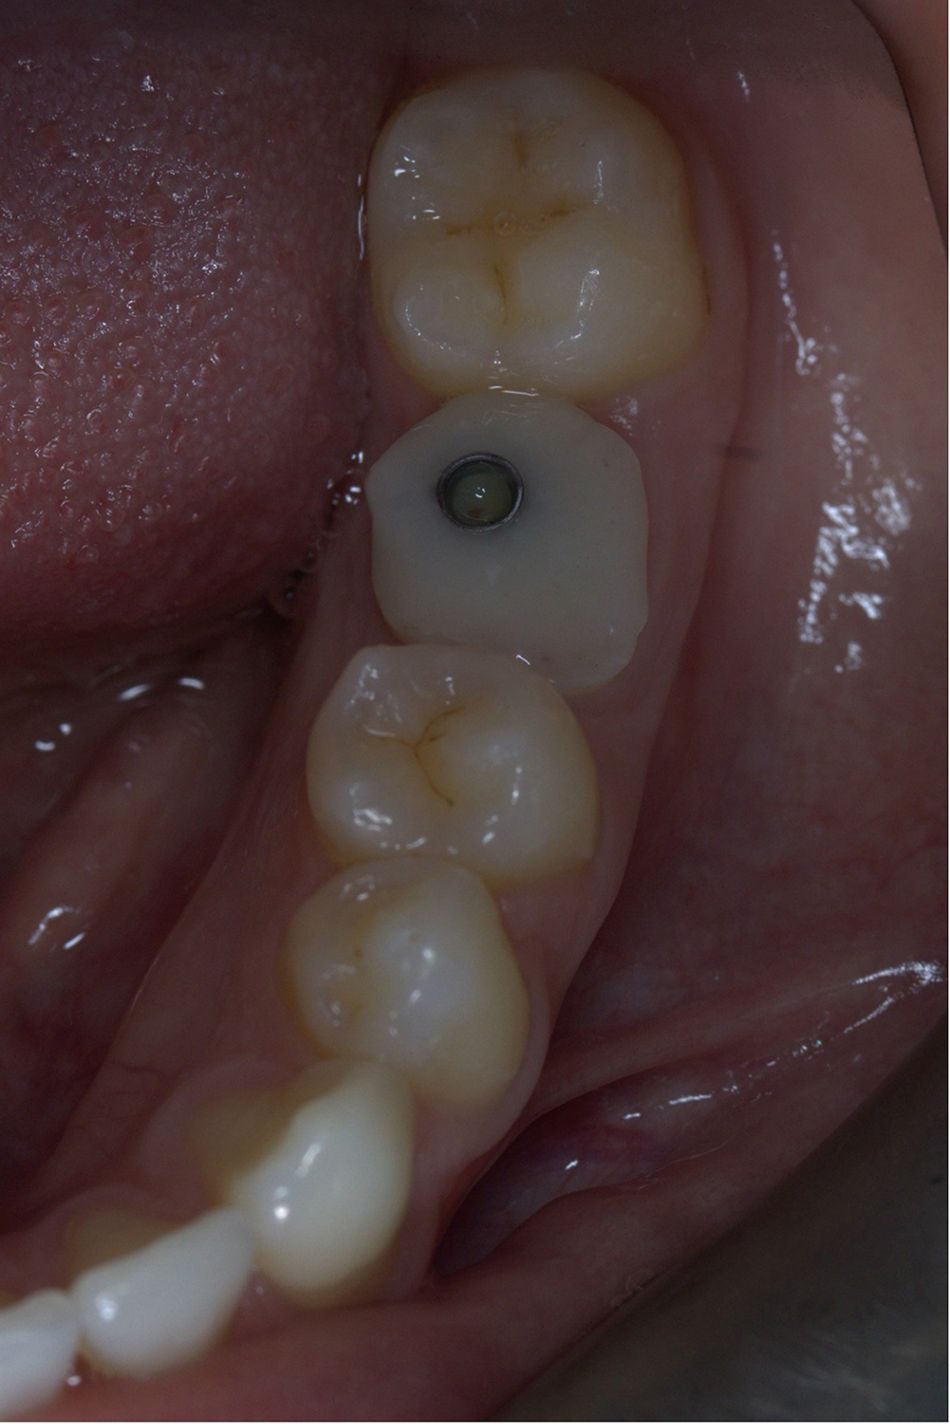
The patient postponed her one-month follow-up due to personal commitments. At the three-month follow-up, stable gingival margins, healthy peri-implant soft tissue, and stable bone levels compared to baseline were observed. No complications were reported, and the patient expressed satisfaction with the final outcome (Figs. 38-42). The patient particularly appreciated the digital workflow's ability to clearly visualize the treatment process, help understand the intricacies involved in treatment and minimize the number of appointments required through immediate placement and development of the prosthetic emergence profile.
At the six-month follow-up, the patient exhibited continued stable bone levels and healthy peri-implant tissue, with no signs of inflammation or complications. The zirconia crown showed excellent retention and stability, with no functional or esthetic concerns.
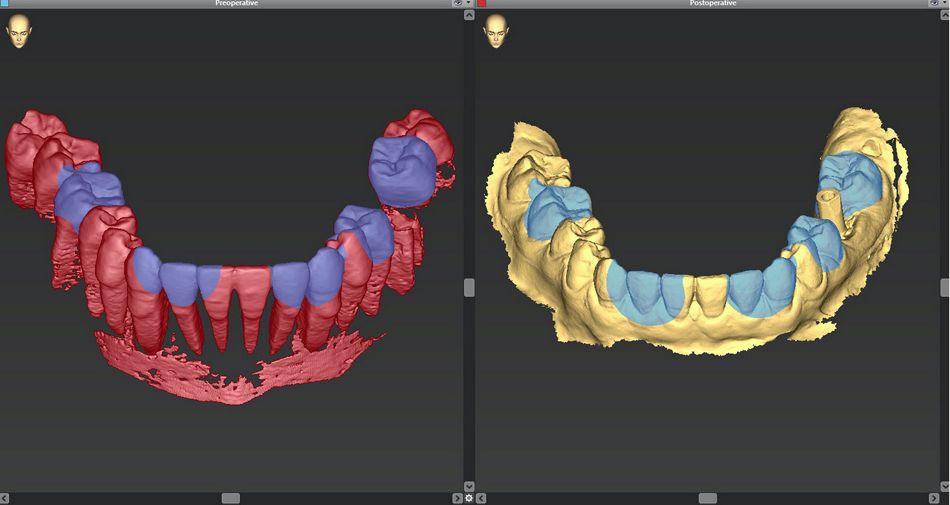
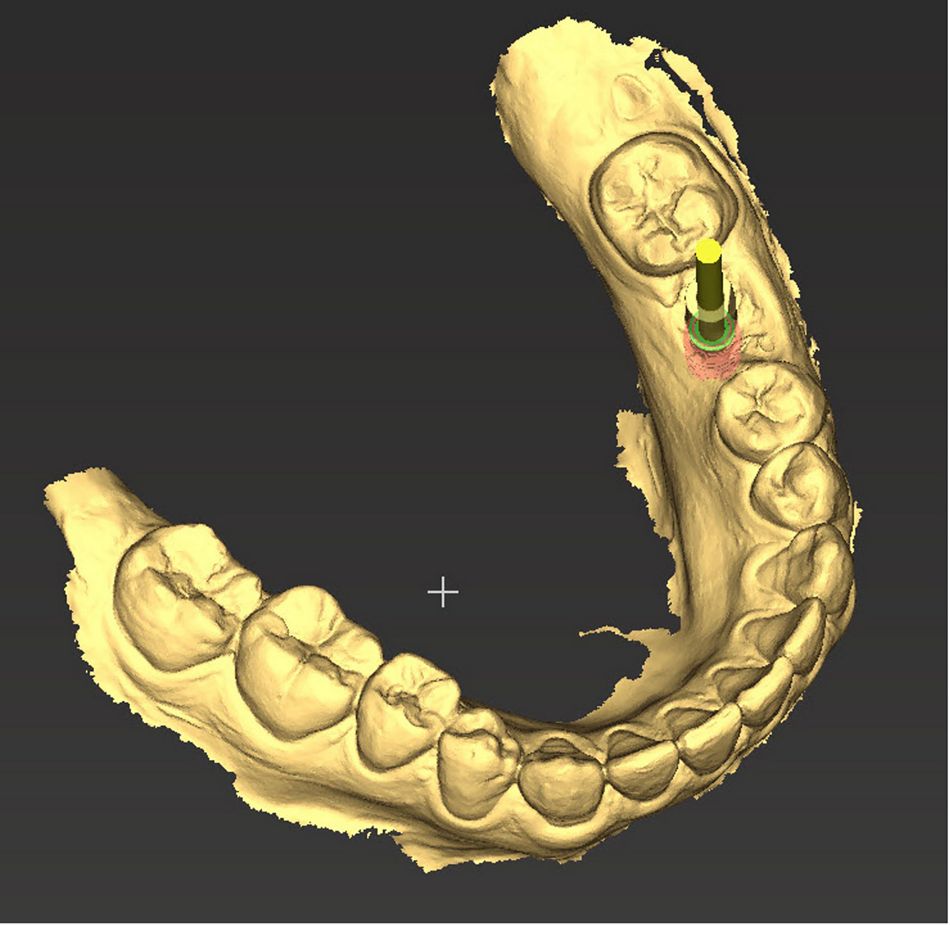
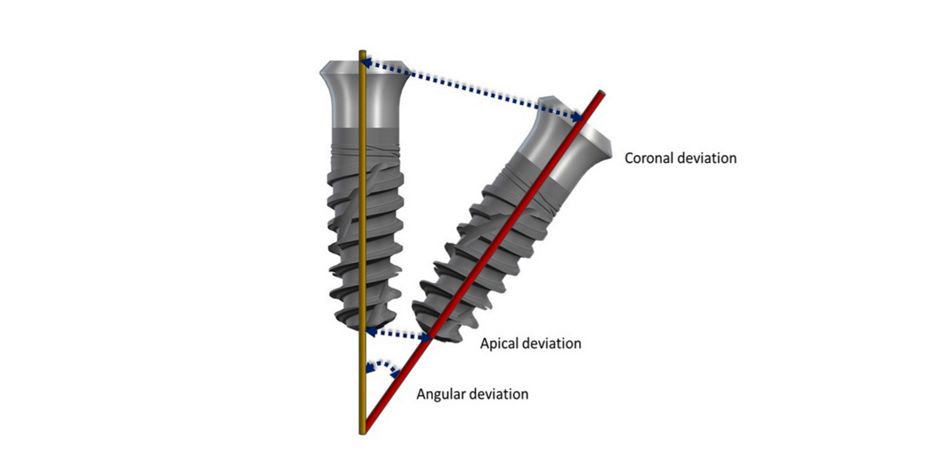
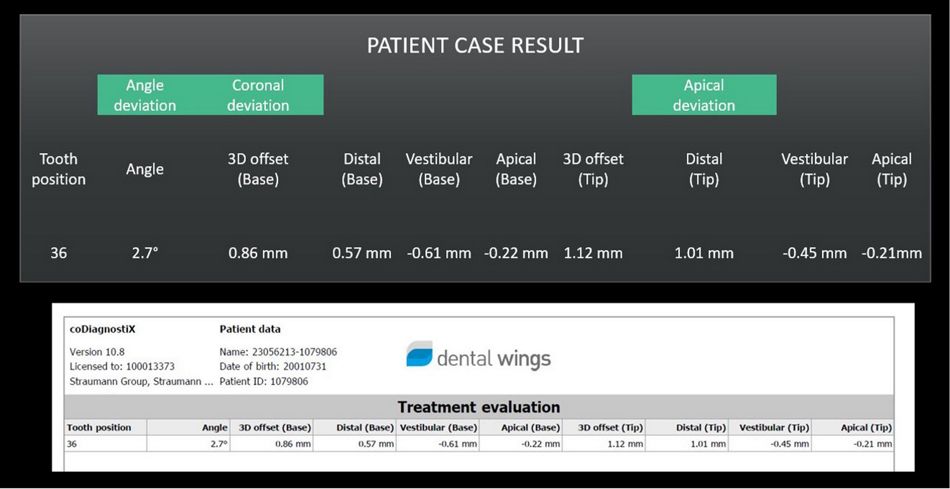
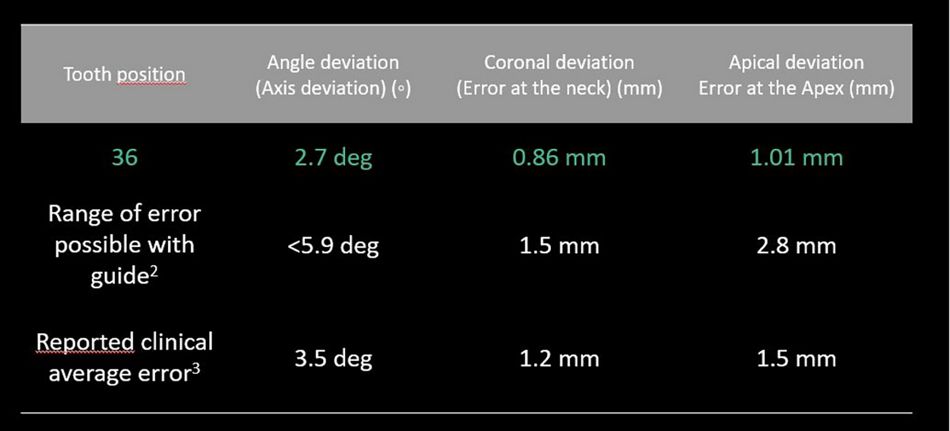
Furthermore, the outcome assessment offered by the analytic capability of RD360 (Figs. 43-45) demonstrated a more favorable deviation compared to what is reported in the literature2,3.
Specifically, the evaluation showed an axial (angle) deviation of just 2.7 degrees, a coronal deviation of 0.86 mm and an apical deviation of 1.01 mm compared to the respective reported average errors of 3.5 degrees, 1.2 mm and 1.5 mm (Figs. 46- 48).
Author’s testimonial
The RD360 digital workflow not only simplified complex clinical decisions, but also allowed for more predictable outcomes. In this case, the ability to visualize and plan every step with precision reduced chair time and allowed for a seamless treatment experience.
It is evident that immediate placement following extraction offers considerable benefits in reducing the number of appointments, eliminating the need for a healing period after extraction and before placement.
Using an individualized socket sealing abutment enabled soft tissue management without the need for additional surgical and prosthetic interventions. Using the RD360 digital workflow solution added additional significant benefits. Digital planning provided an accurate visualization of planned treatment, eliminating human errors of placement in the reduced alveolar sockets and adding precision. Outsourcing the planning enhanced efficiency and productivity. Analytic capabilities allow for optimization and improved outcomes.
The full RD360 workflow streamlined the operating procedures, allowing seamless collaboration between the dental team, planners, laboratory technicians and the patient, thus enhancing the overall experiences of the dental team and the patient. Moreover, offering improved communication with the patient via visualizations allows for a well-informed decision-making process.
Moving forward, incorporating the RD360 end-to-end digital workflow solution in cases involving immediate implant placement seems rational and appealing, as the benefits to both clinician and patient are significant.

